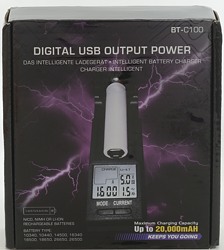
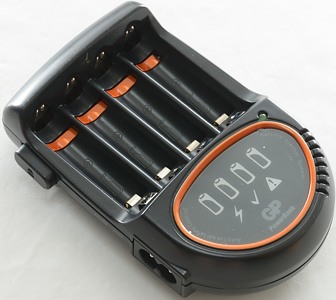
Charger Opus BT-C100 early version
Updated review of the shipping version


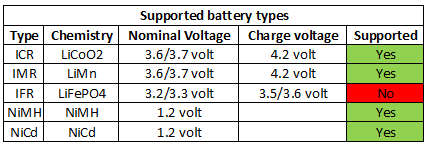
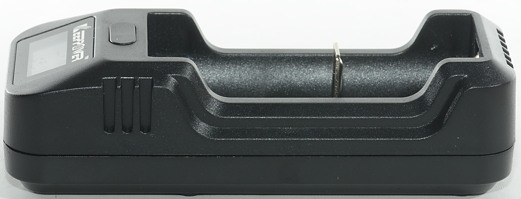
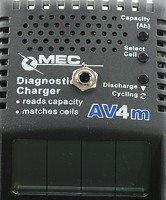
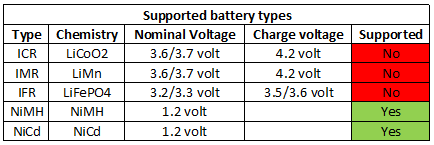
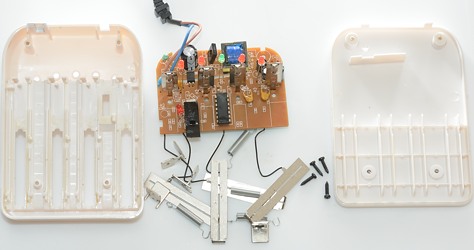
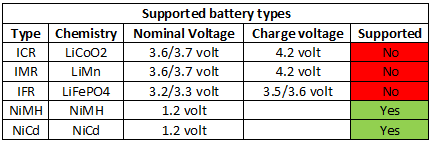
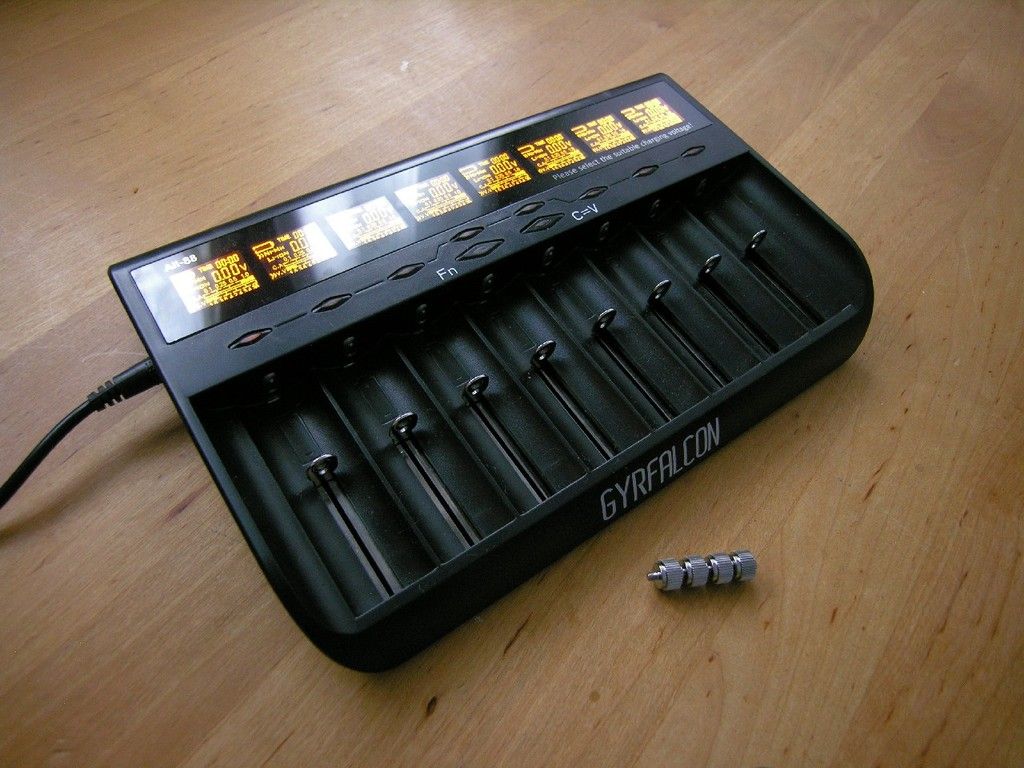
This charger is a single channel analyzing LiIon and NiMH charger, i.e. it can both charge and discharge while measuring, the charger can also work as a power bank. The total number of function is large and for that reason the technical section in this review is very large.
I got this charger from Gearbest for review, before it was completely finished. This means that some of the issues I find in this review probably will be fixed very soon.
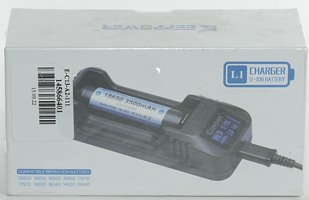
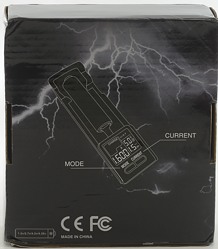
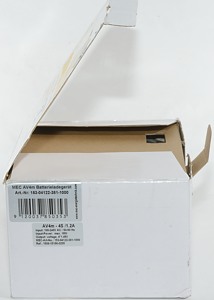
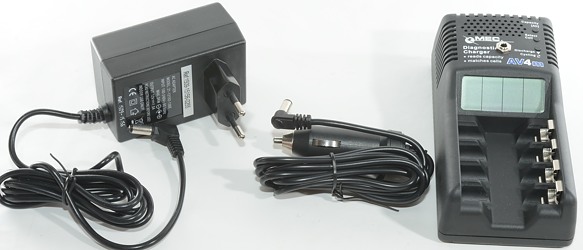
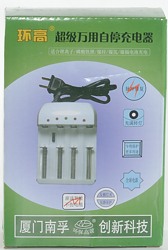
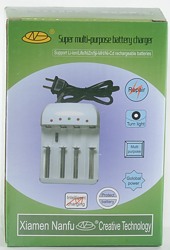
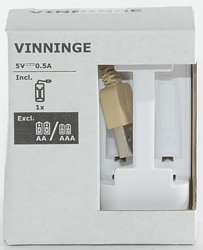
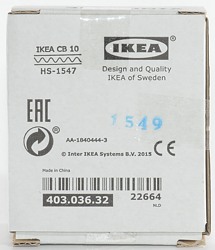
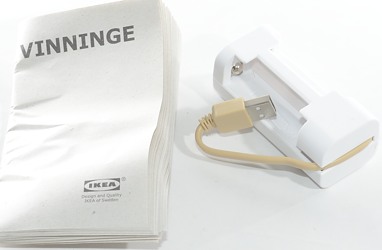
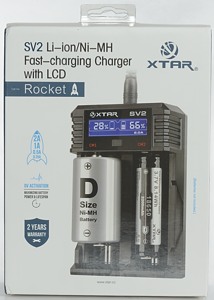
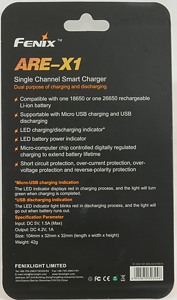
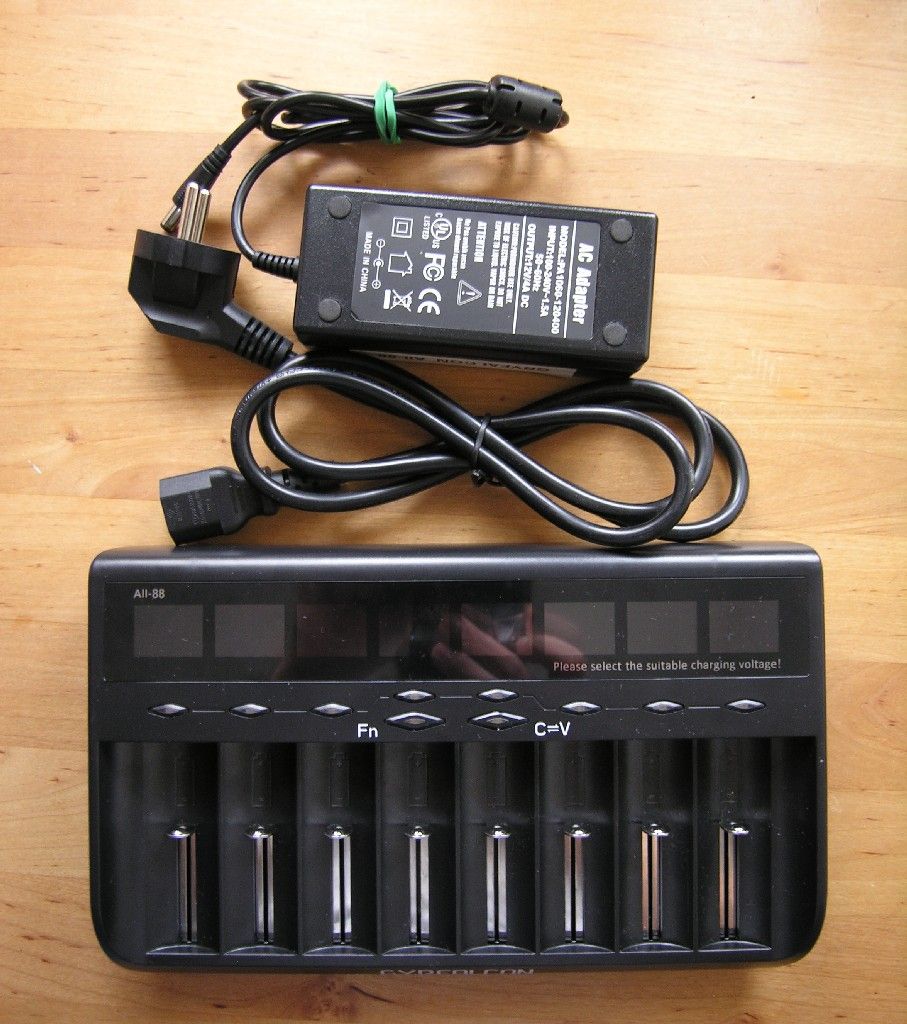
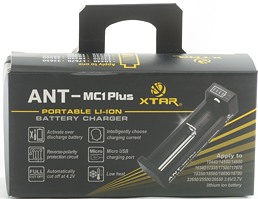
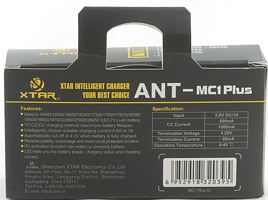
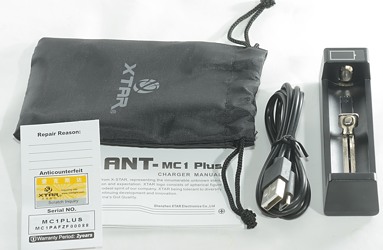
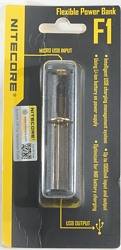
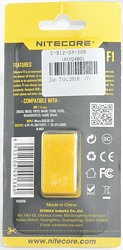
I got the charger in a “retail” box, but before any printing was done.
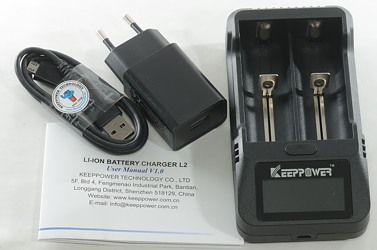
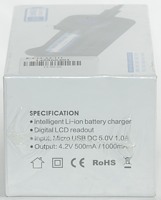
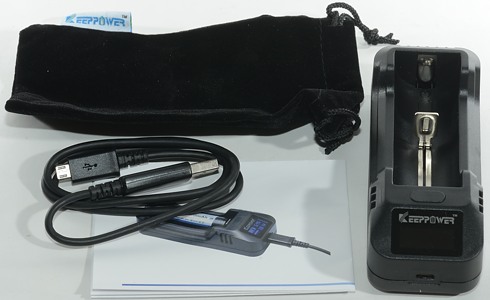
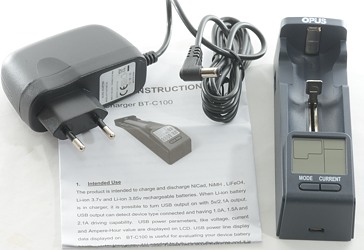
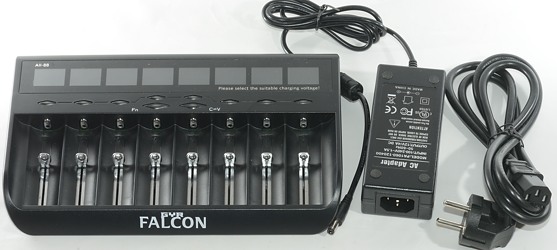
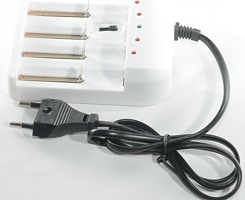
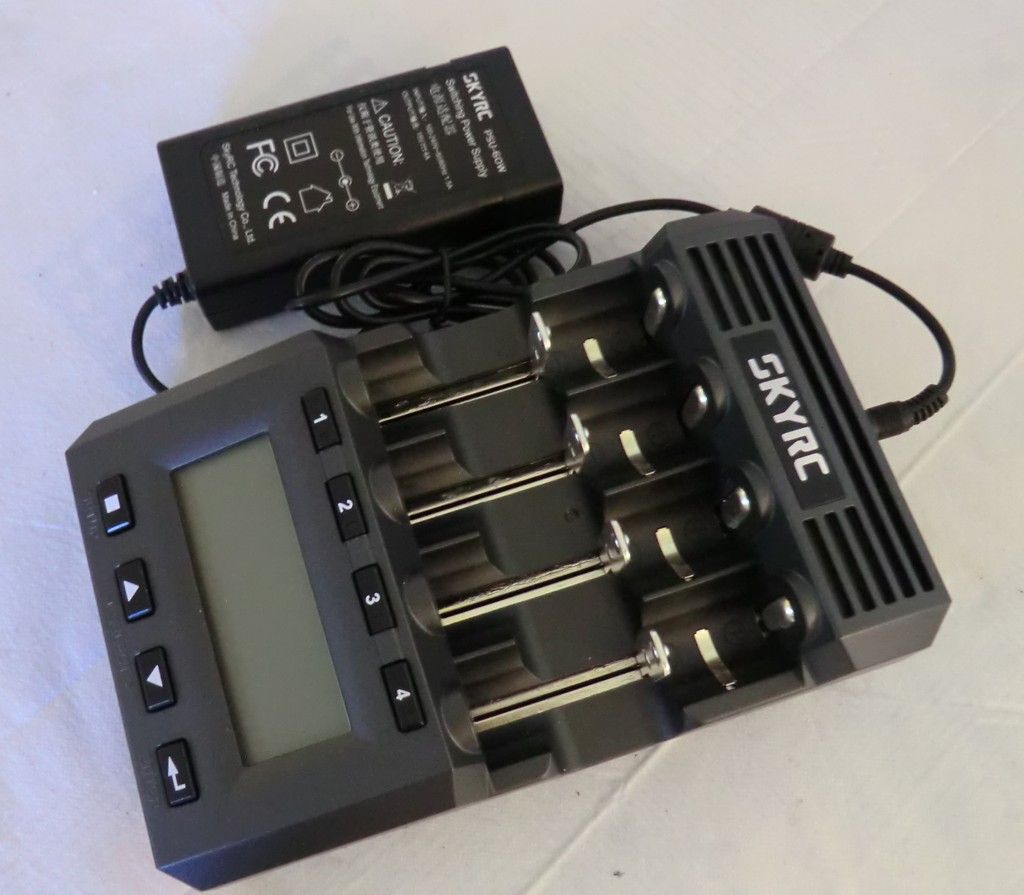
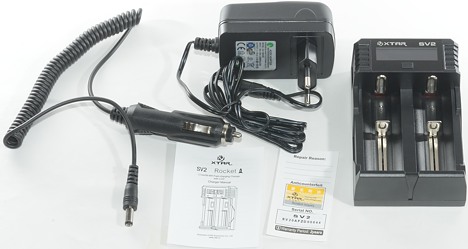
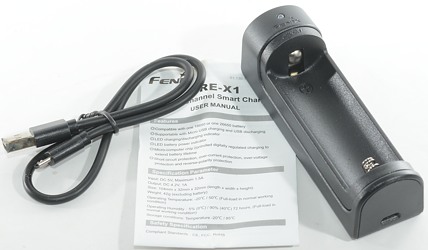
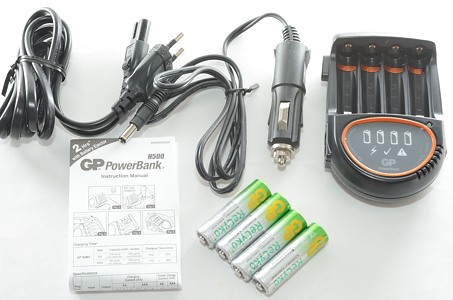
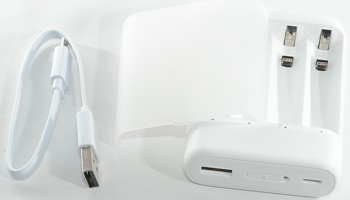
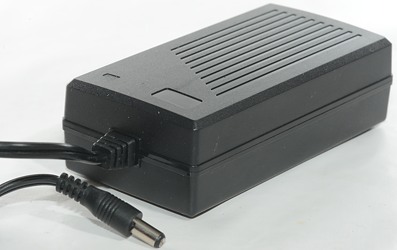
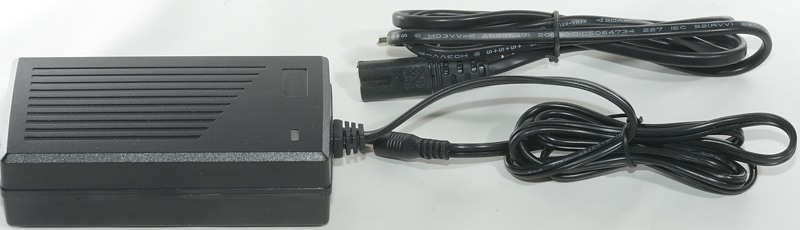
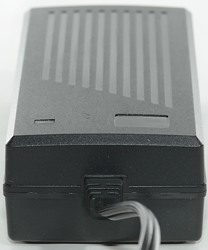
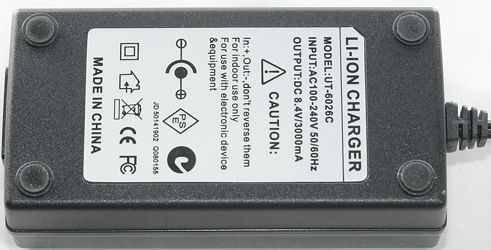
The box contained the charger, a power supply and a manual.

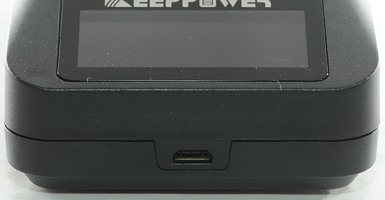
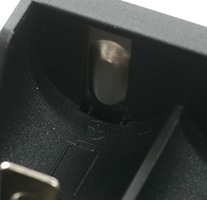
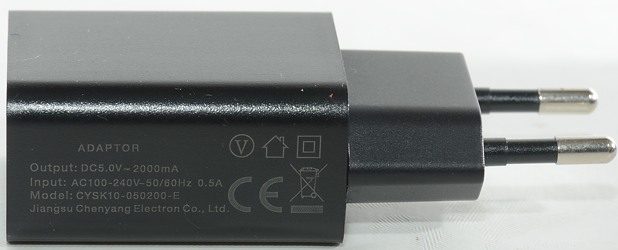
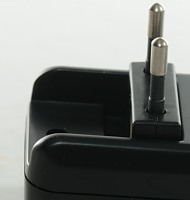
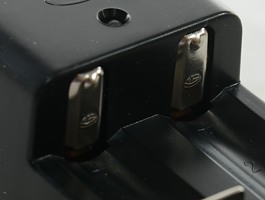
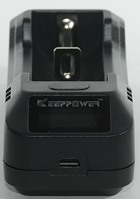
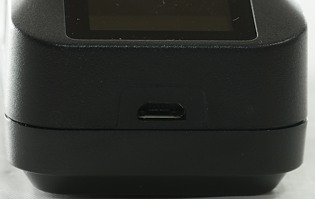
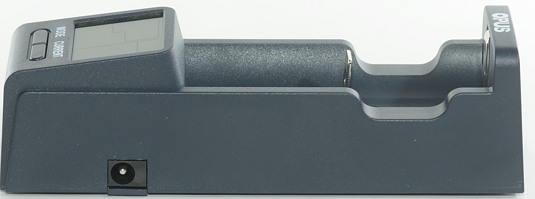
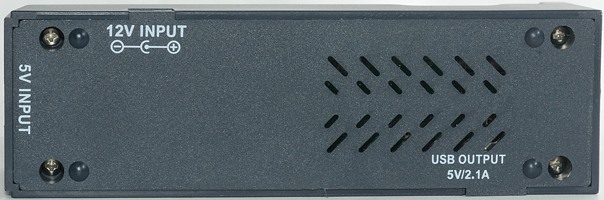
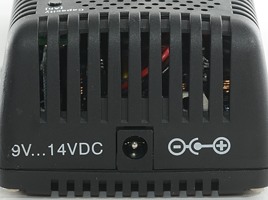
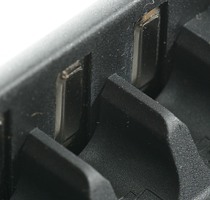
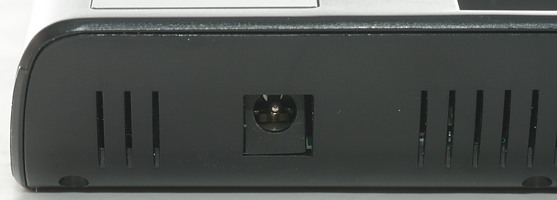
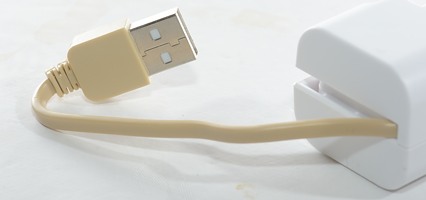
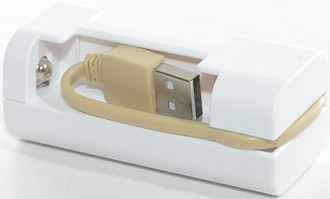
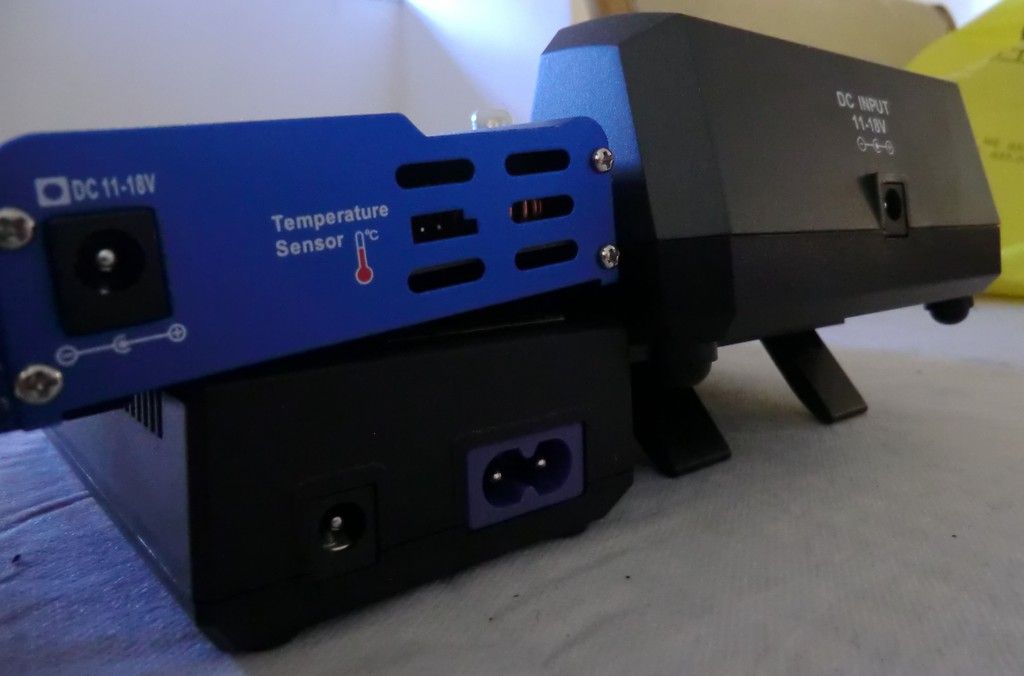
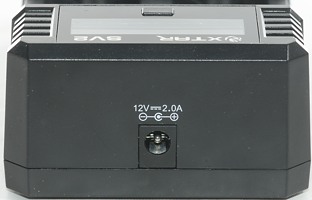
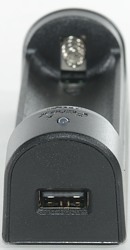
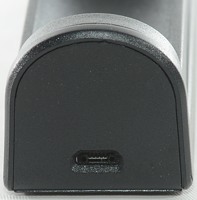
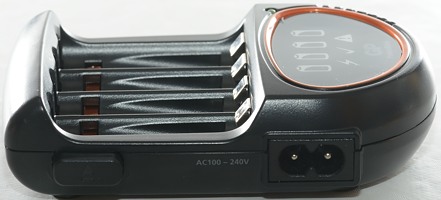
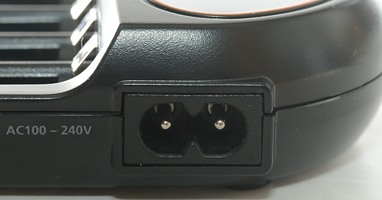
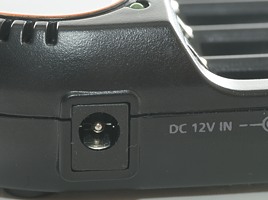
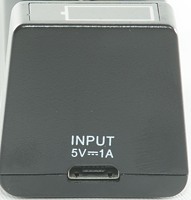
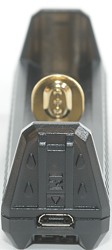
The charger can be powered from the supplied 12V/1A power supply or from usb. I did not test the usb power, the connector was misaligned and broke off when I tried to connect to it.
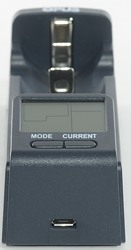
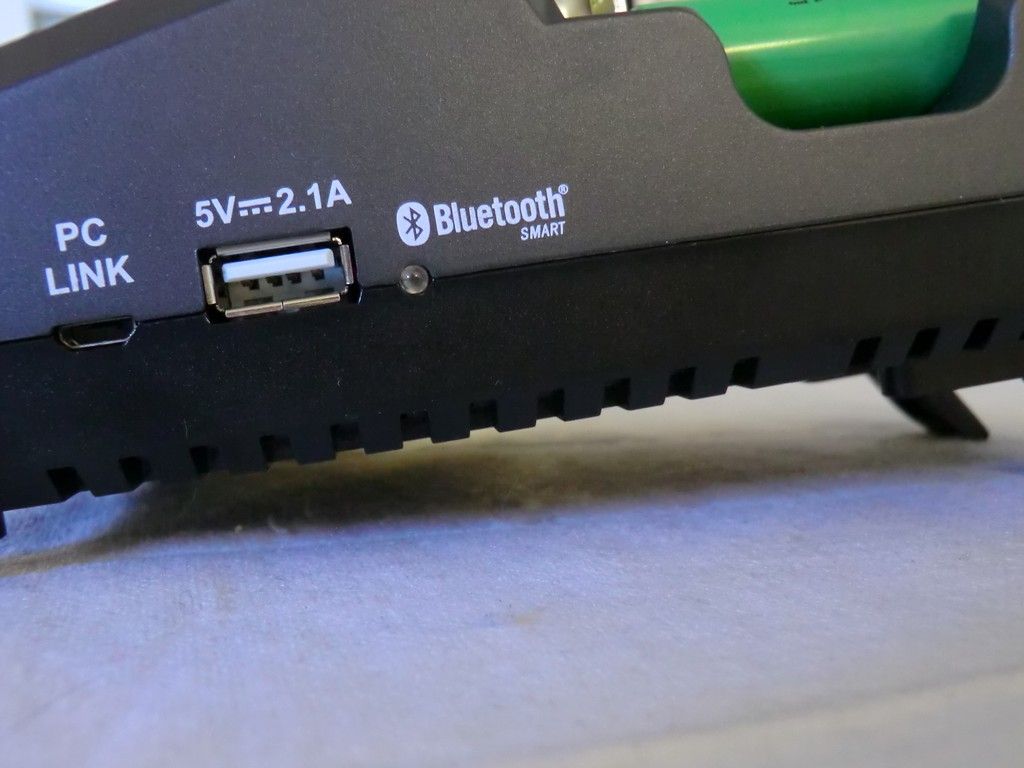
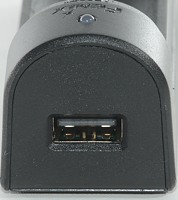
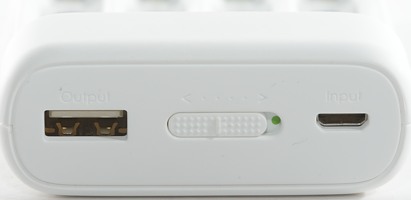
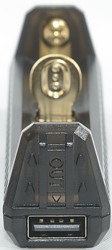
The usb output is usual disabled, it is required to hold the “CURRENT” button down for some time to enabled the usb mode function, then press the button again to turn usb output on.
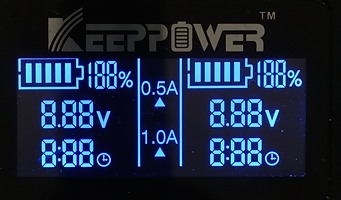
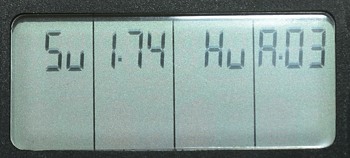
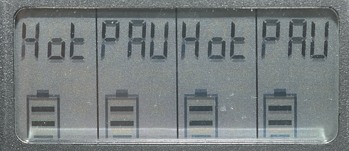
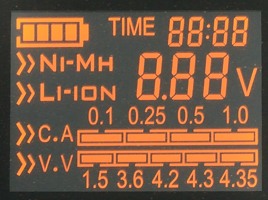
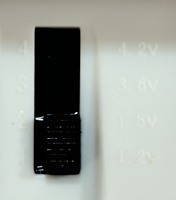
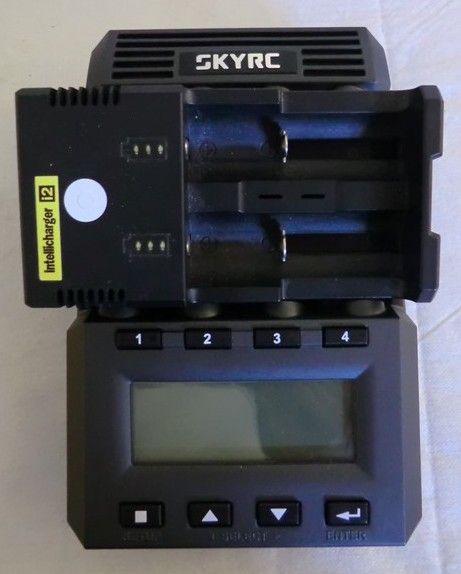
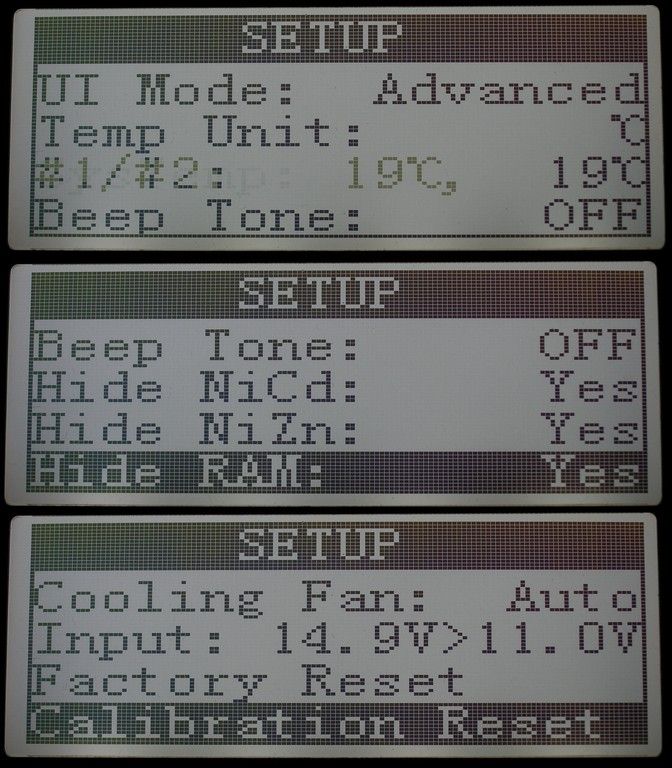
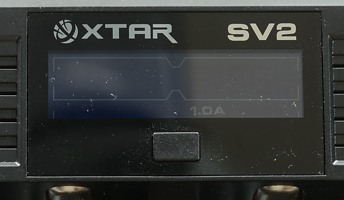
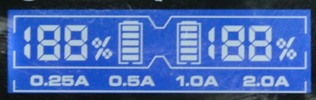
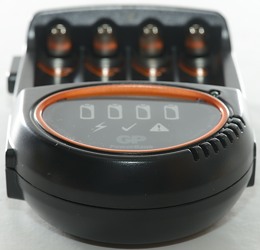
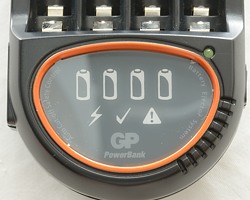
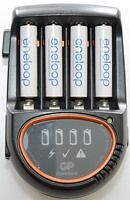
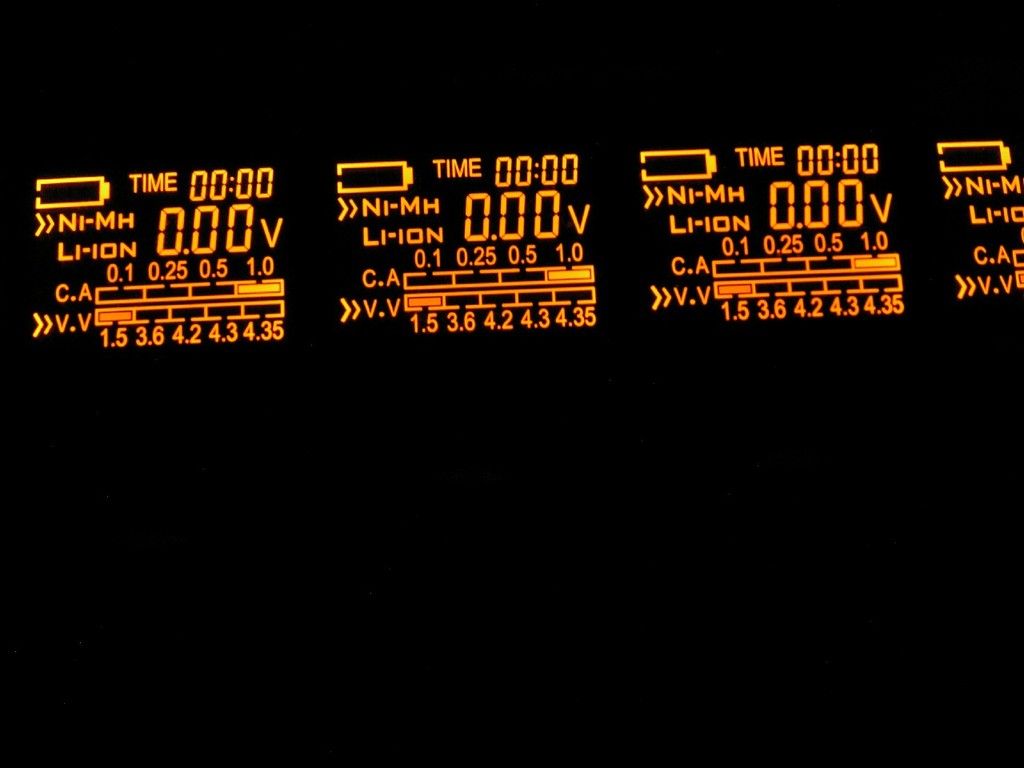
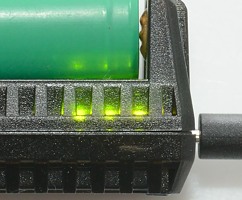
When the charger is turned on, it displays test where all the text can be seen.
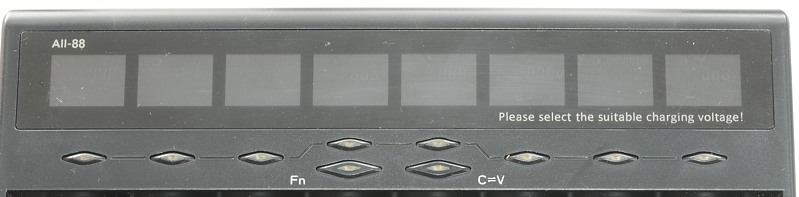
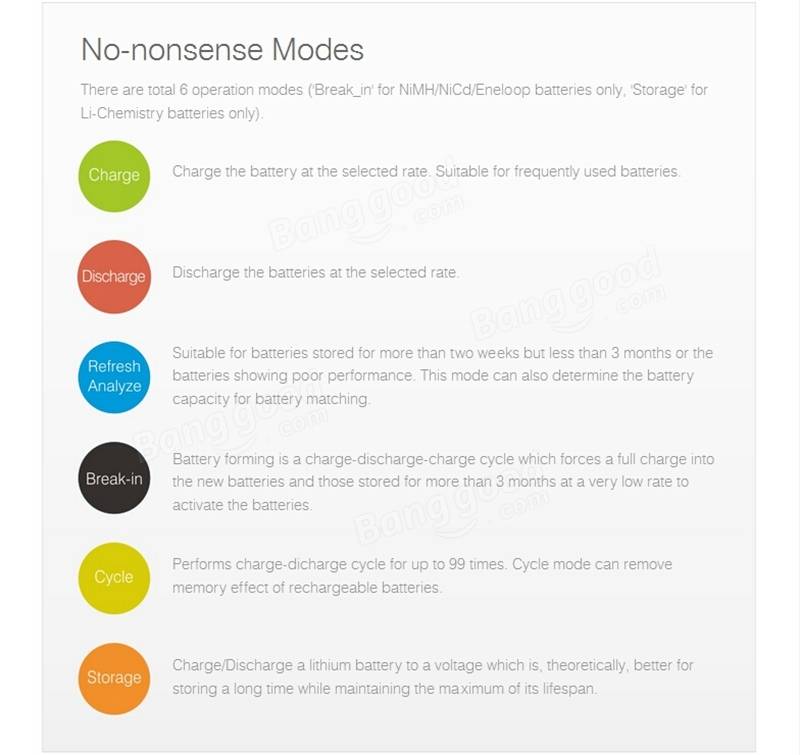
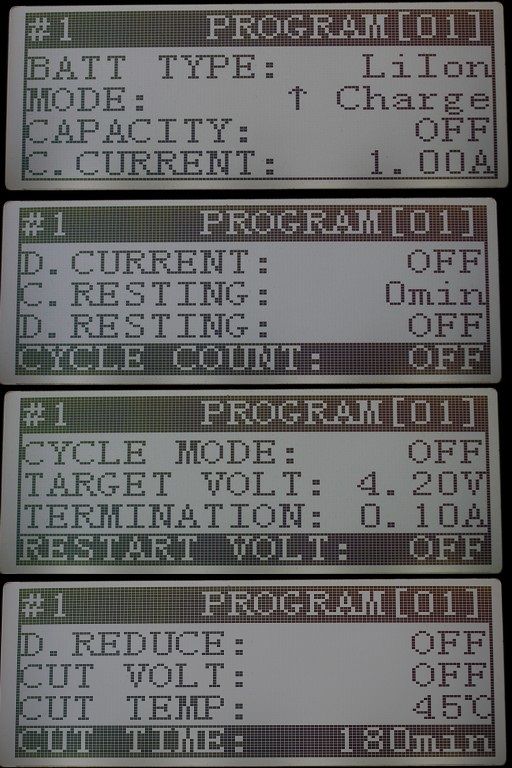
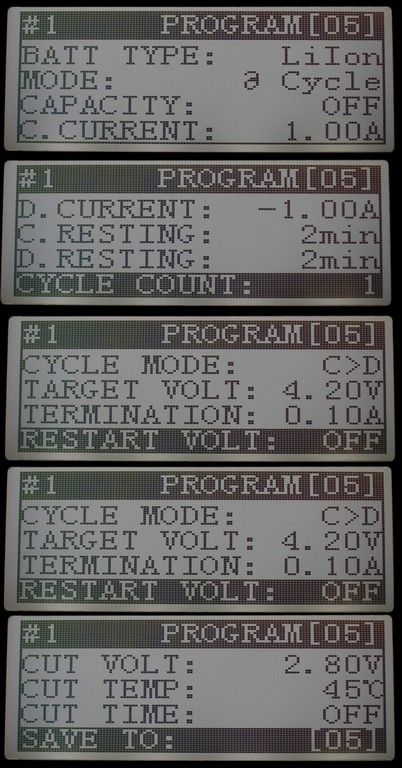
When startup is finished it is possible to select mode:
- CHARGE: Charge battery with 200 to 2000 mA.
- DISCHARGE: Discharge battery with 100 to 1000 mA.
- DISCHARGE REFRESH: Discharge and charge the battery 3 times.
- CHARGE TEST: Charge, discharge and charge the battery, show how much current was discharged.
- IMPEDANCE TEST: Measure the internal resistance of the battery.
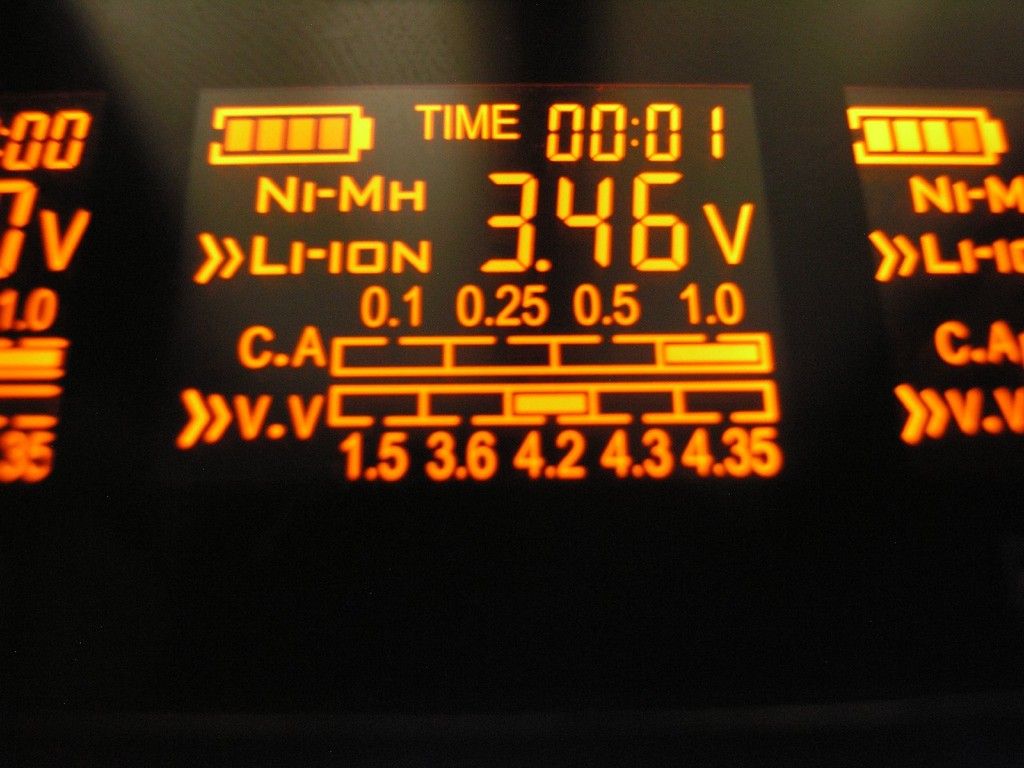
When display is flashing it is possible to select mode and current.
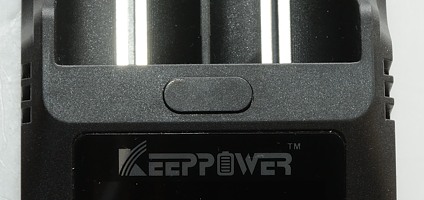
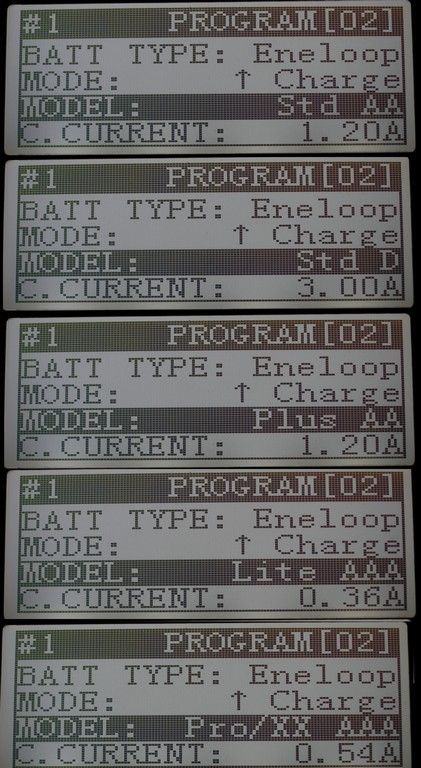
Holding down the MODE button enables selection of chemistry.
Holding down the CURRENT button enables turning usb on/off.
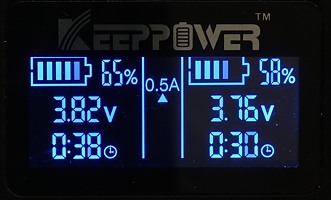
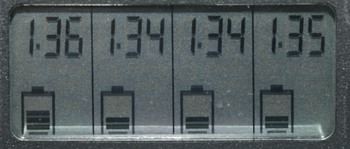
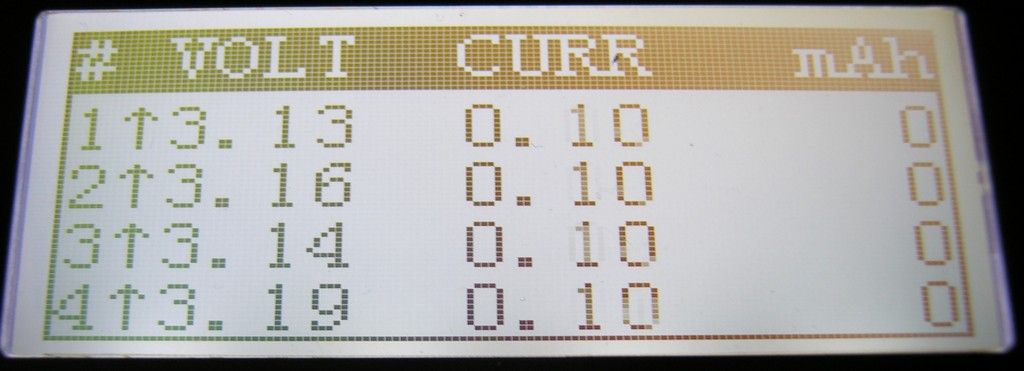
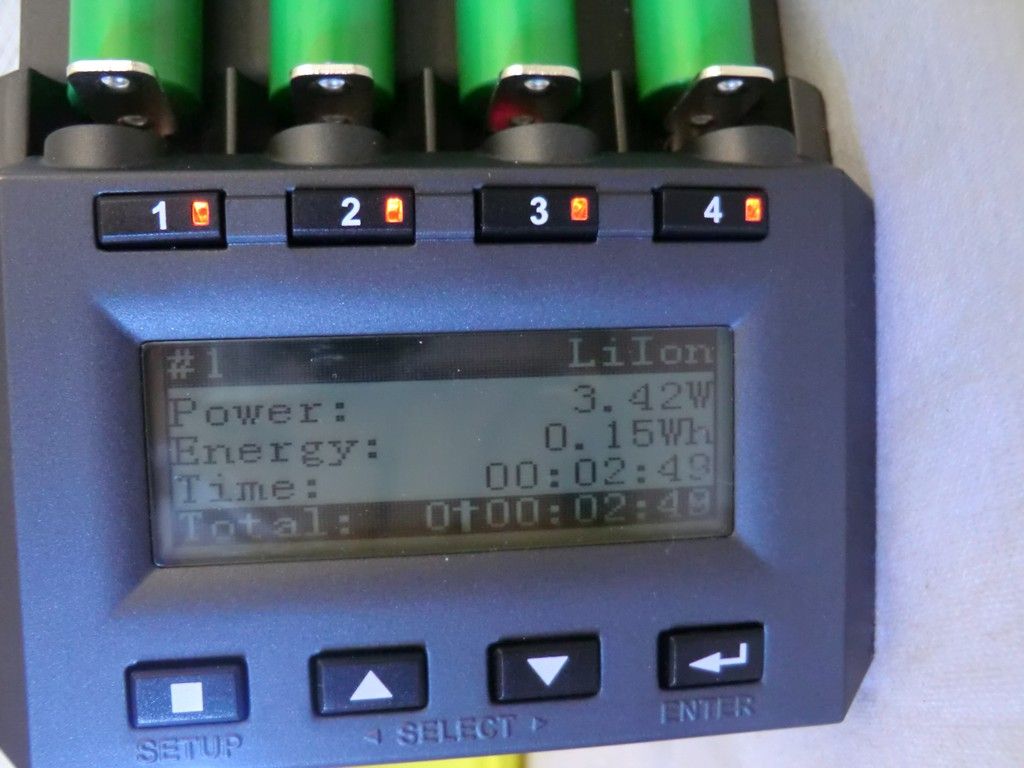
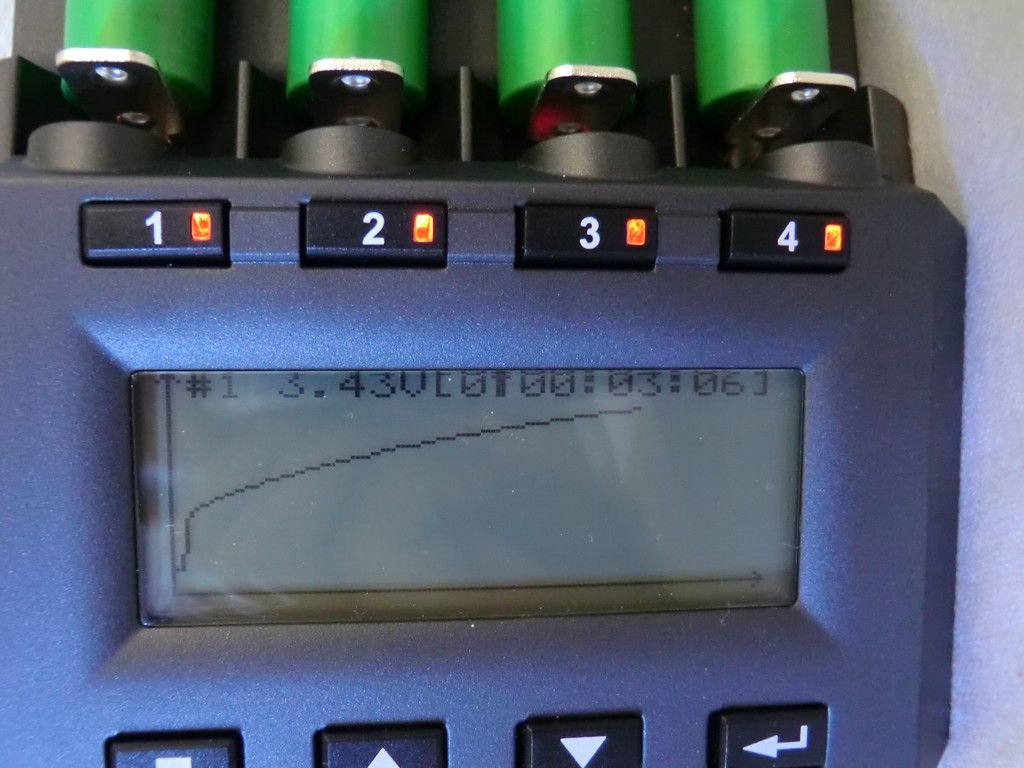
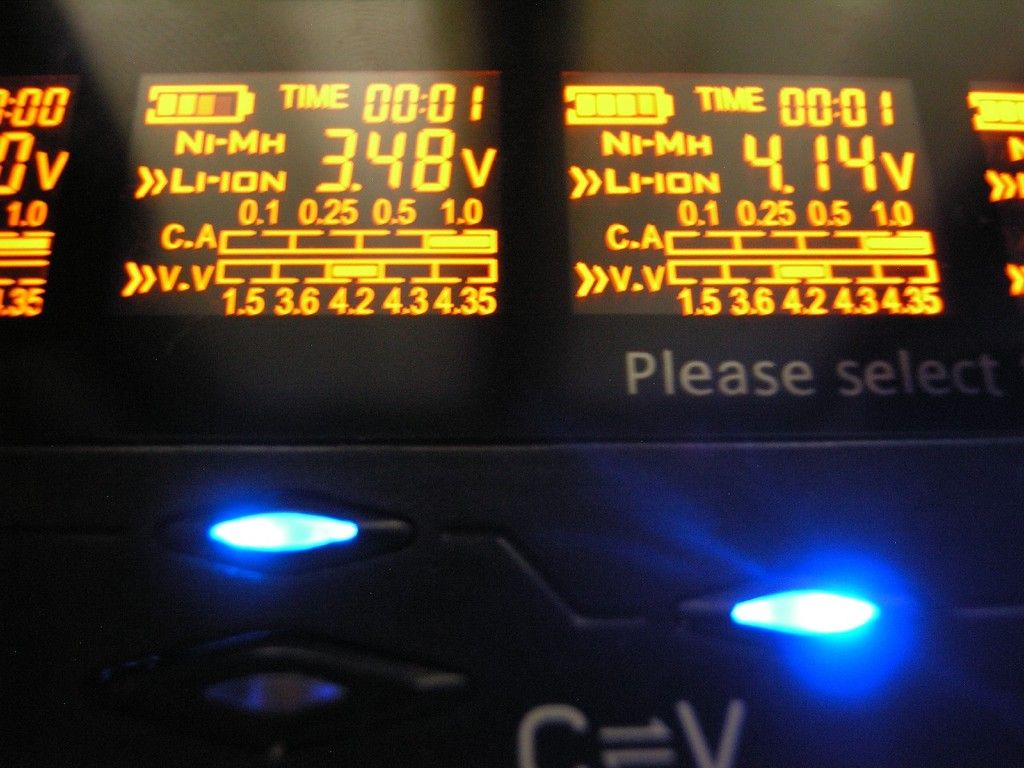
When charging or discharging it is possible to use the DISPLAY button to select between V, mA, mAh, resistance and time.


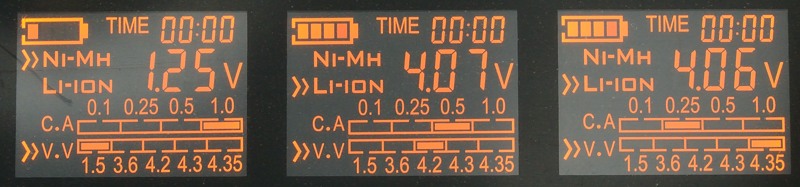
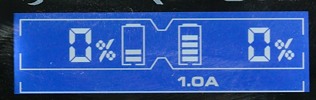
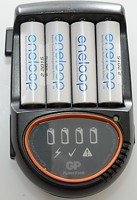
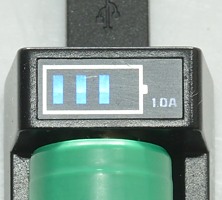
Here I have select some functions.

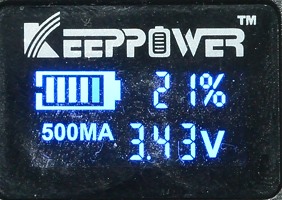
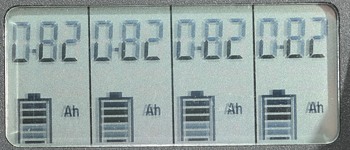
Usb output is enabled, it can show either A or Ah delivered (I took this picture just as the numbers was changing).


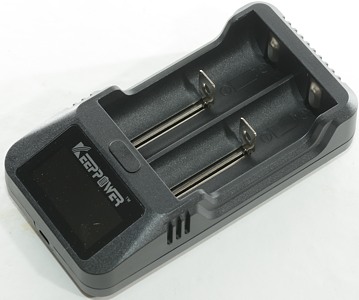
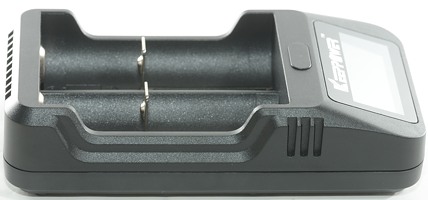
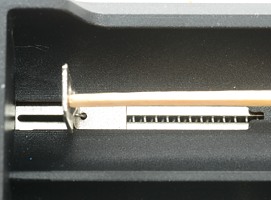
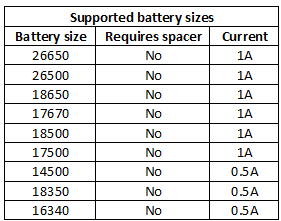
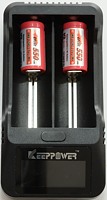
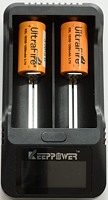
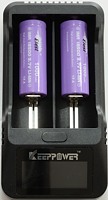
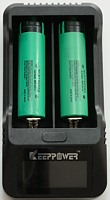
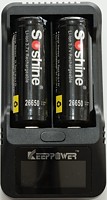
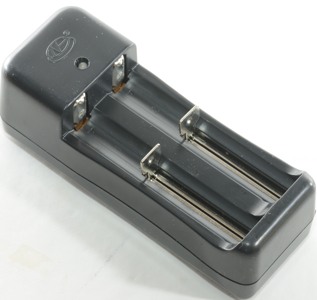
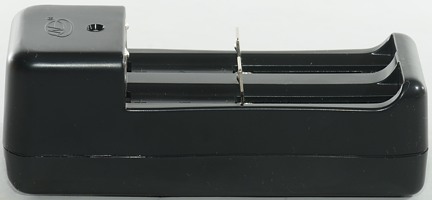
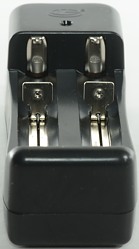
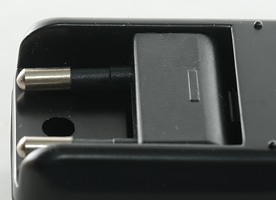
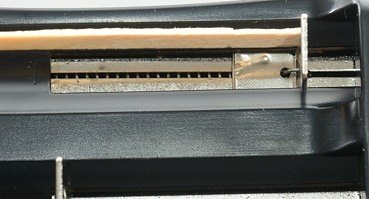
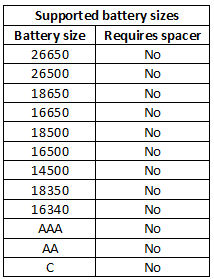
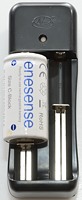
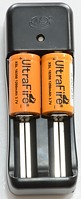
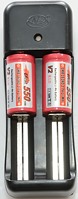
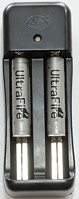
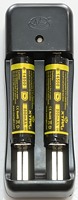
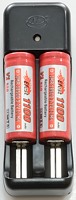
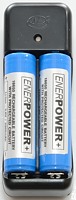
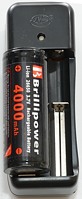
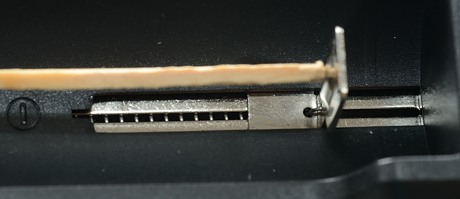
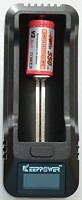
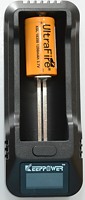
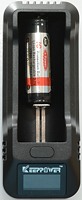
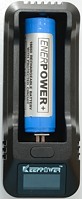
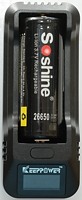
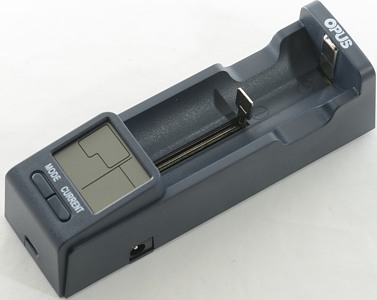
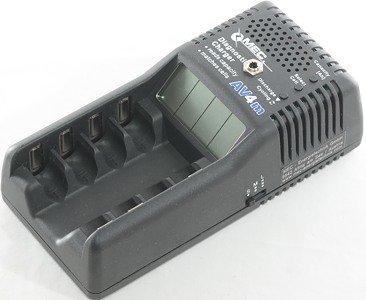
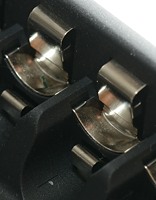
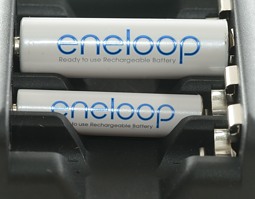
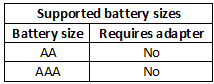
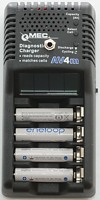
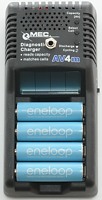
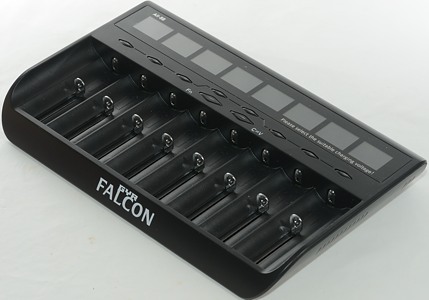
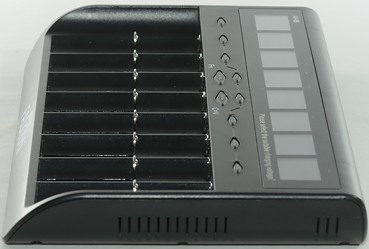
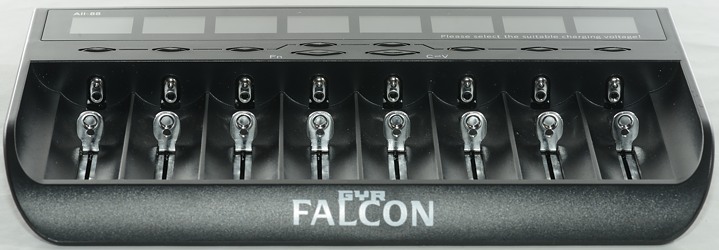
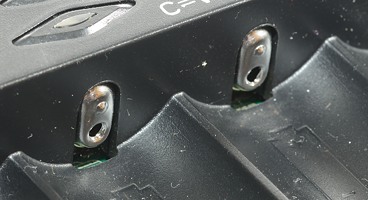
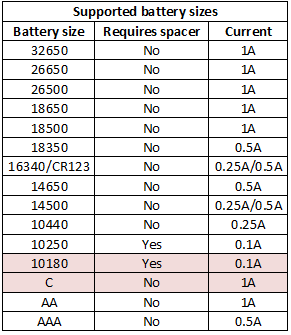
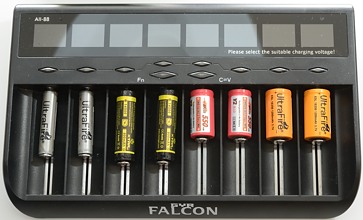
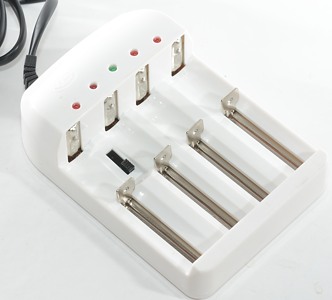
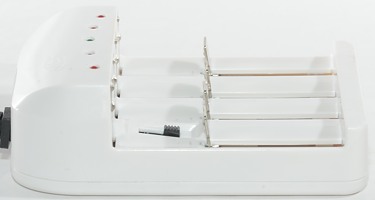
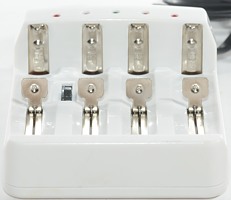
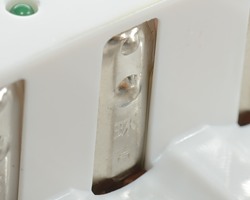
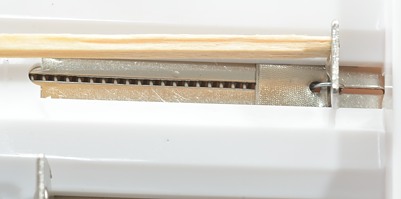
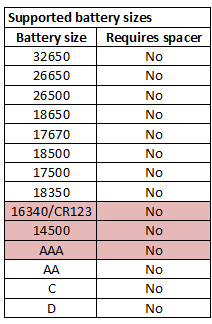
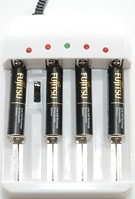
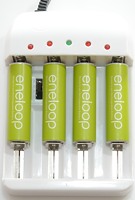
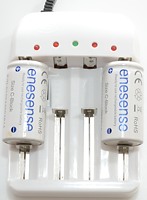
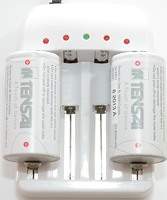
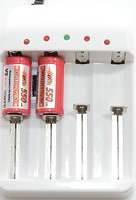
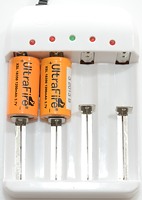
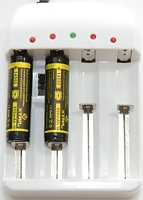
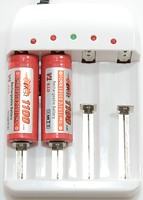
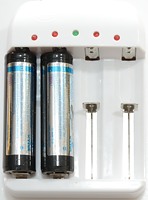
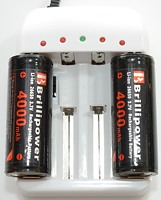
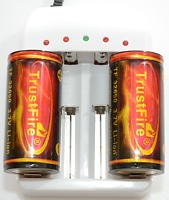
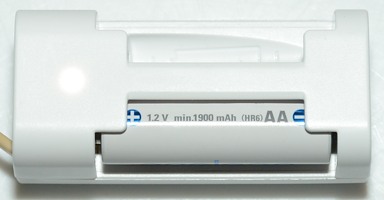
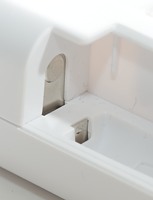
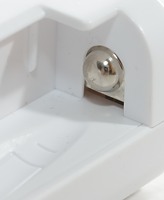
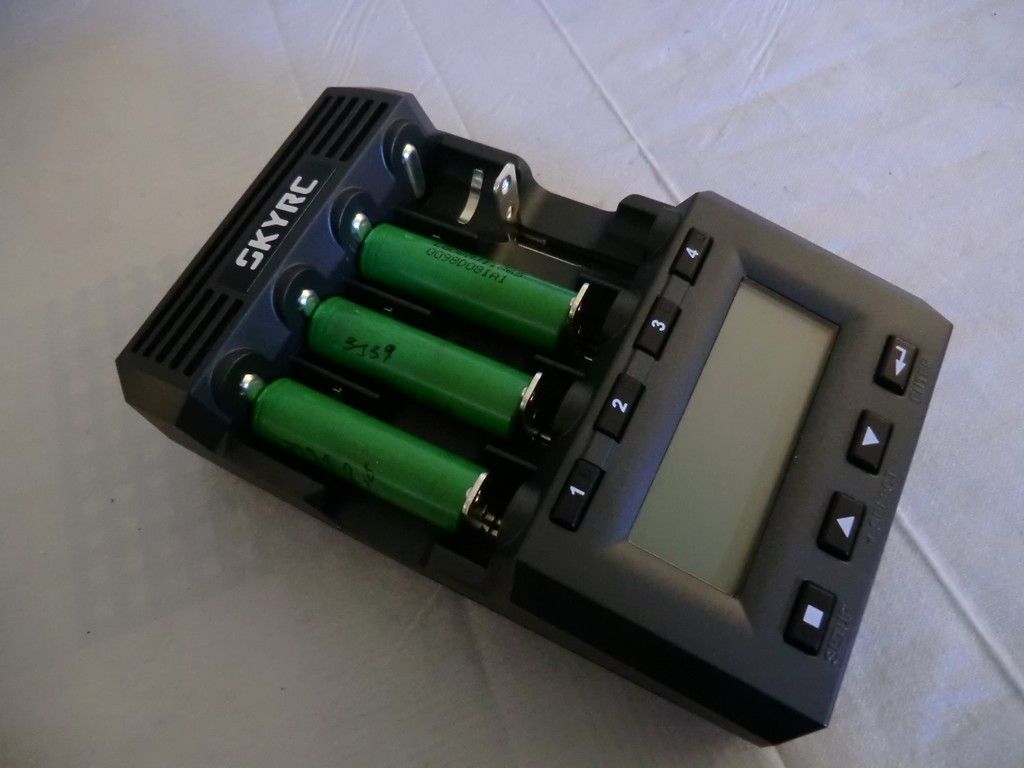
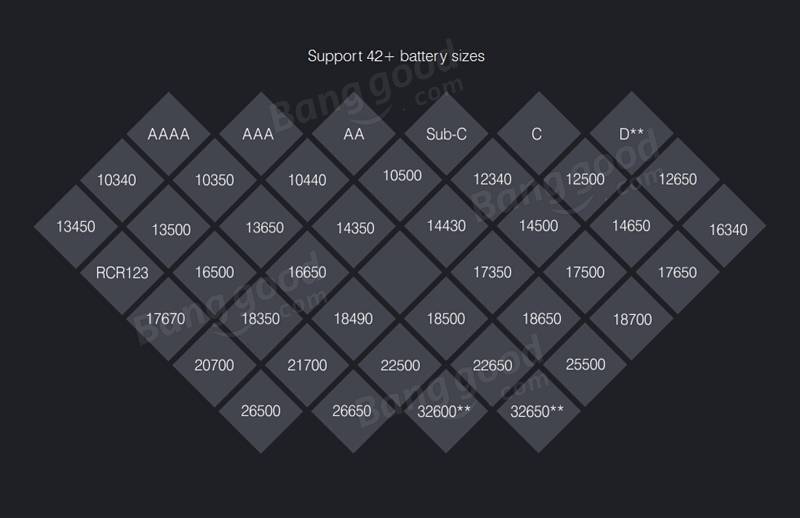
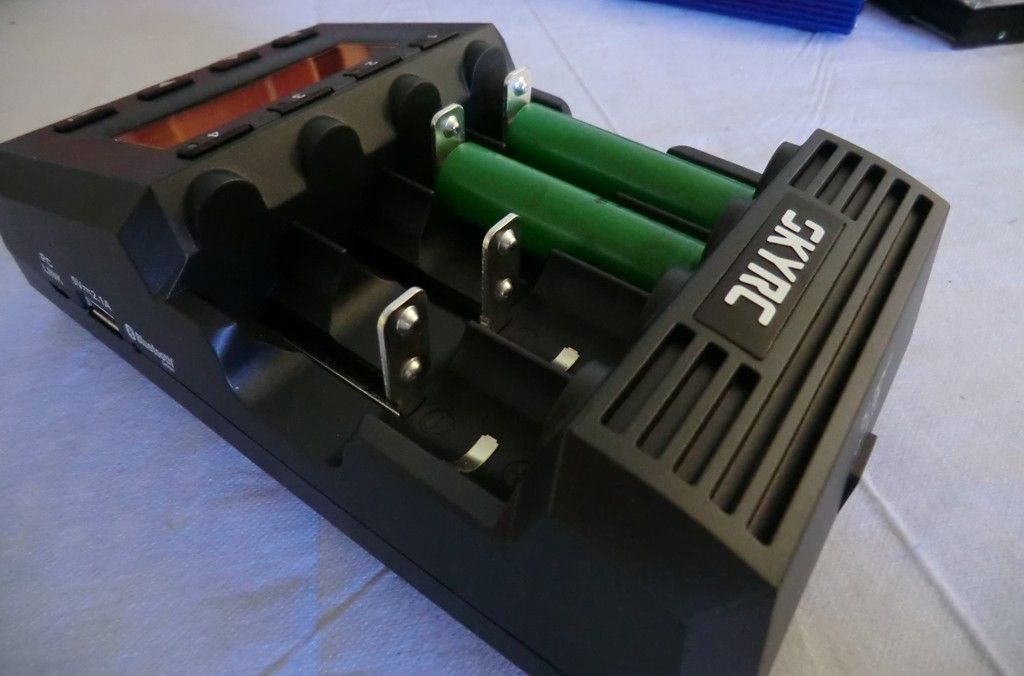
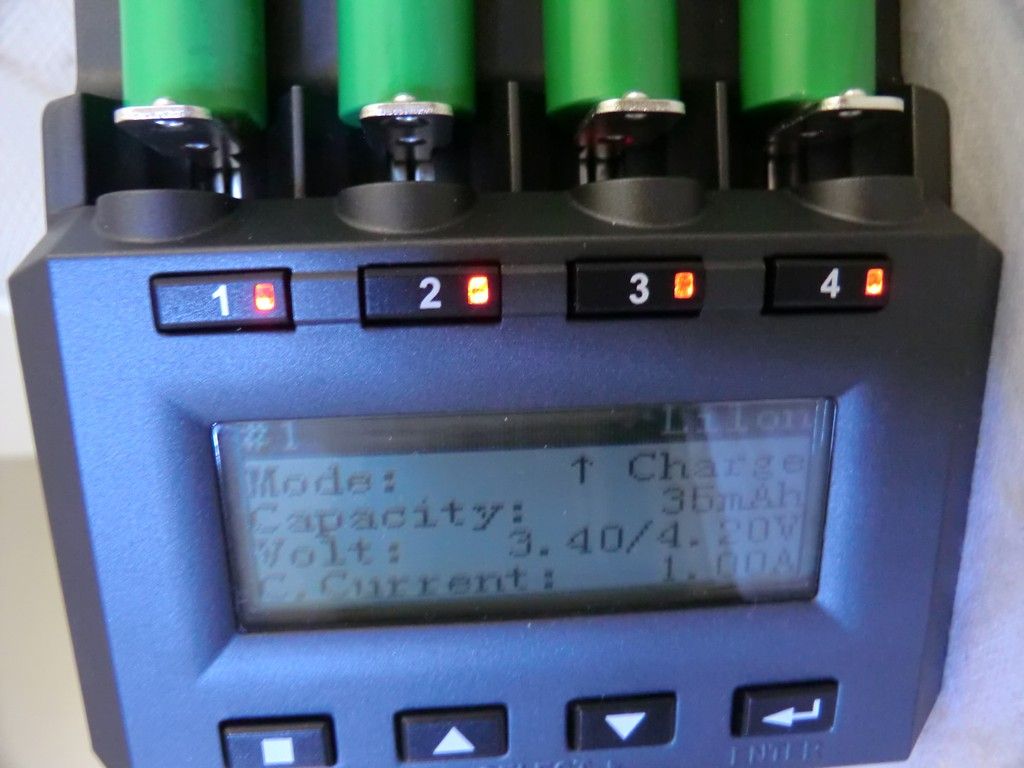
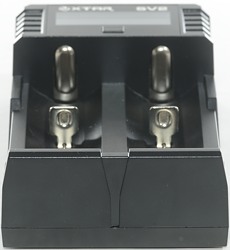
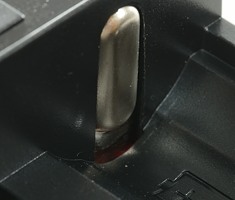
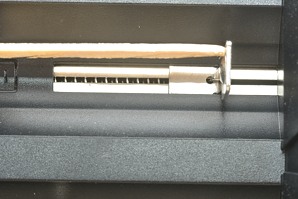
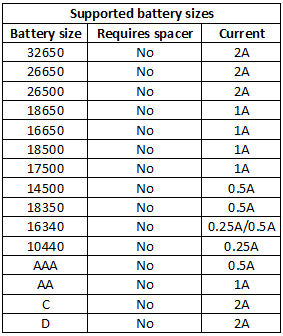
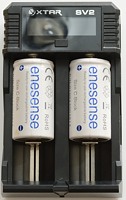
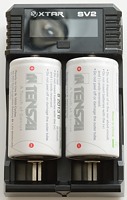
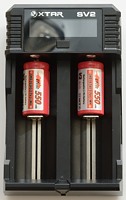
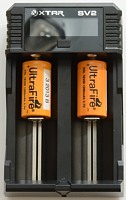
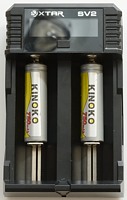
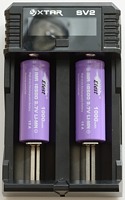
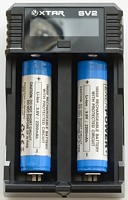
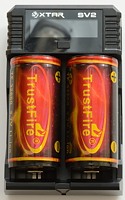
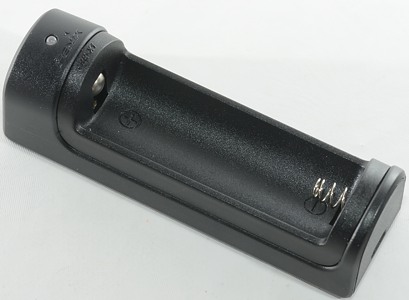
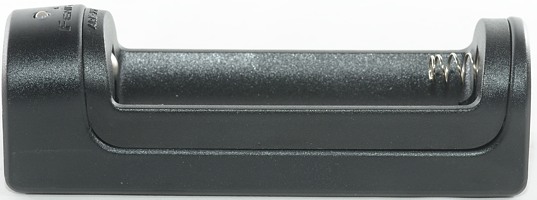
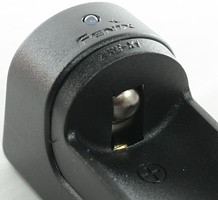
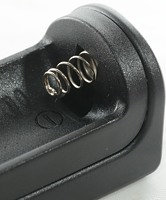
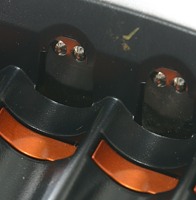
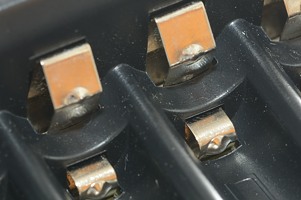
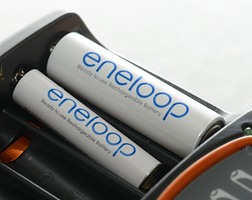
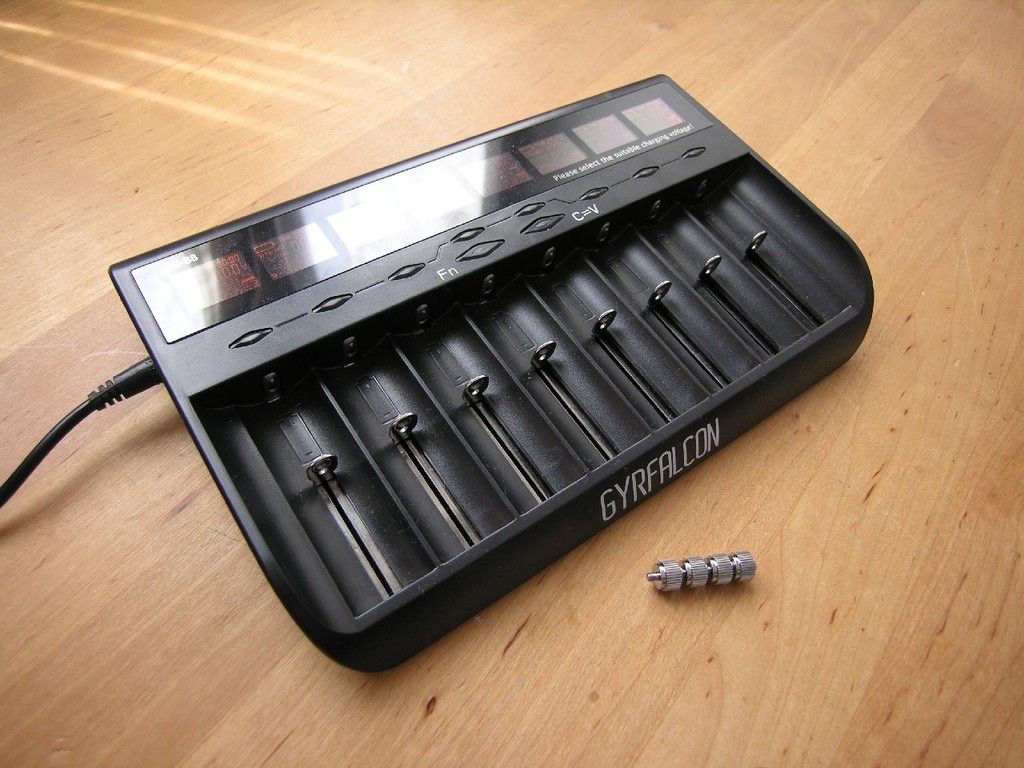
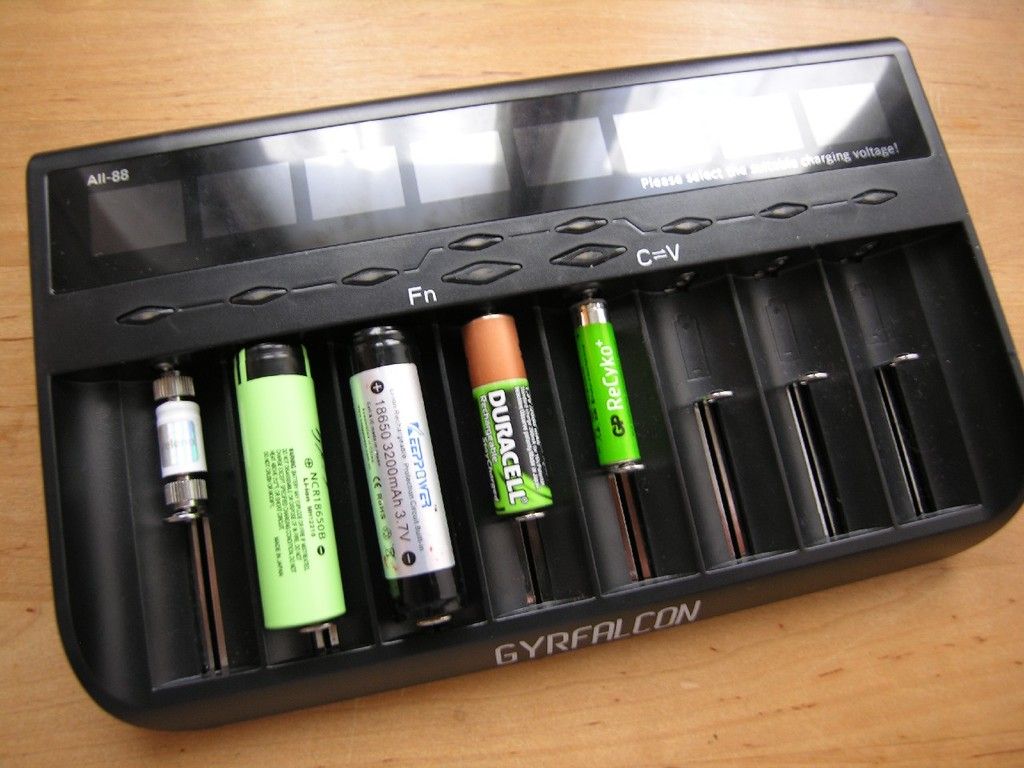
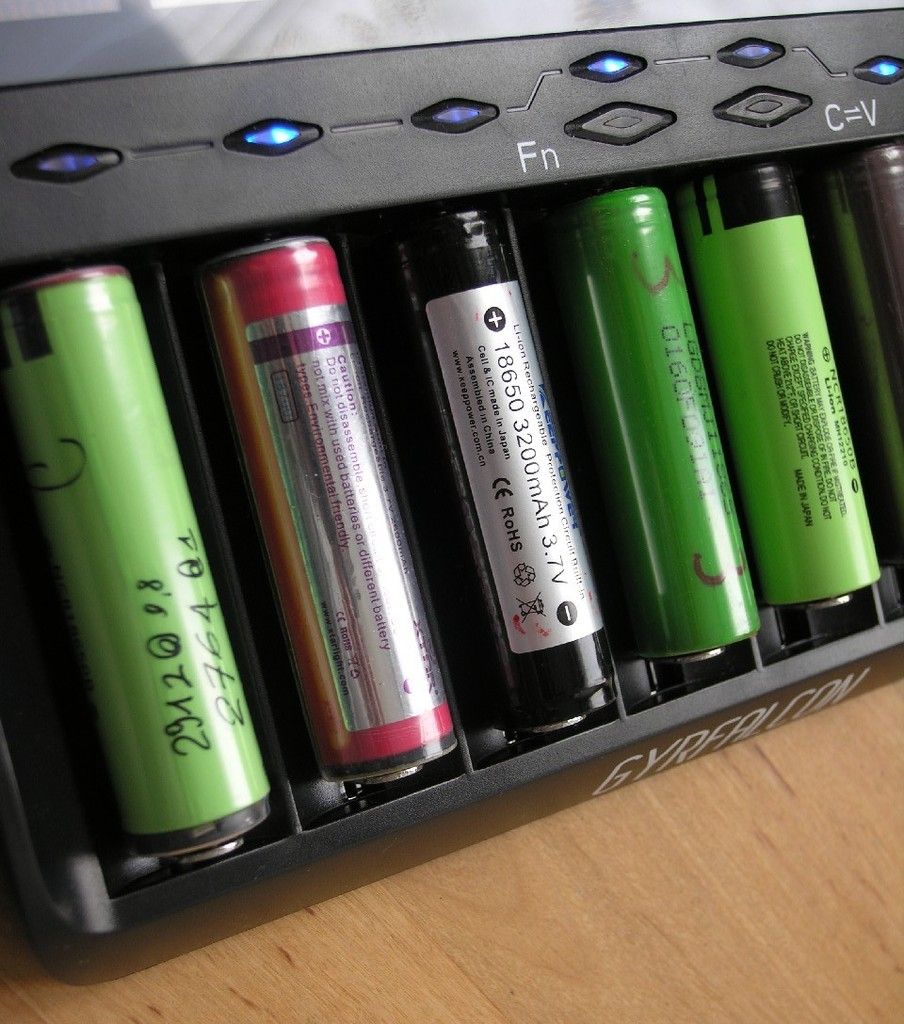
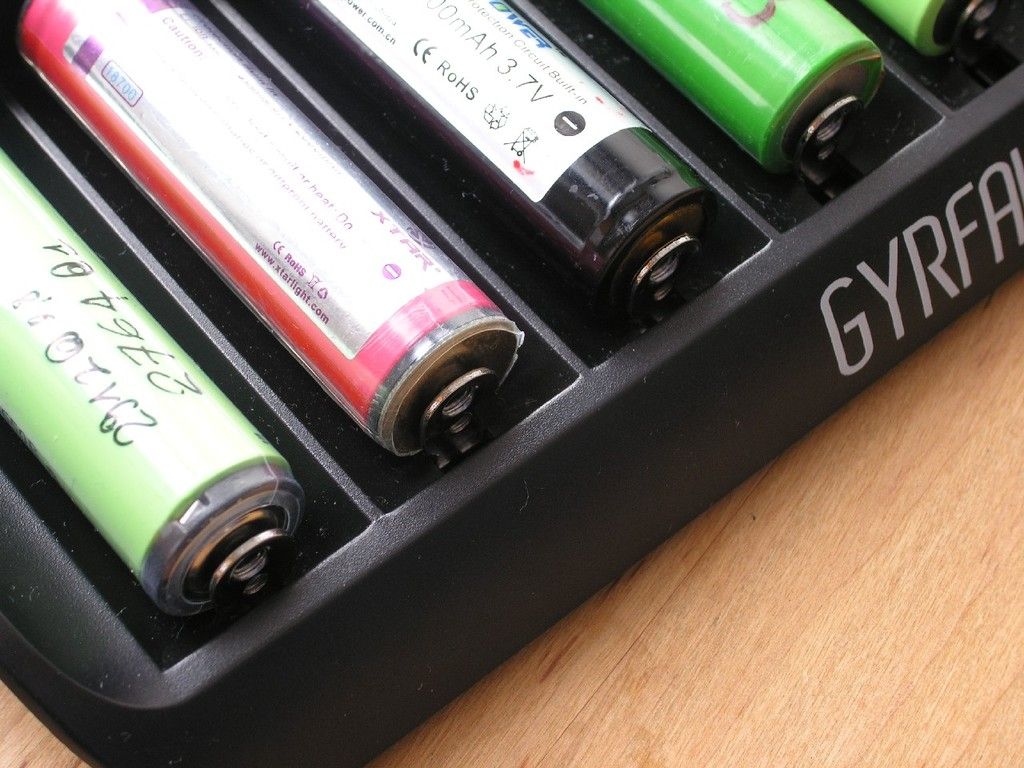
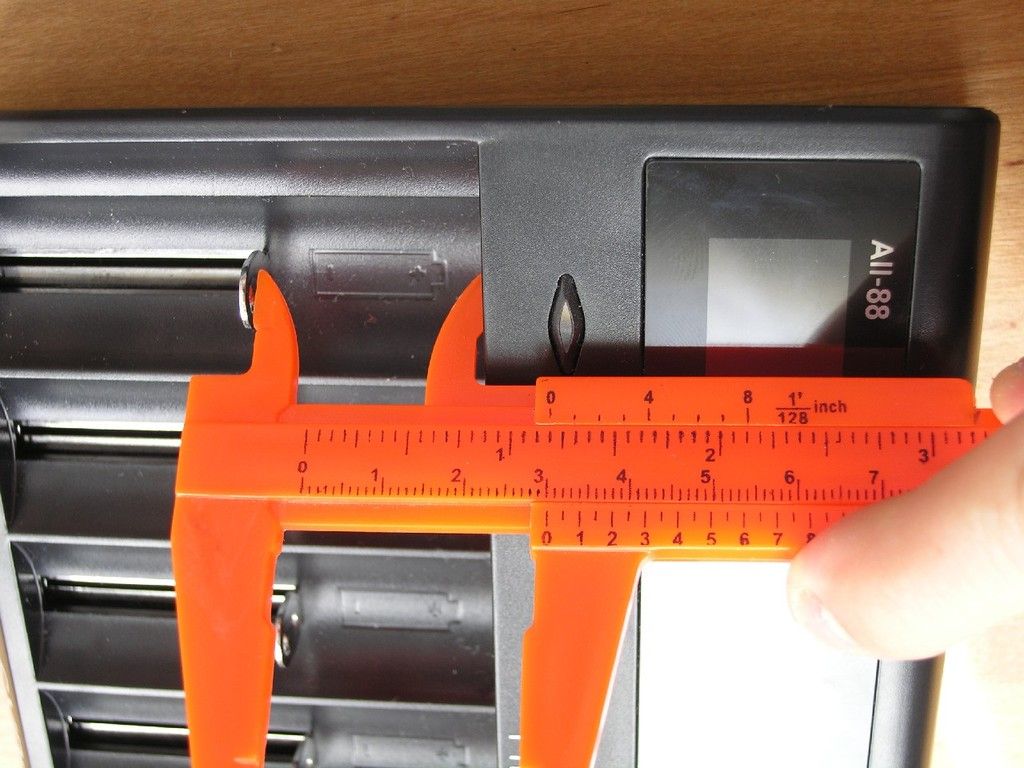
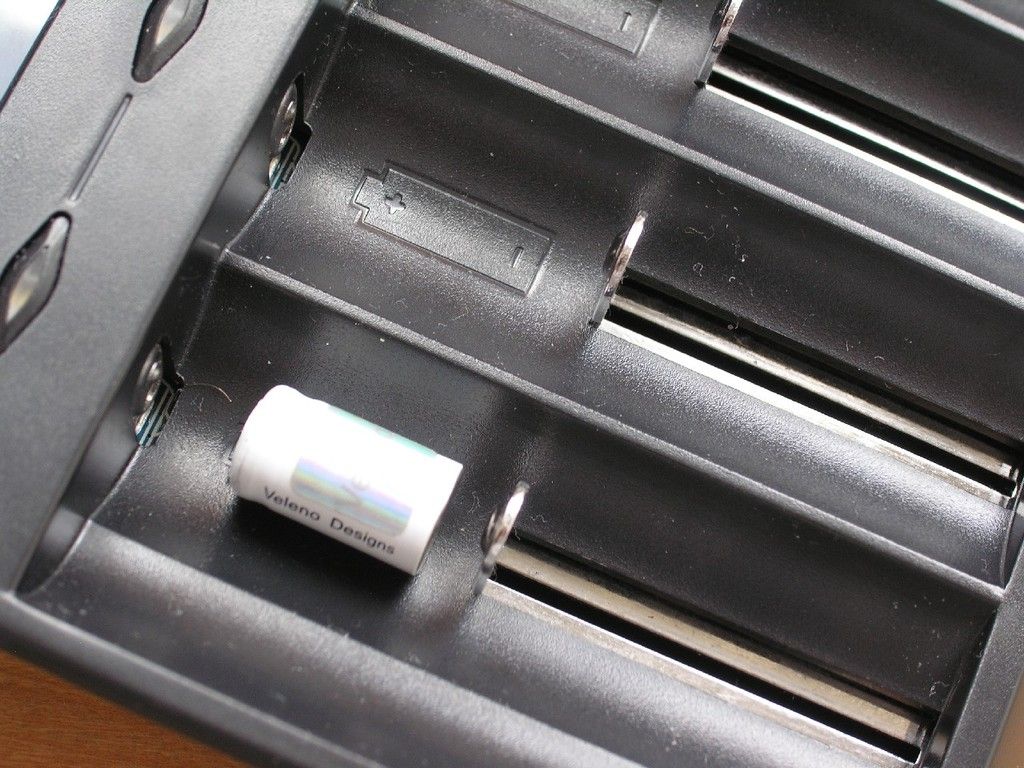
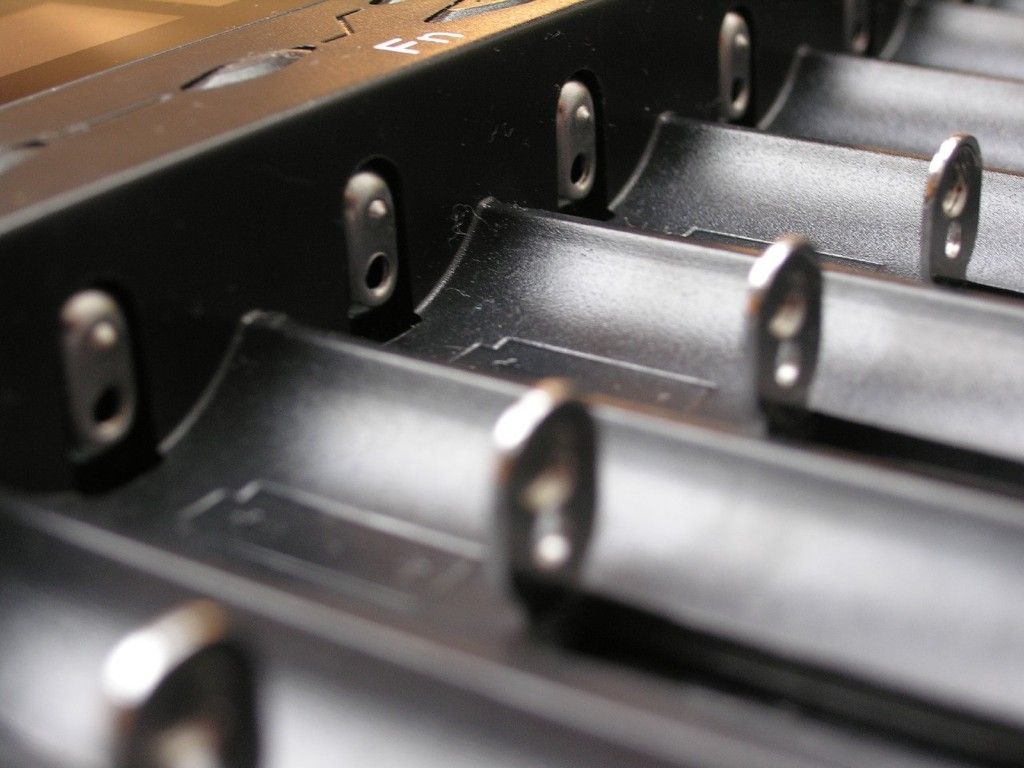
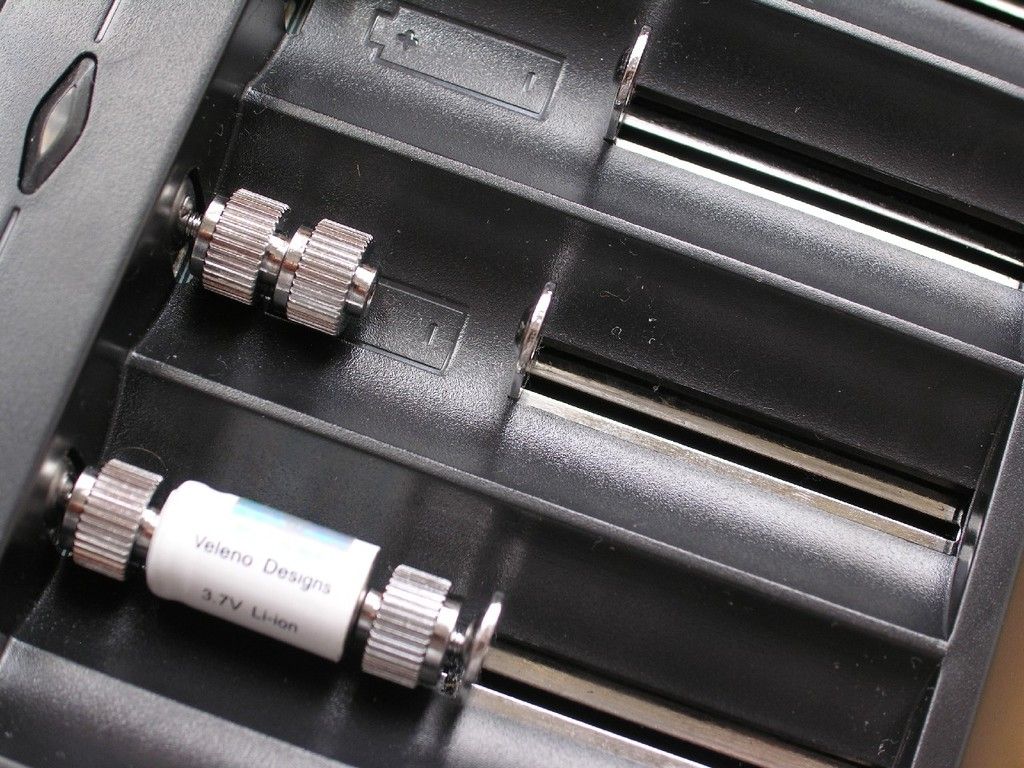
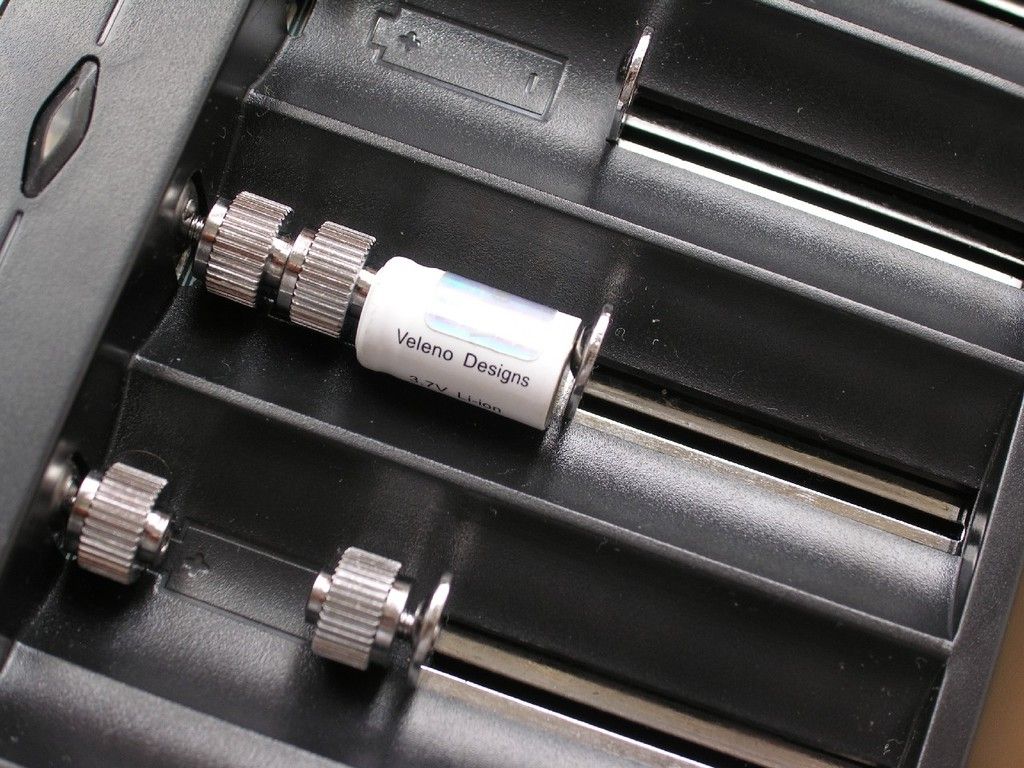
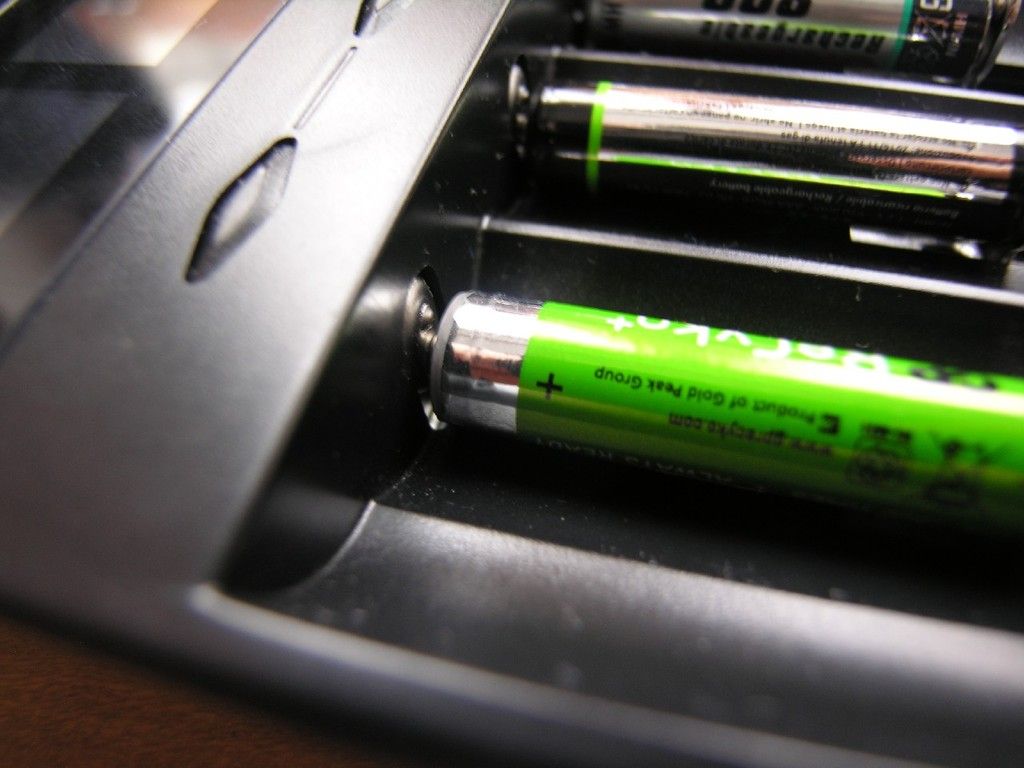
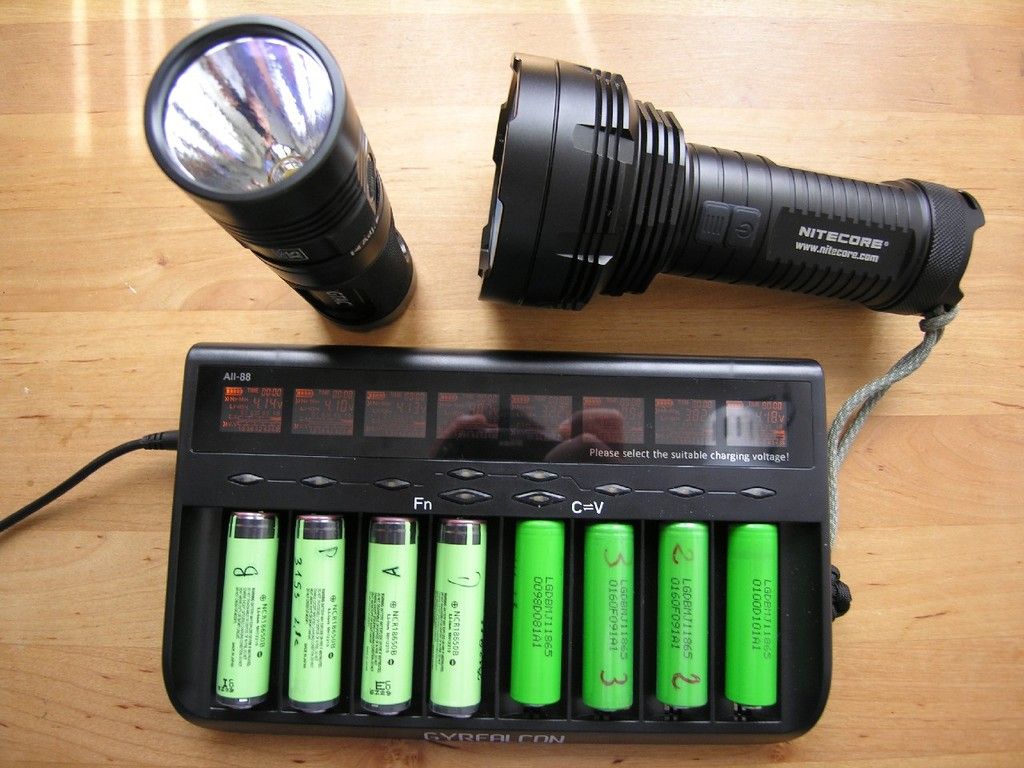
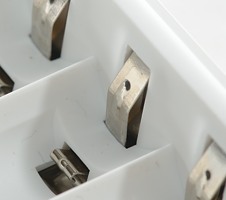
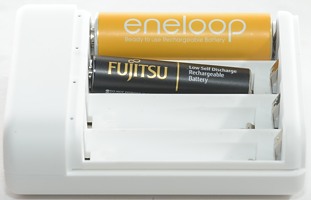
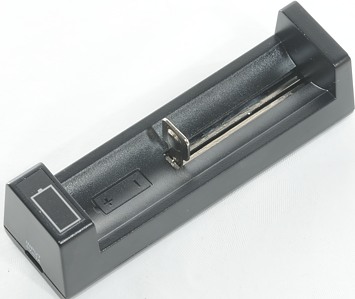
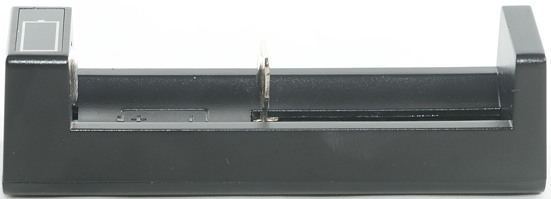
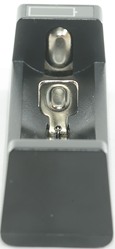
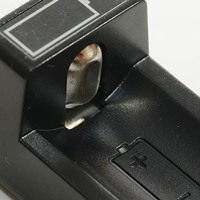
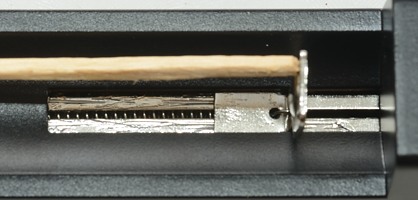
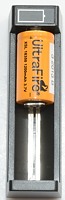
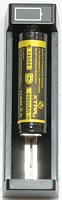
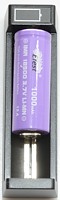
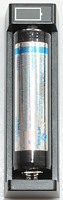
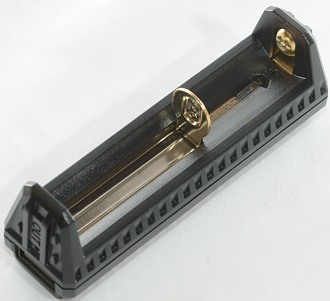
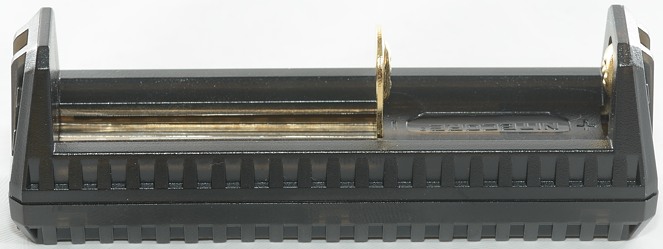
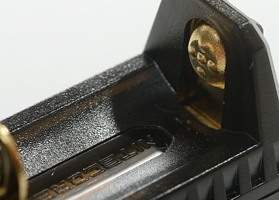
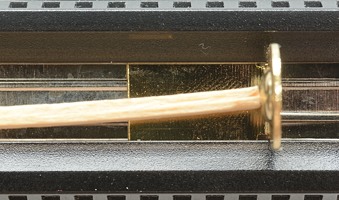
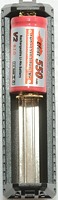
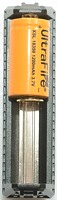
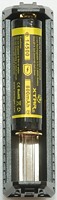
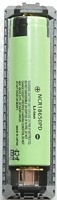
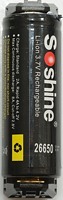
The charger uses the classical slider construction to handle most battery sizes, but notice how far up the plus pole goes, this means it support 32xxx and D sized cells. The slider works smoothly and can handle sizes from 33 mm to 73.5 mm, this means even the longest 18650/26650 will fit.


Measurements
- LiIon batteries will be discharged with 8mA when power is off.
- LiIon batteries will be discharged with 2mA when power is on.
- NiMh batteries will be discharged with 0.8mA when power is on or off.
- Voltmeter shows wrong values when charger is unpowered.
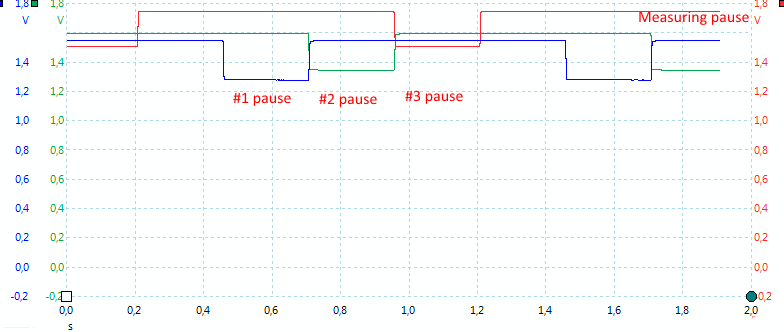
- Voltmeter do not freeze, but shows the actual cell voltage all the time (Very nice).
- The voltage is measured with current off and is within 0.05 volt.
- From 0.05 volt on the battery the charger will recognize it and start charging.
- Up to 2 volt NiMH is assumed, above 1.6 volt they will be reported full immediately.
- Above 2 volt LiIon charging is used.
- Charger will restart if battery voltage drops below 4 volt.
- Charger will restart charging after power loss, or battery insertion.
CHARGE LiIon batteries
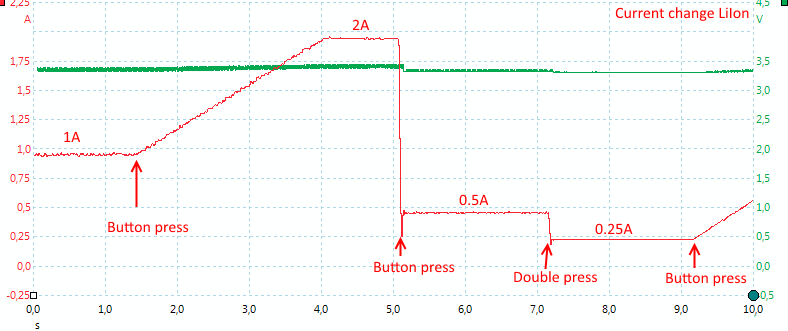
The charger supports 0.2, 0.3, 0.5, 0.7, 1.0 and sometimes 1.3 and 1.6A charge current, default current is 1A
.png)
Due to the pulsing current the voltage line is rather thick. It looks like the charger terminates premature on this charge, maybe because it has a 900 minutes charge limit.
Display shows: 2968mAh in 15:00 hours
.png)
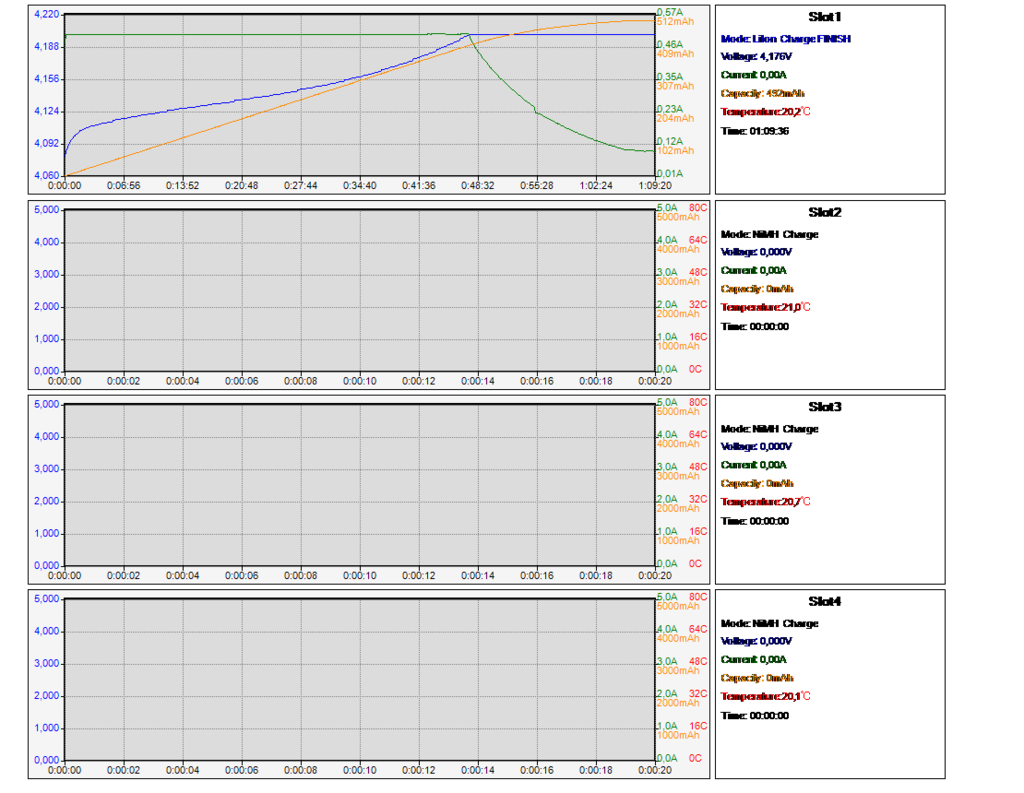
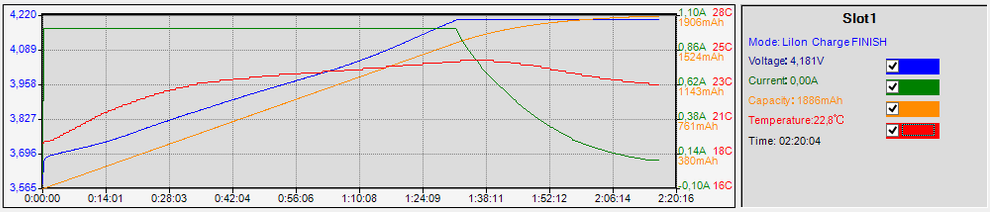
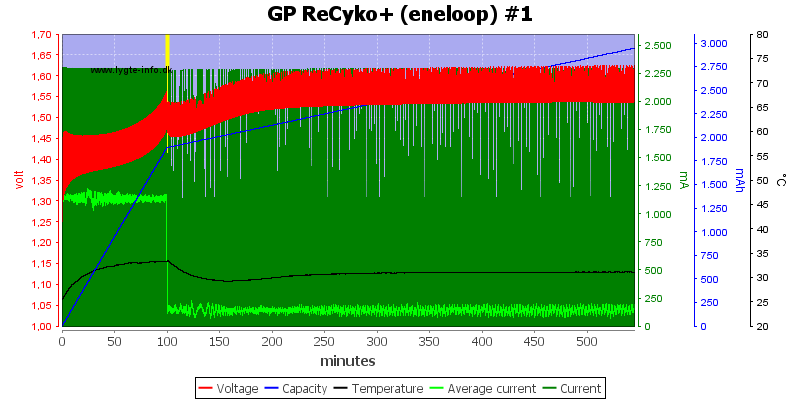
With 1A charge current it looks much better. The charger uses a simulated CC/CV charge curve and because the voltmeter is about 0.05 volt to high it stops when the battery hits 4.15 volt with a terminating charge current of around 100mA.
Display shows: 3142mAh in 3:59 hours
.png)
.png)
No surprise with the above two cells.
Display shows: 2728mAh in 3:21 hours and 3448mAh in 4:15 hours
.png)
With this older cell the problem with pulsing charging can be seen. The voltage is too high when current is on and well below termination when current is off.
Display shows: 2492mAh in 3:25 hours
.png)
.png)
These two smaller cells are handled fine.
Display shows: 825mAh in 2:08 hours and 622mAh in 1:40 hours
.png)
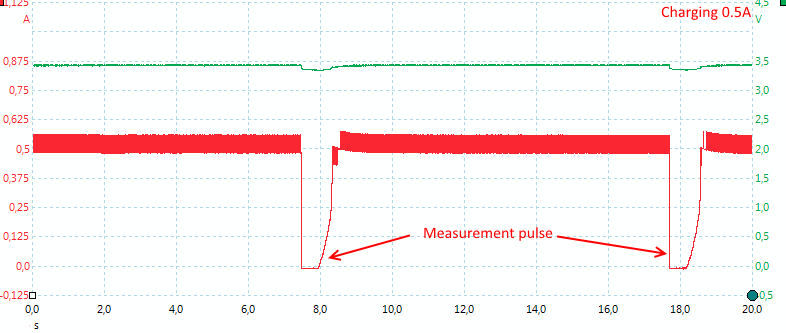
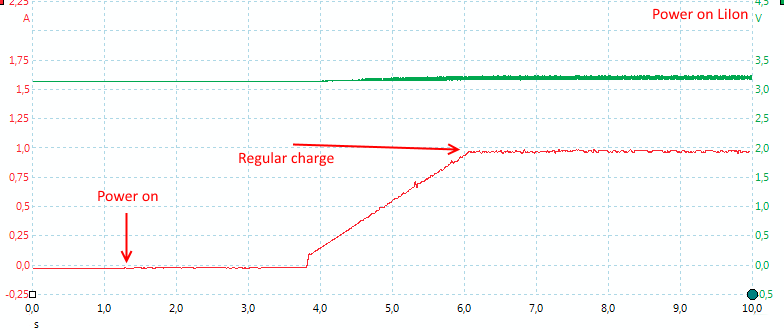
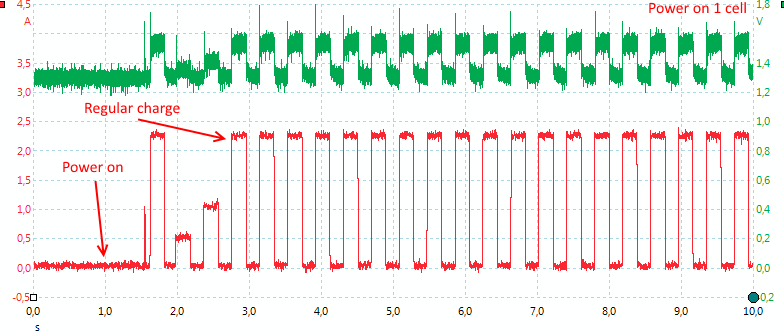
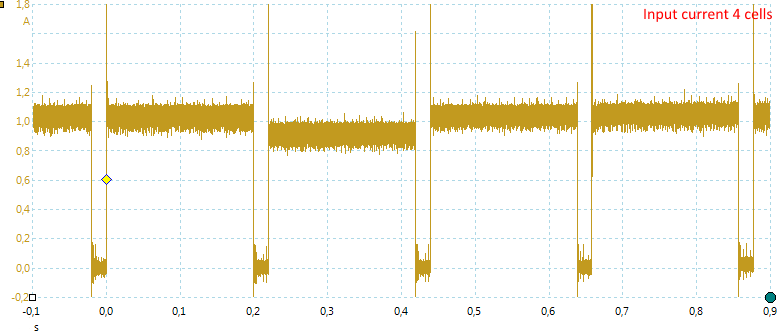
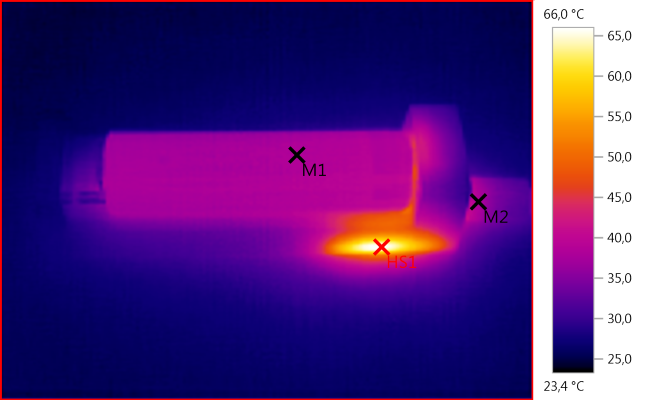
The current from the power supply is drawn in pulses, but no high pulse.

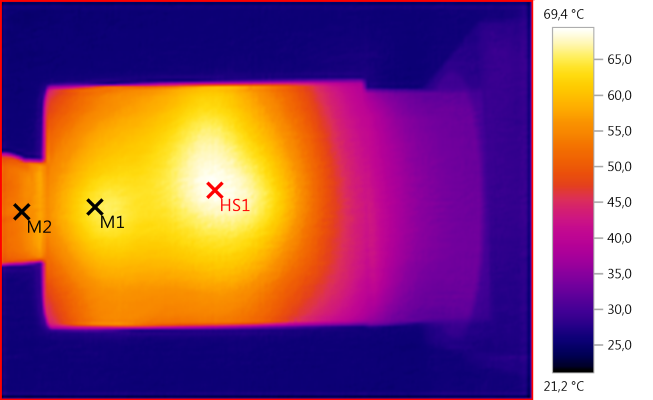
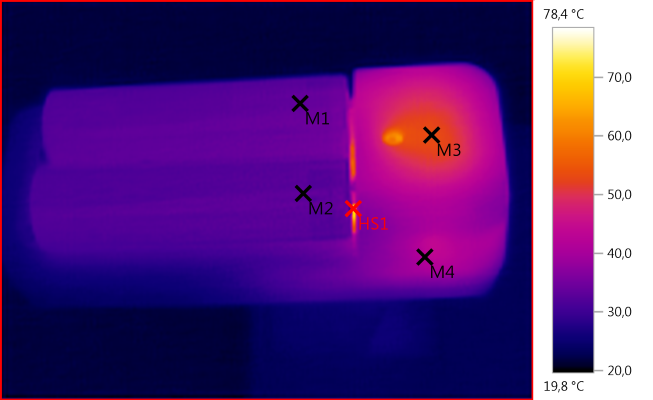
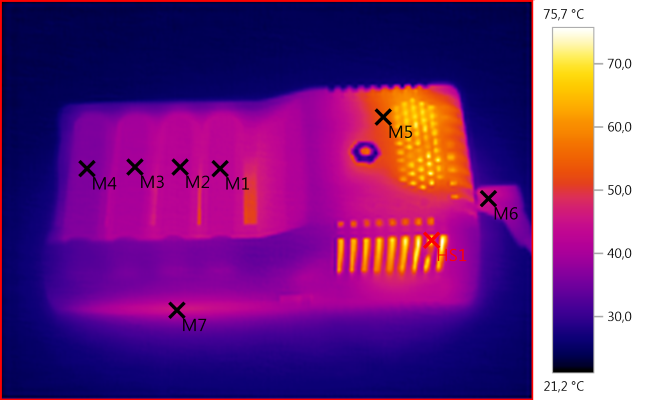
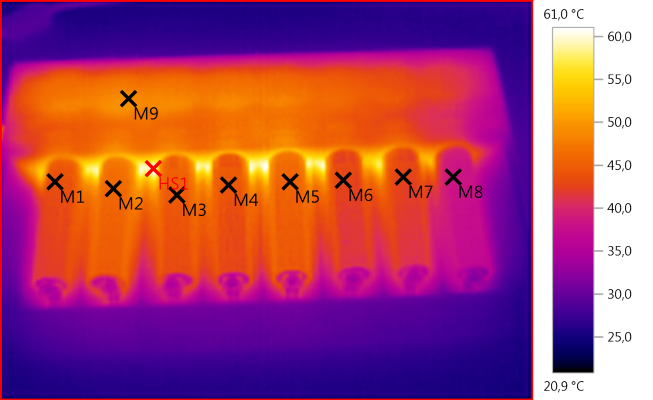
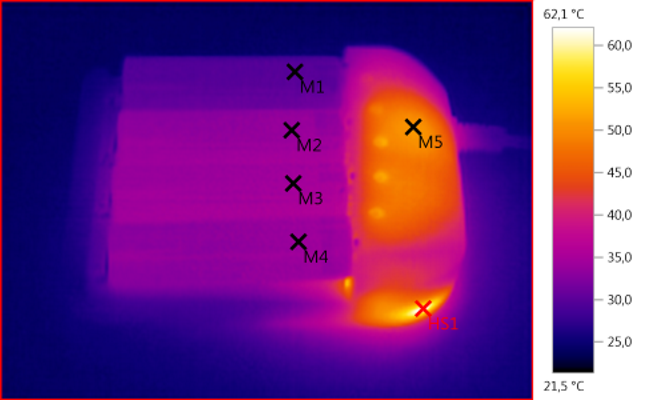
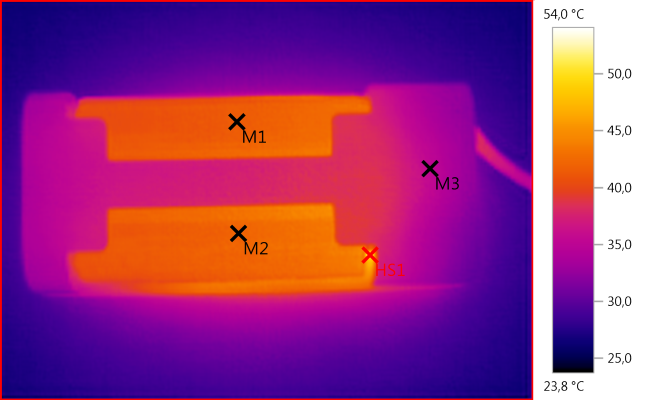
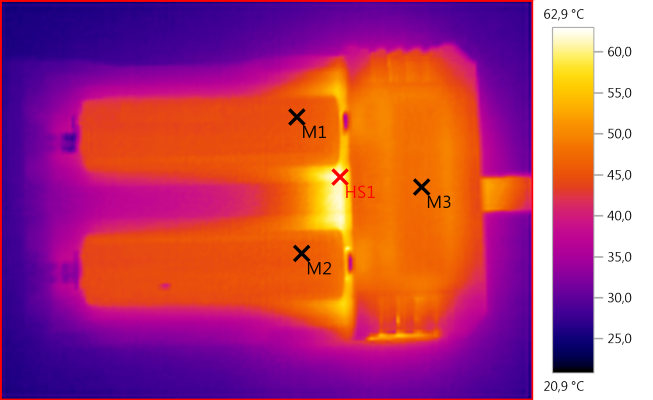
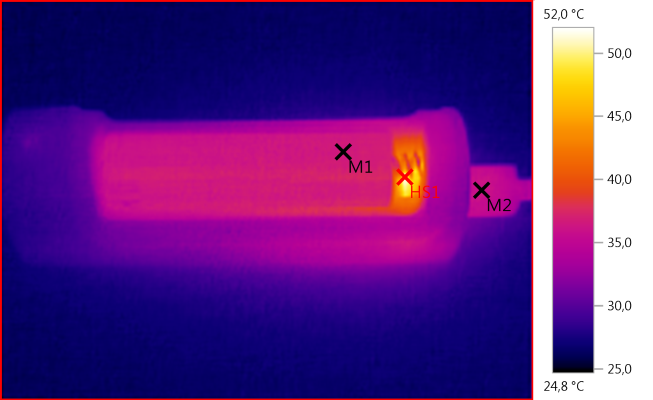
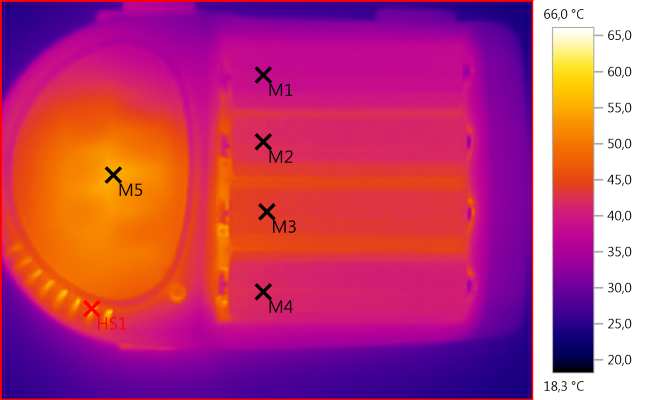
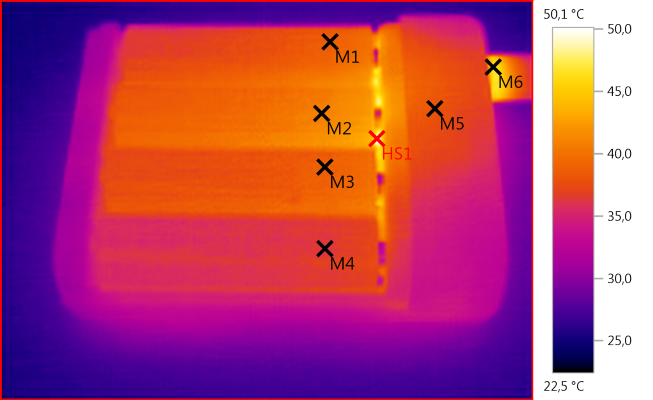
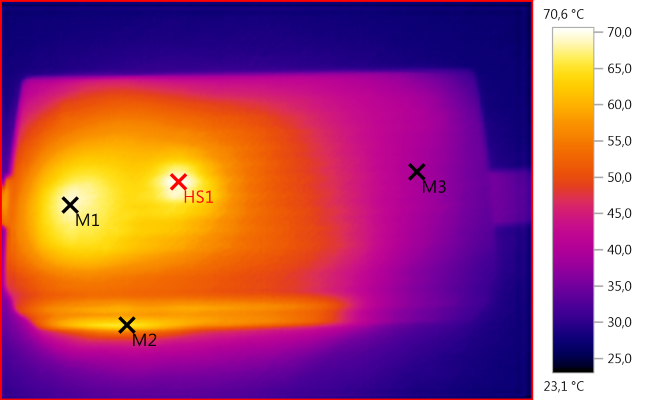
M1: 45,0°C, M2: 47,2°C, M3: 32,5°C, M4: 53,8°C, HS1: 67,2°C
When charging with 1.6A stuff gets warm.
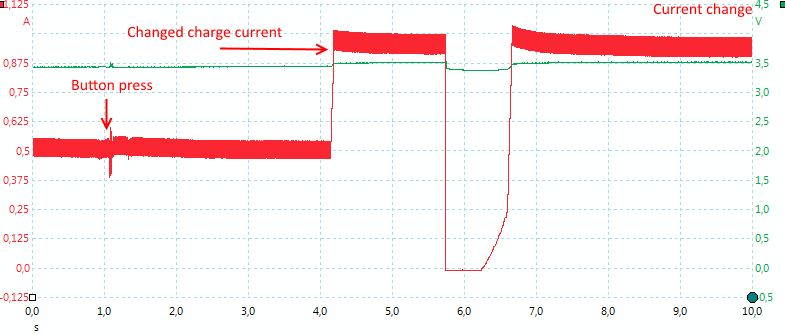
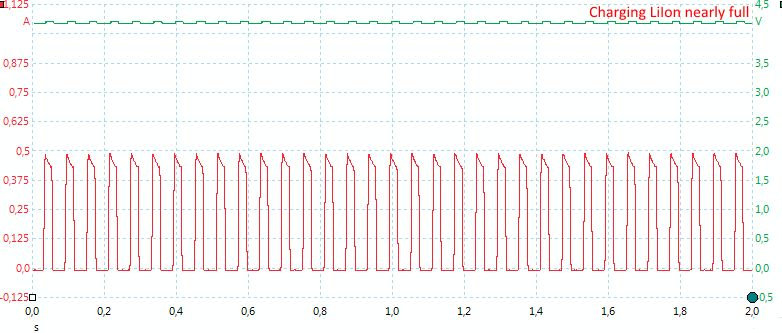
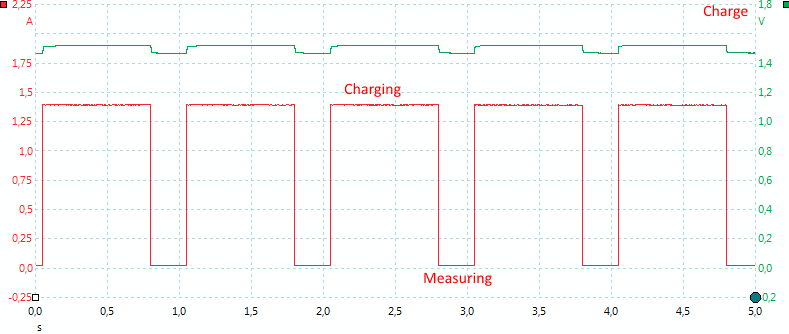
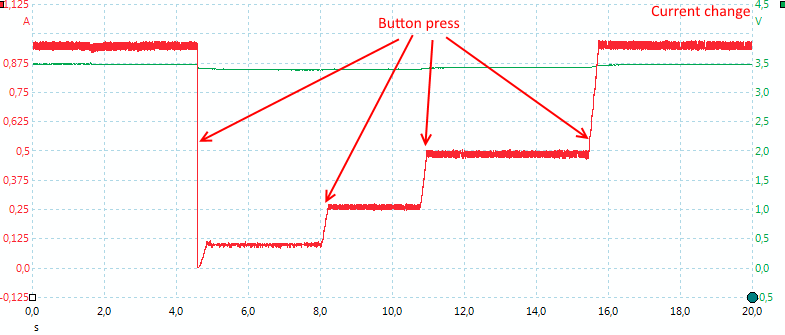
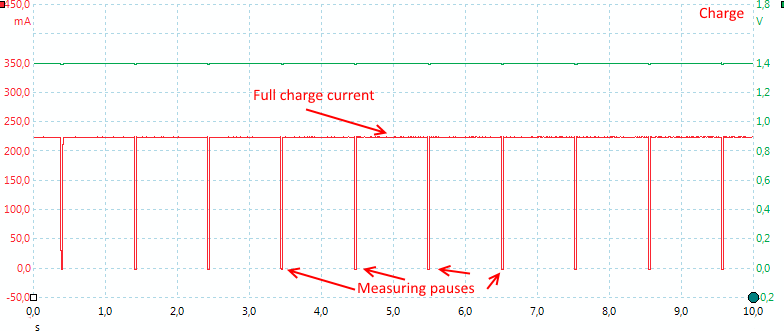
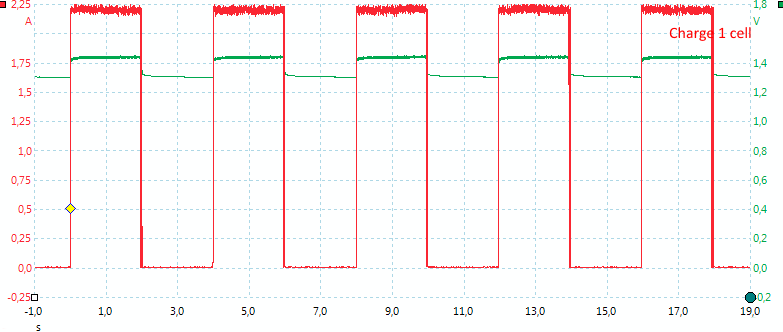
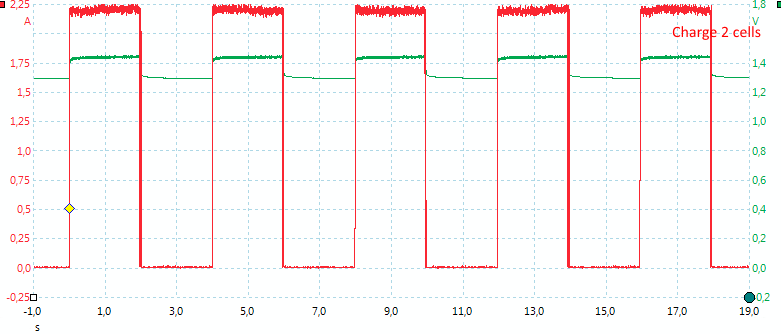
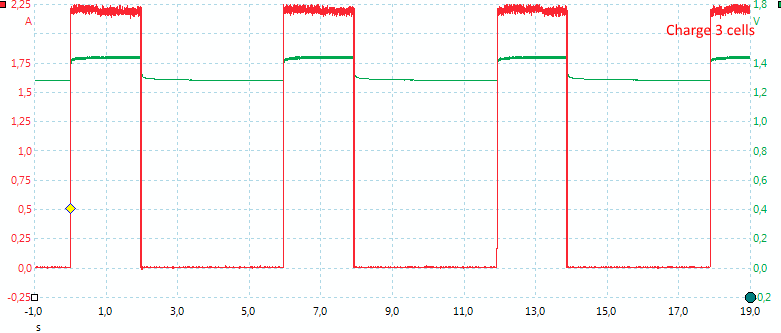
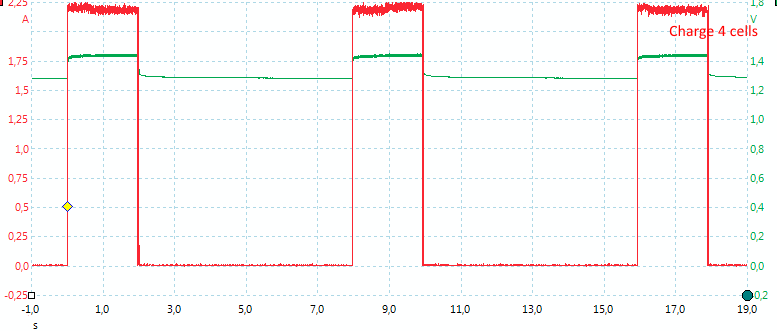
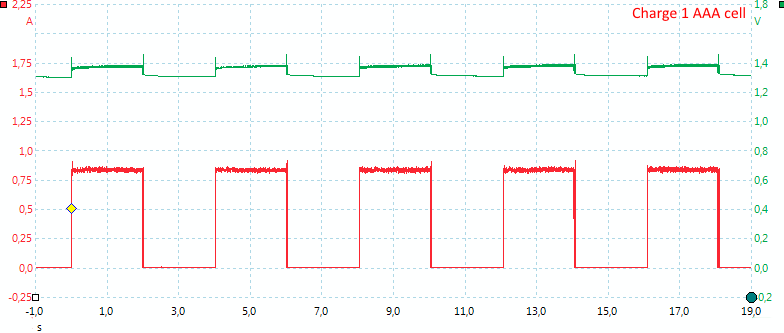
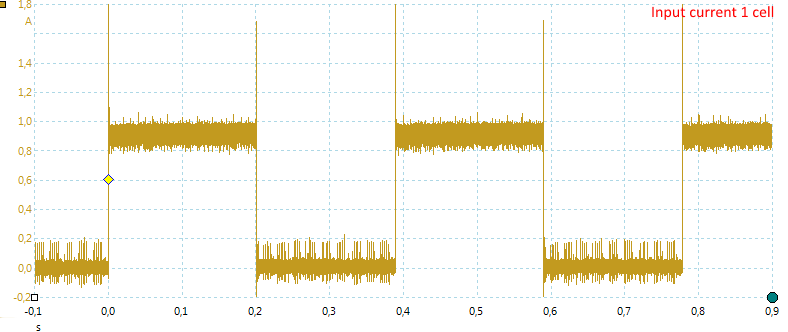
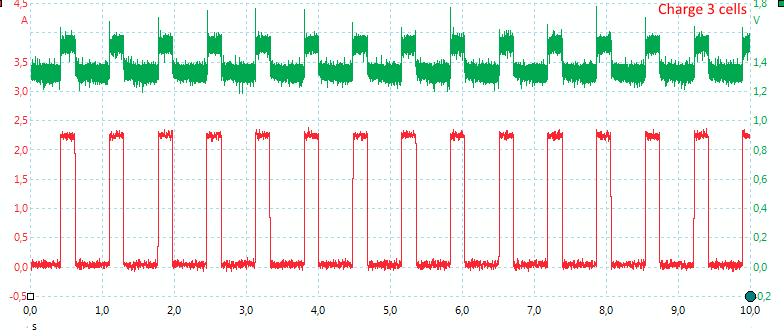
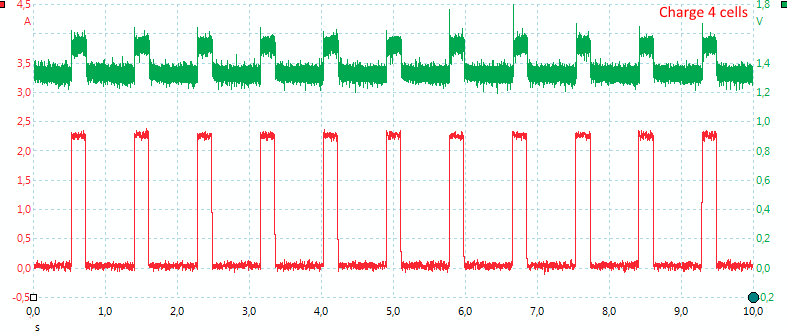
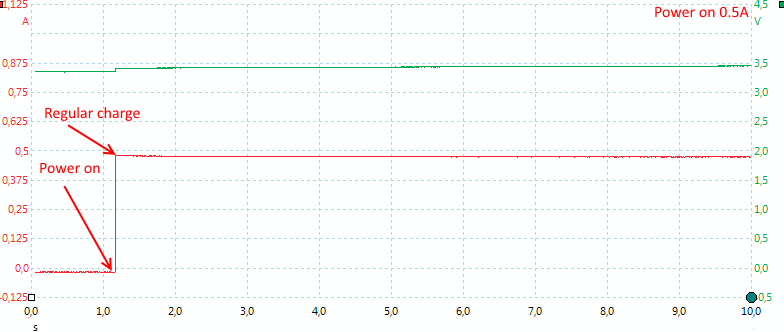
When charging with lower currents the pwm pulses are around 0.75A, this is a good improvement for charging smaller cells.
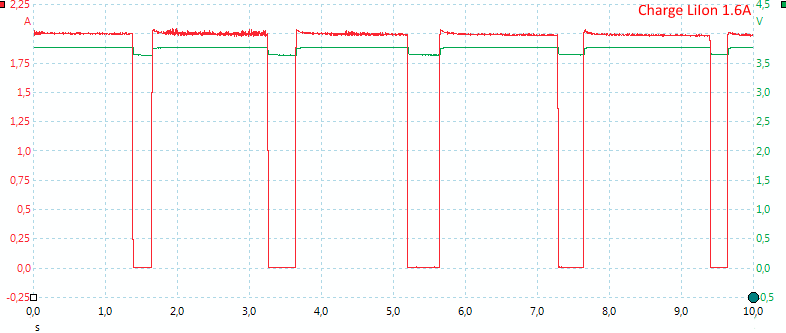
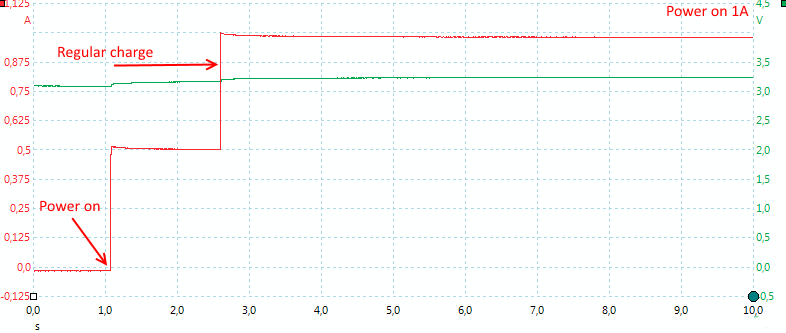
At high charger current the pwm pulses are around 2A.

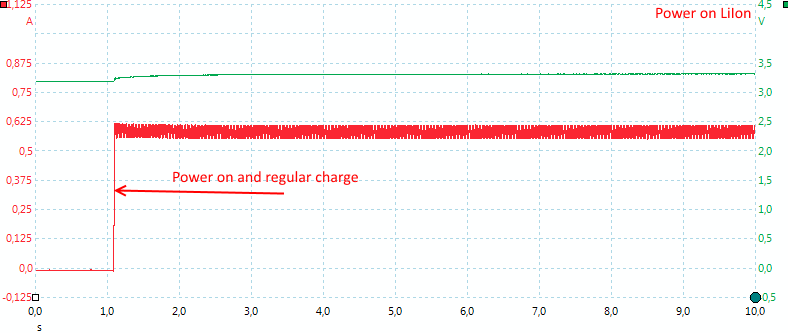
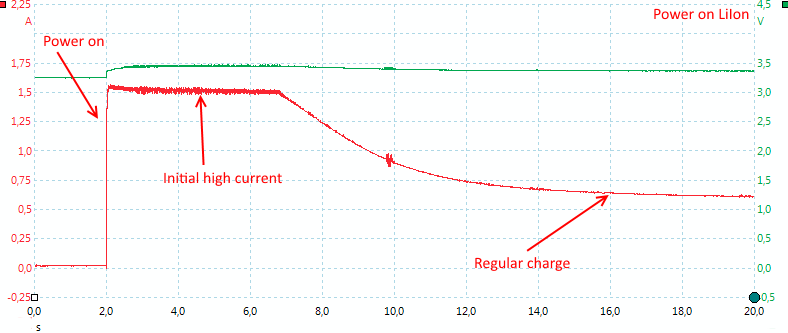
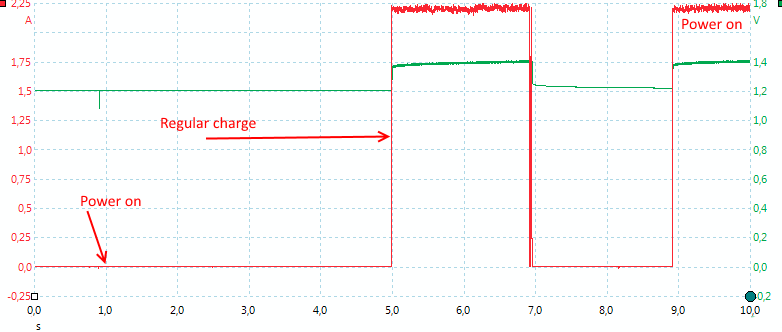
The current draw from the power supply is very close to 1A, there is no high current pulses.

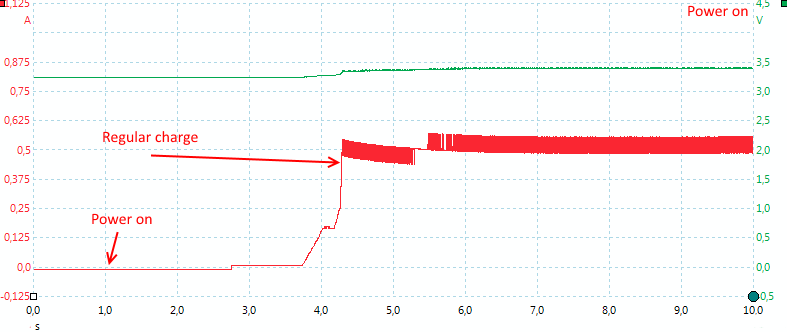
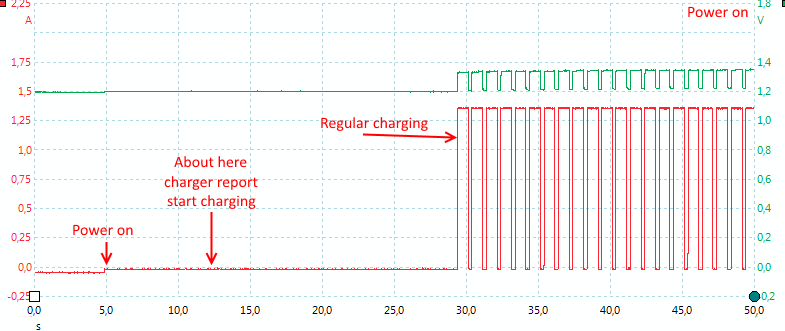
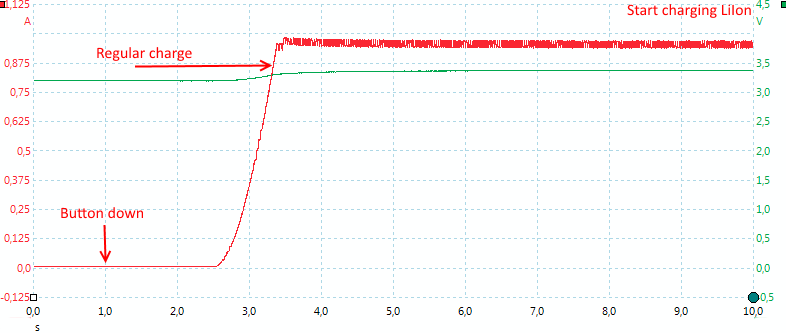
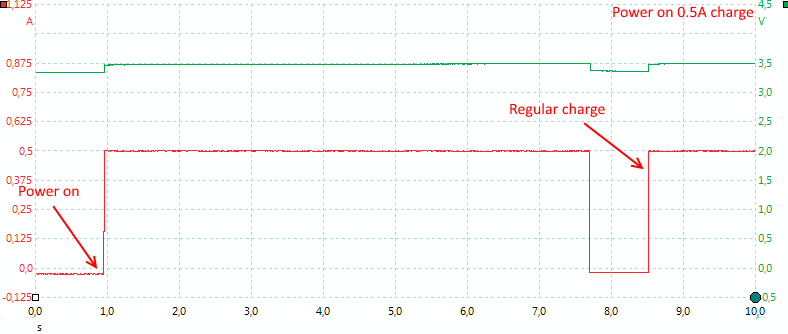
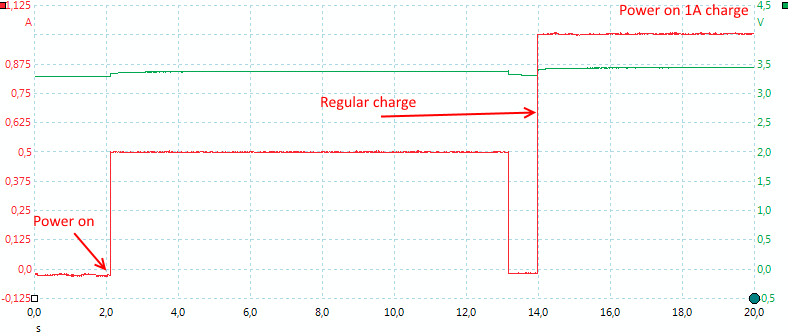
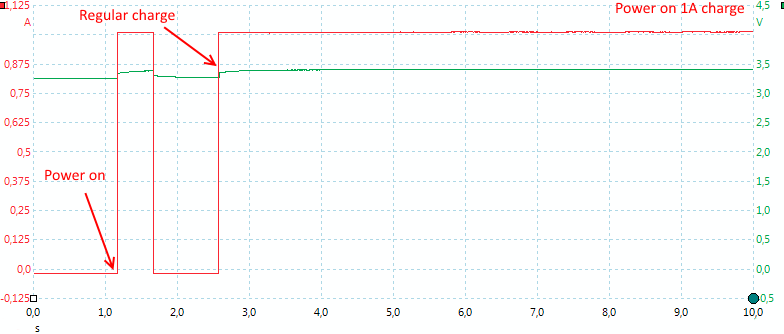
Usual I check the charger from power on, until it charges, this was not possible with this charger. Instead the chart shows from the battery is connected.
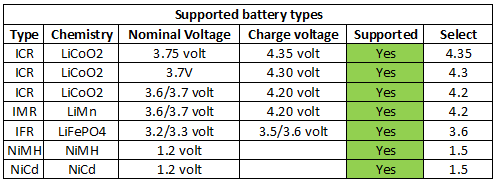
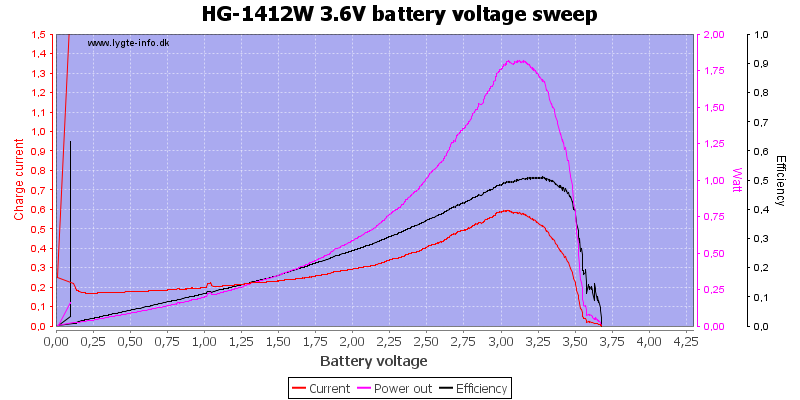
CHARGE LiIon batteries with 4.35 volt
When selecting Li-3.8 volt cells the charger will charge to 4.35 volt
.png)
The result looks more like 4.30 volt, than 4.35 volt, but that is due to the voltage error on the charger.
Display shows: 3086mAh in 3:39 hours
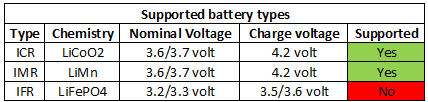
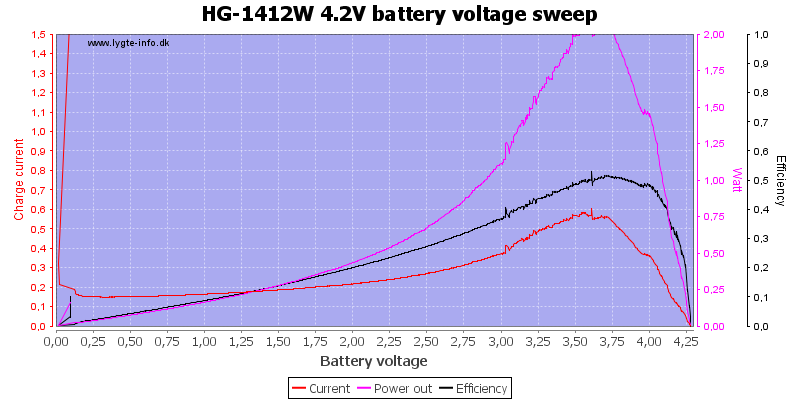
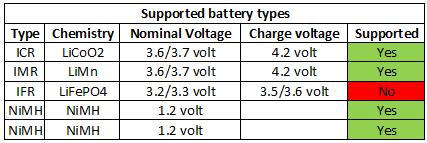
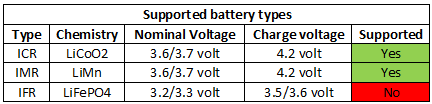
CHARGE LiIon batteries with 3.6 volt, i.e. LiFePO4
When selecting LiFeO4 cells the charger will charge to 3.6 volt, that is the charge voltage for LiFePO4 cells.
.png)
This looks exactly as expected with a 3.6 volt charger.
Display shows: 1351mAh in 1:39 hours
.png)
But with the small cell there is a small problem, due to the voltage drop after charging (This voltage drop is rather large with LiFePO4 cells) the charger will restart charging a couple of times.
Display shows: 702mAh in 1:45 hours
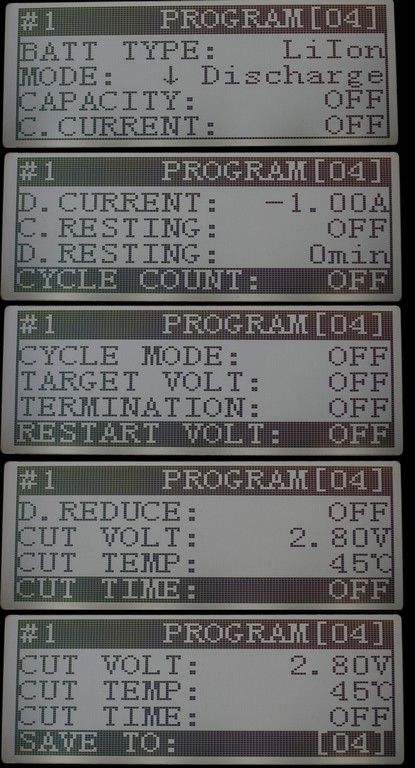
DISCHARGE LiIon batteries
The charger support 0.1, 0.2, 0.3, 0.4, 0.5, 0.6A and sometimes 0.7A in discharge current.
.png)
The charger discharges to about 3.2 volt while measuring capacity.
Display shows: 2529 in 25:27, it looks like the long discharge time affect the precision.
.png)
With LiIon the maximum discharge current is 0.7A due to heat.
Display shows: 2997 in 5:59

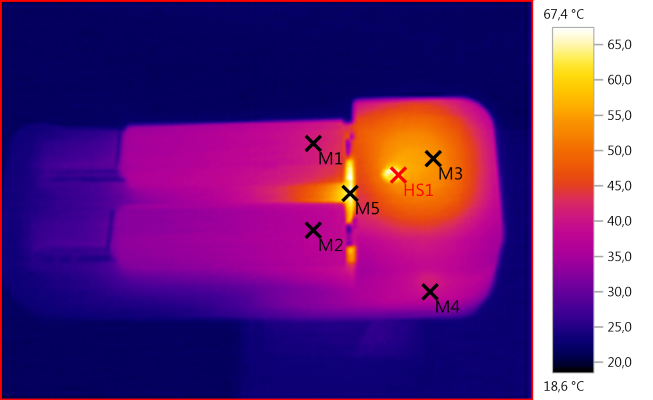
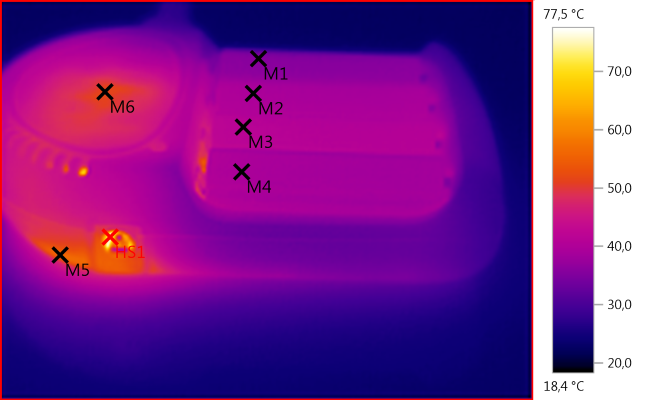
M1: 45,4°C, M2: 58,3°C, HS1: 77,2°C
Discharging at 0.7A

Discharge is done with pwm

The same current is used for all discharge currents.
DISCHARGE REFRESH LiIon batteries, cycles batteries
This function will cycle the batteries 3 times, the discharge current must be selected. Charge current will be twice that. Display will show discharged capacity. This mode is not really designed for LiIon batteries, only for NiMH and sometimes the charger will hide it in LiIon mode.
.png)
Here the 3 cycles can be seen and a careful study of the curve will show that there is a small pause between each step. Note that 1300 minutes nearly 22 hours.
Display shows: 3002mAh in 2:32 hours.
CHARGE TEST LiIon batteries, measure capacity
Test capacity of battery, this means charge, discharge and charge, the charge current must be selected. Discharge current is half the selected charge current. Display will show discharged capacity.
.png)
One cycle.
Display shows: 3082mAh in 3:58 hours
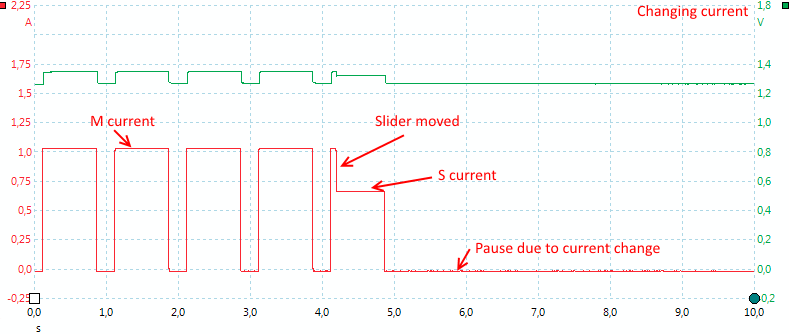
IMPEDANCE TEST LiIon batteries, i.e. measuring internal resistance
I tried with the same LiIon cell a couple of times:

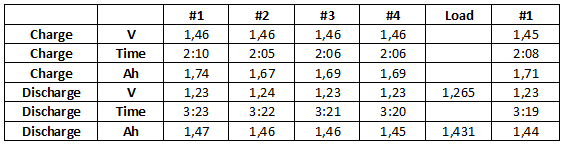
The result is average for the 5 values and is supposed to match the +XXmOhm value.
Generally the result is good.

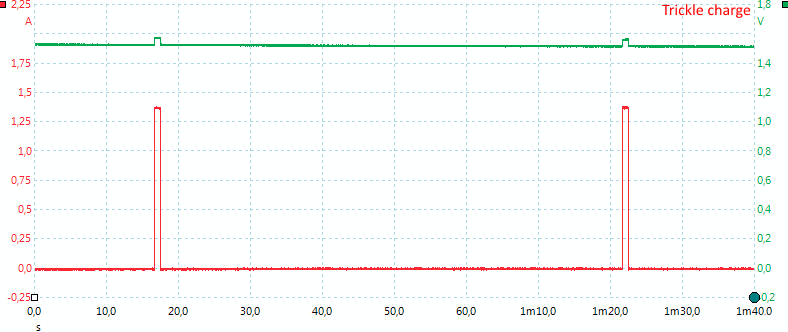
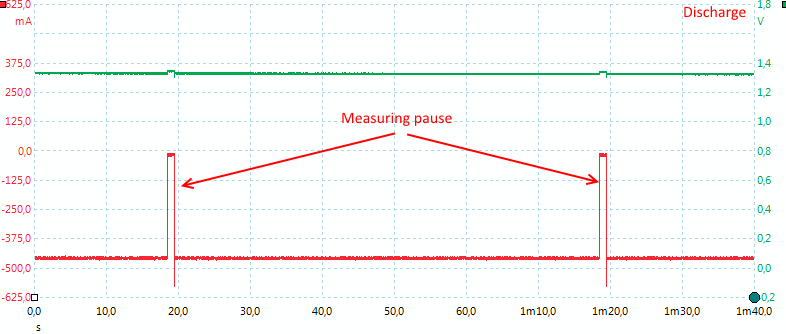
The measuring is done with a couple of short high current pulses.
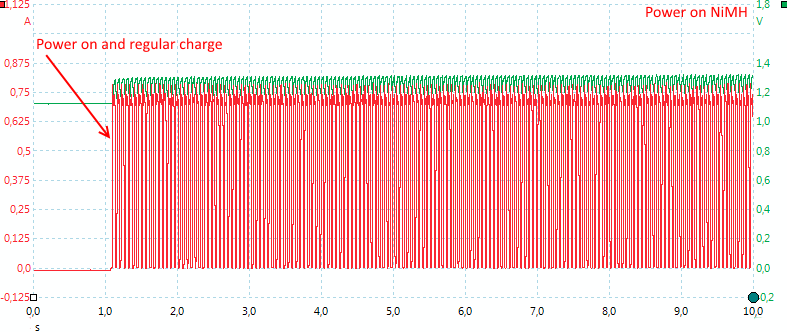
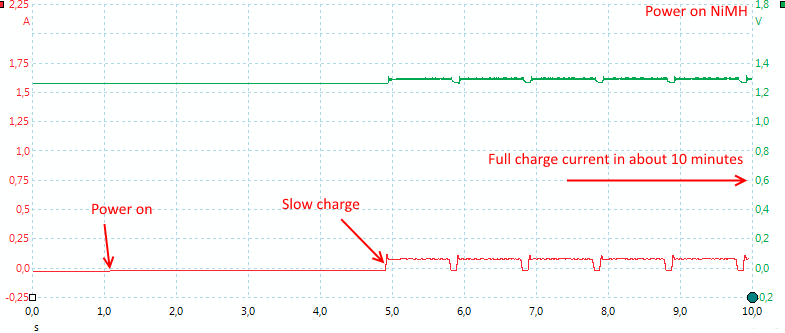
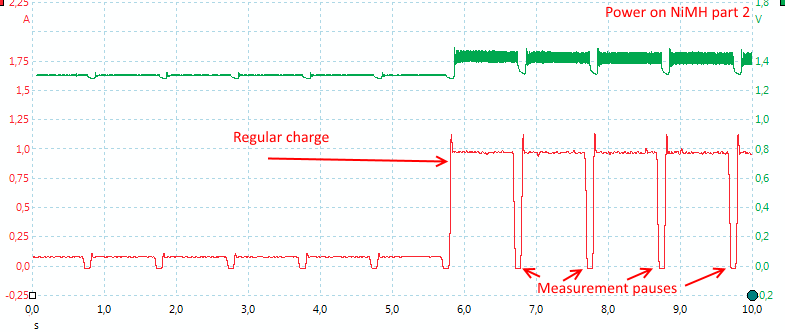
CHARGE NiMH batteries
The charger supports 0.2, 0.3, 0.5, 0.7, 1, 1.3 1.6 and 2A in charge current.
.png)
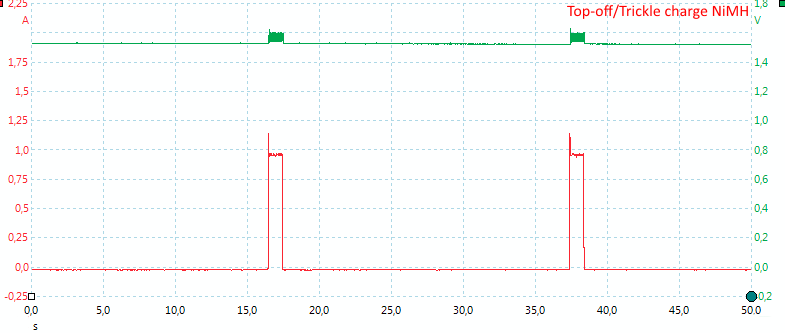
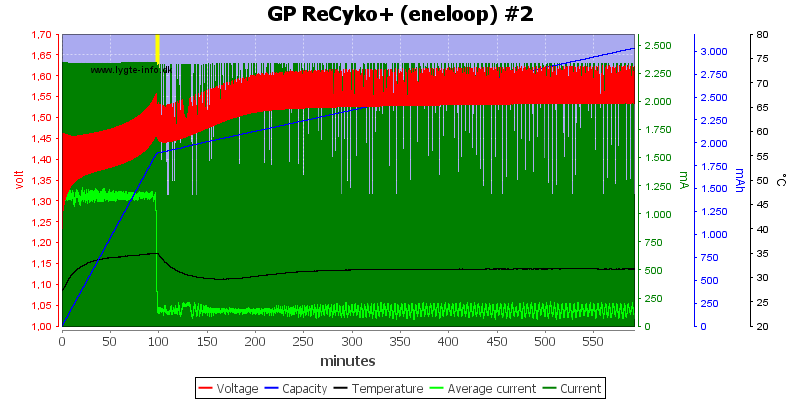
It looks like a good charging, the temperature has just starting to increase when the charging is stopped.
Display shows: 2090mAh in 10:29 hours
.png)
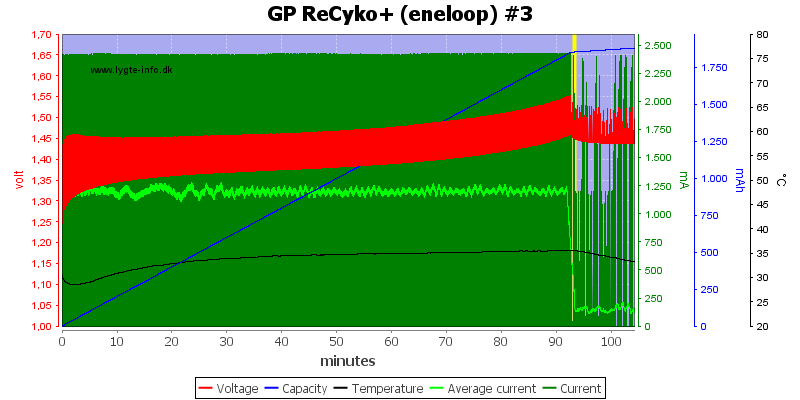
Good charge curve and termination.
Display shows: 2263mAh in 2:16 hours
.png)
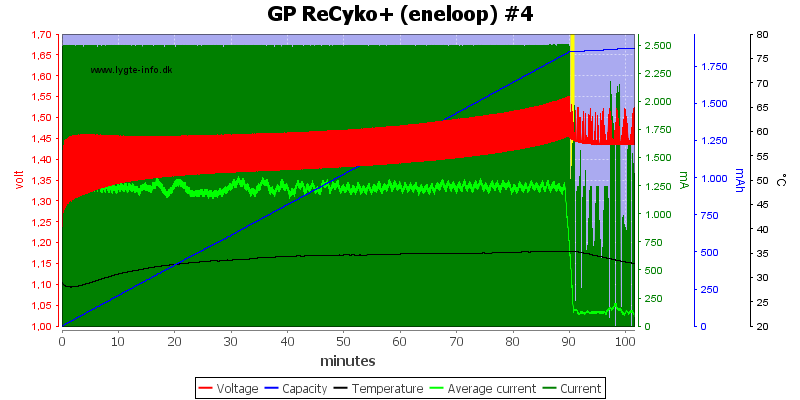
This charge curve looks fine, it is terminated shortly after the temperature starts to raise.
Display shows: 3945mAh in 2:57 hours
.png)
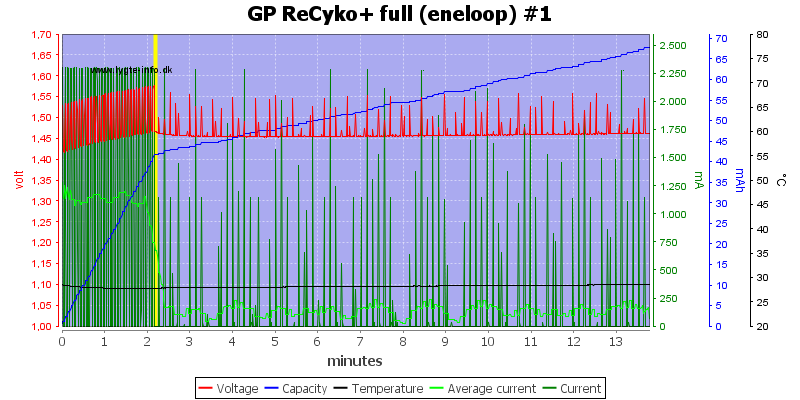
The charger is terminated slightly premature.
Display shows: 2412mAh in 2:25 hours
.png)
Again a slightly premature terminations.
Display shows: 2629mAh in 2:38 hours
.png)
The temperature has started to raise, showing a full cell.
Display shows: 822mAh in 1:38 hours
.png)
This looks like a classic -dv/dt termination, but as can be seen on the other curves the charger is not depend on that. The charger do not maintain 2A charging current for the full charge, but reduces the current to 1.5A after some time.
Display shows: 2322mAh in 1:23 hours
.png)
I asked for a 2A charge, but the charger decided on 1.6A and reduced it further after some time. The termination is fine.

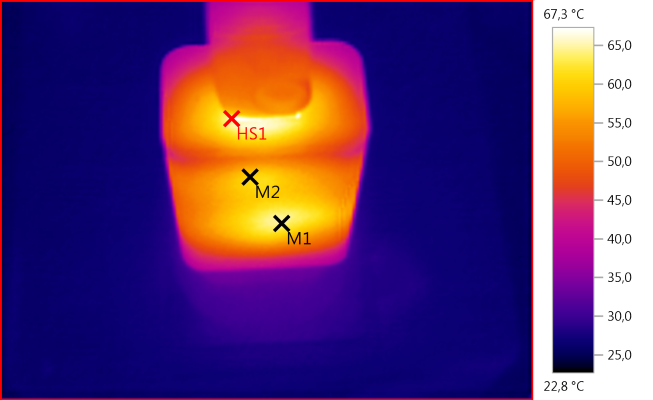
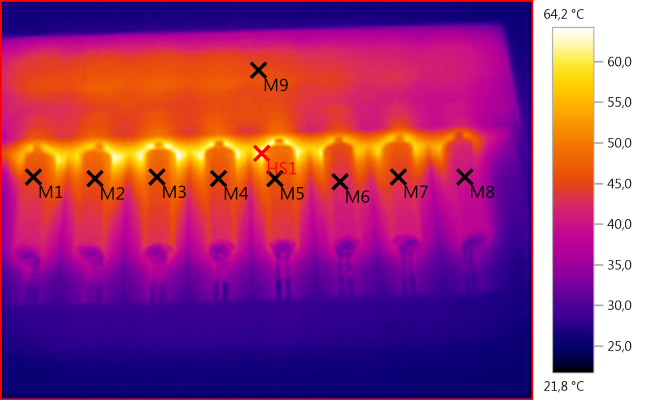
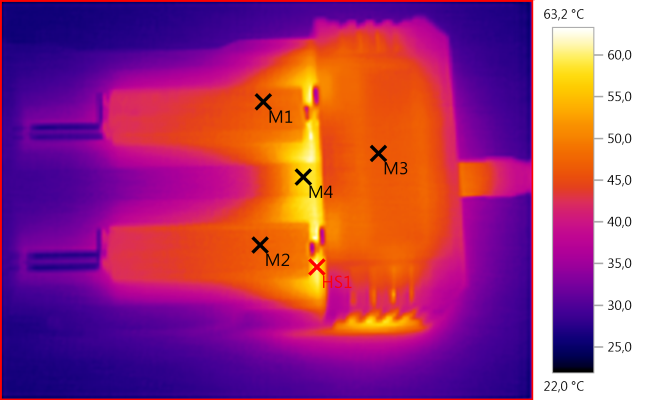
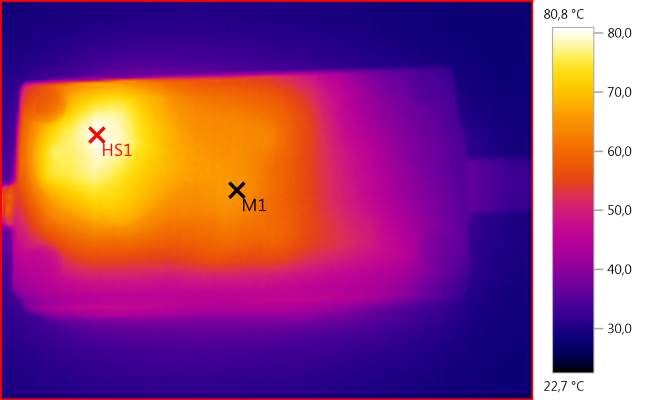
M1: 48,1°C, M2: 56,1°C, M3: 33,4°C, M4: 74,0°C, HS1: 88,0°C
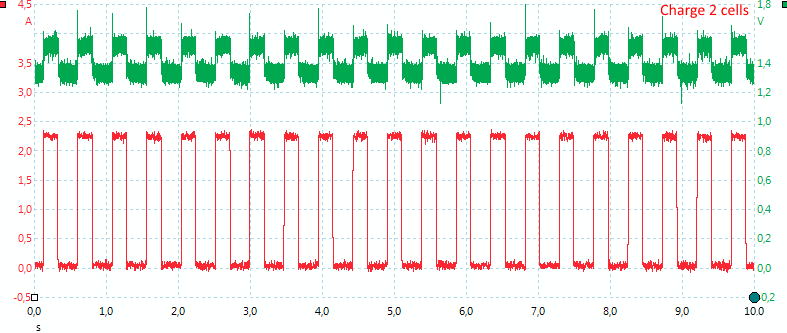
Charging with 2A.

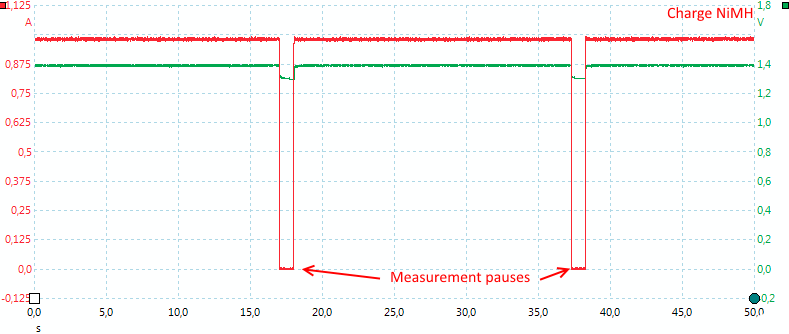
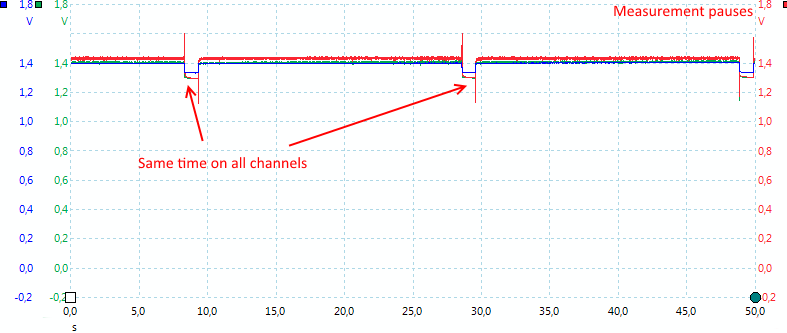
The charger uses pwm and can also select between different charge currents.

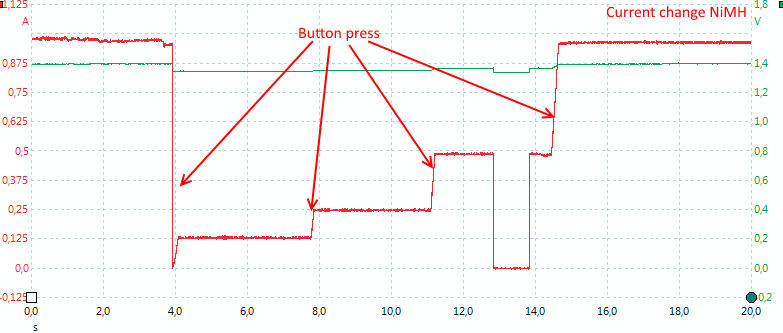
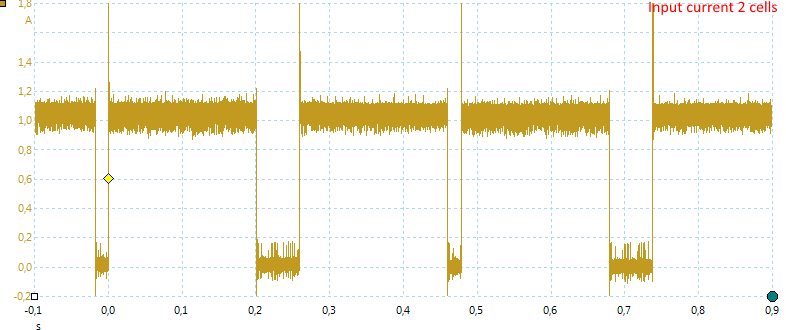
Here the current was stepped up.

And for a 2A charge it is much higher.

Usual I check the charger from power on, until it charges, this was not possible with this charger*. Instead the chart shows from the battery is connected.
*At least with LiIon, I could probably have done it with NiMH.
DISCHARGE NiMH batteries
The charger supports 0.1, 0.2, 0.3, 0.4, 0.5, 0.6, 0.7 and 1A in discharge current.
.png)
Discharge is terminated at about 1 volt.
Display shows: 1943mAh in 19:32 hours
.png)
Display shows: 2025mAh in 2:02 hours

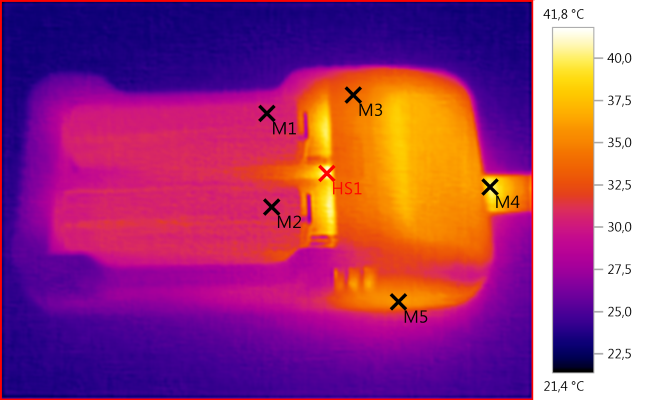
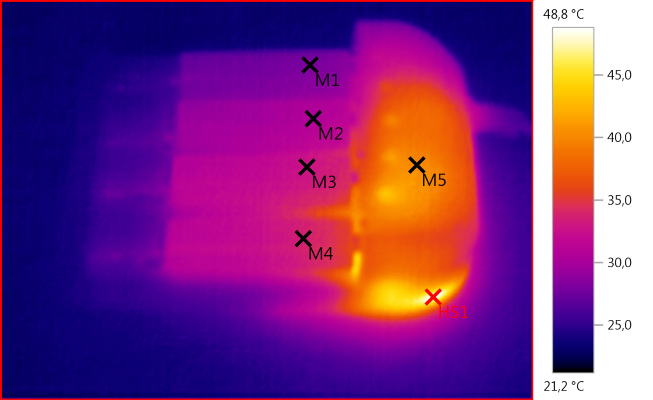
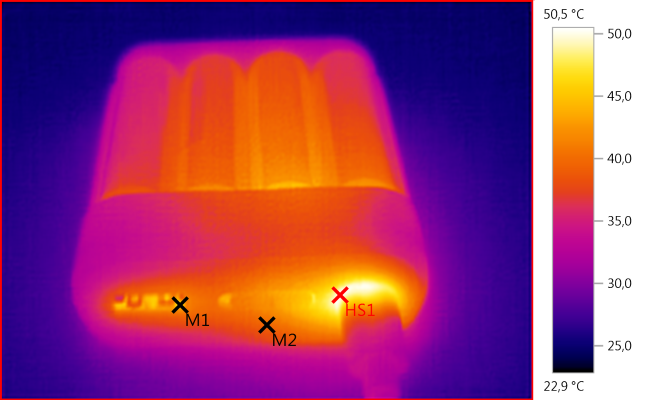
M1: 35,3°C, M2: 35,6°C, M3: 39,4°C, HS1: 47,2°C
The power when discharging NiMH is much lower than LiIon, this means the charger will be cooler.
Discharging at 1A.

Discharge is controlled with pwm pulses, they are a bit above 1A (Depends on battery voltage).

Maximum discharge current with a nearly full battery.
DISCHARGE REFRESH NiMH LiIon batteries, cycles batteries
This function will cycle the batteries 3 times, the discharge current must be selected. Charge current will be twice that. Display will show discharged capacity.
.png)
Display shows: 2042mAh in 1:23 hours
CHARGE TEST NiMH batteries, used to measure capacity
Test capacity of battery, this means charge, discharge and charge, the charge current must be selected. Discharge current is half the selected charge current. Display will show discharged capacity.
.png)
Display shows: 2039mAh in 2:14 hours
IMPEDANCE TEST NiMH batteries, i.e. measuring internal resistance

The results with the loose battery looks fine, but with my box something goes wrong.

With NiMH the test current is only 1A, not the 3A from LiIon.
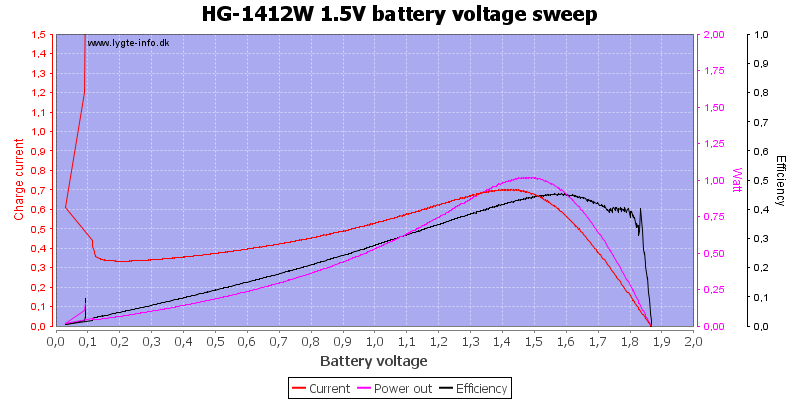
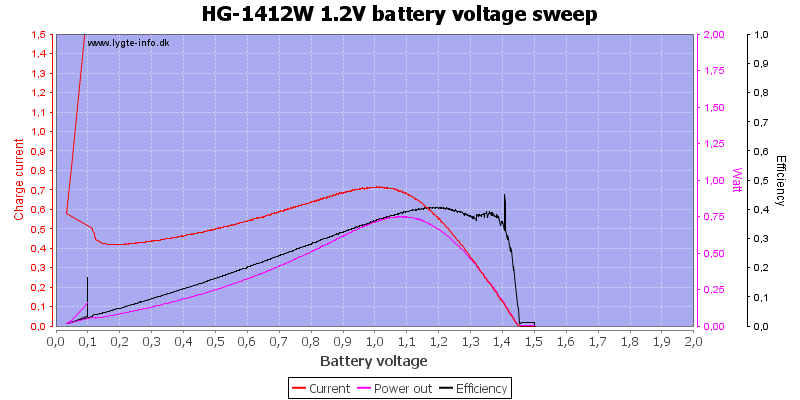
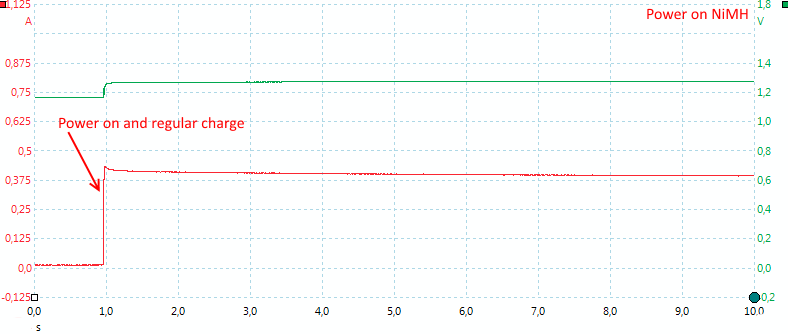
USB output (power bank) function
- When usb output is enabled the battery is discharged with 15mA
- Usb output uses automatic coding with Apple 2.4A as maximum.
- Usb output can be used as ups
- Usb output must be manually turned on when battery it put into charger.
- When under voltage or over load trips the battery must be removed to reset the circuit.
- Voltage, current, etc. on charger part of display is not correct

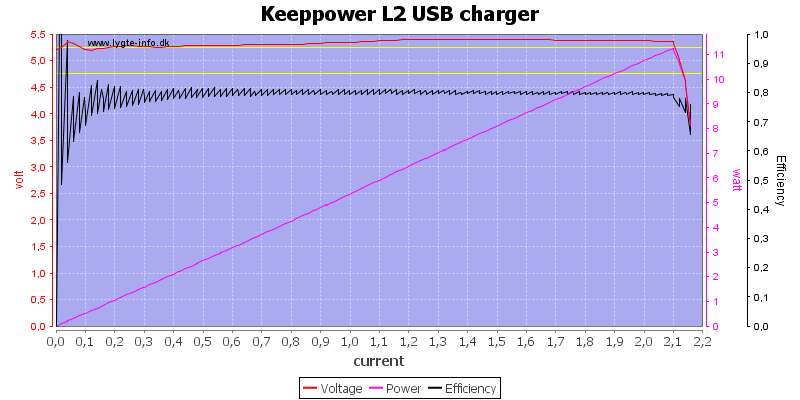
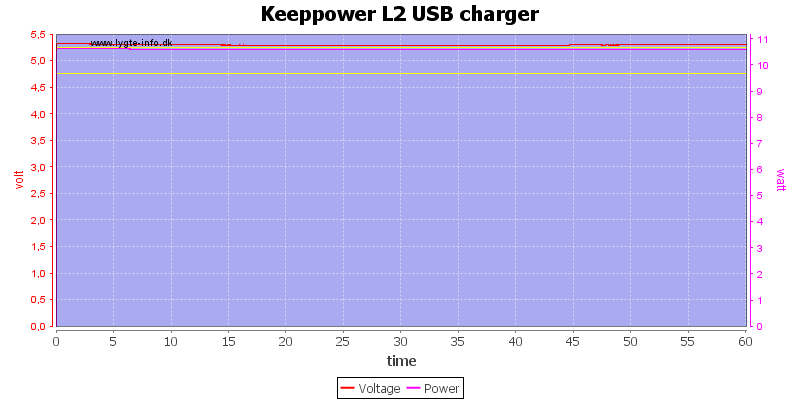
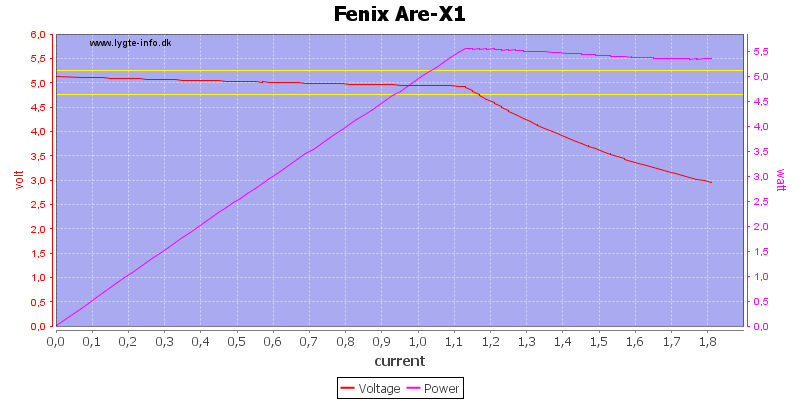
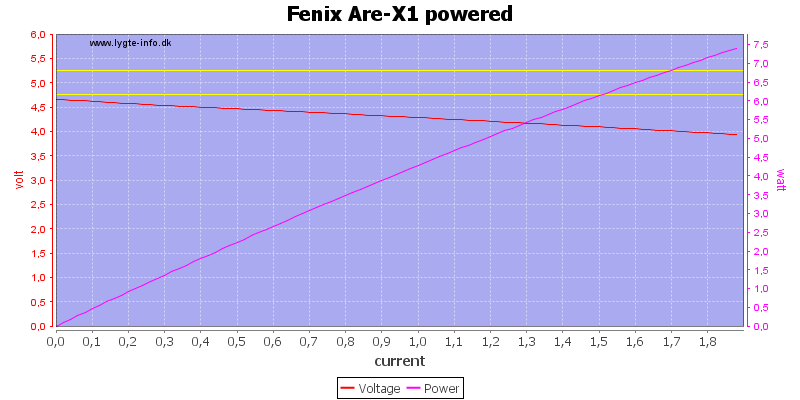
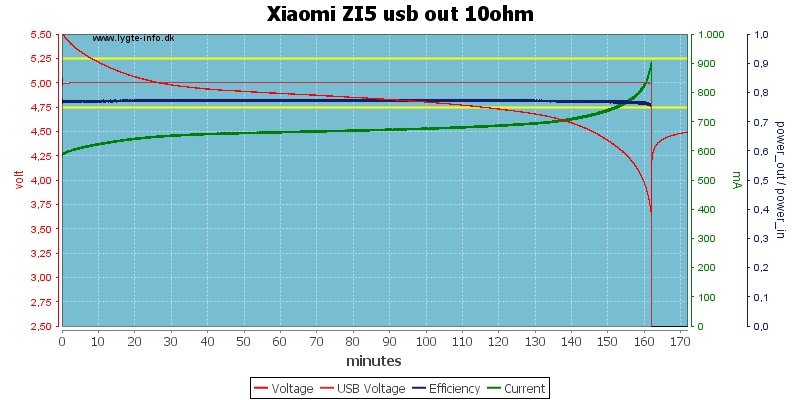
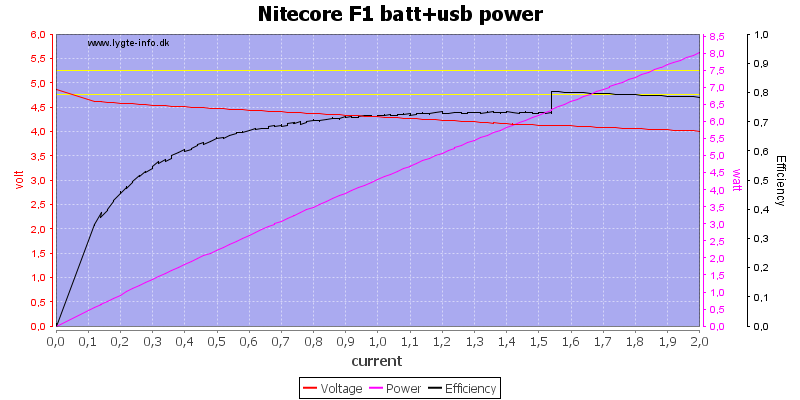
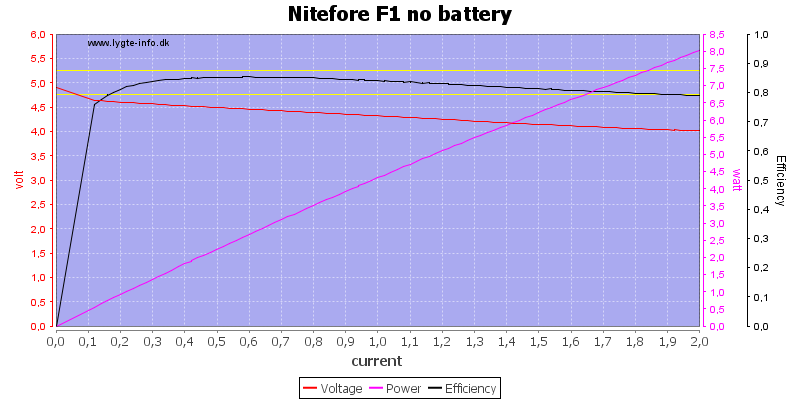
As a power bank it can deliver 2A, the over current protection is at 3A.

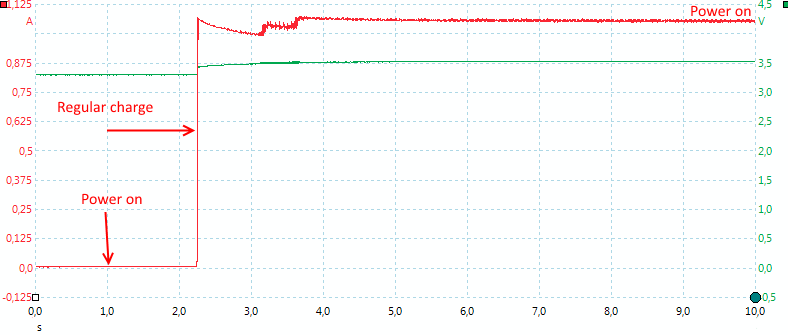
It will also work when the charger is powered, i.e. it can be used as a ups, but if the battery is over discharged or the output overloaded the power must be manually turned on again.
.png)
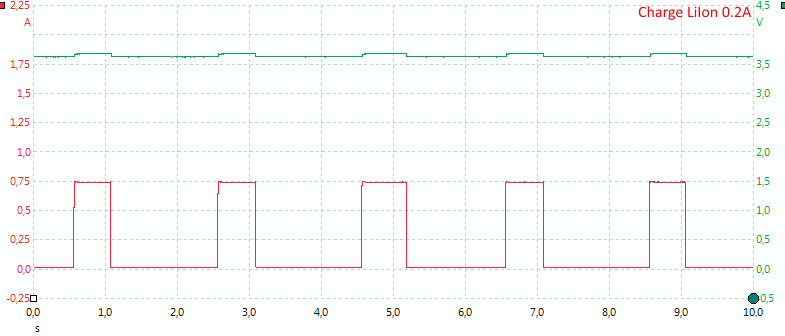
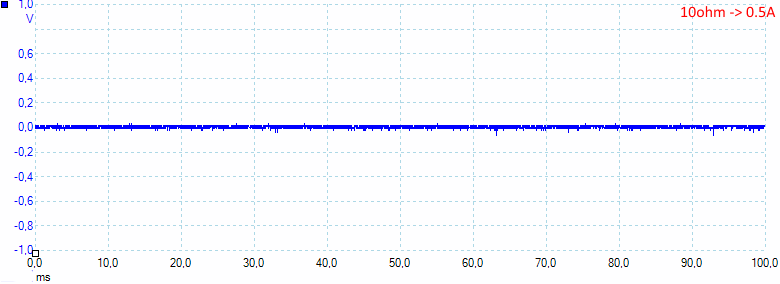
Output looks fine with a 0.5A load.
Display shows: 1.6Ah, this matches the above chart.
.png)
1A load also looks fine.
Display shows: 1.5Ah, this nearly matches the above chart (I get 1.4Ah).
.png)
With 2A output current the charger has problems when the battery is running low.
Display shows: 1.2Ah, I got 0.7Ah that looked fine and a total slight below 1.2Ah

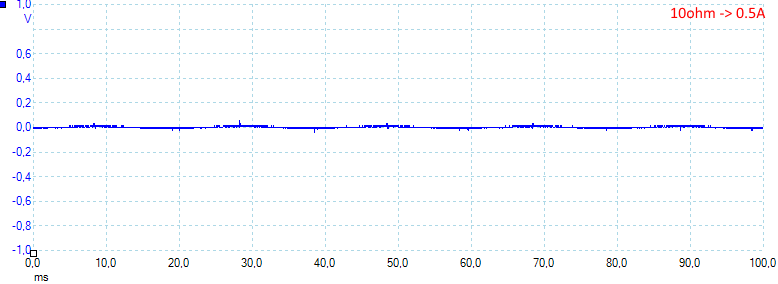
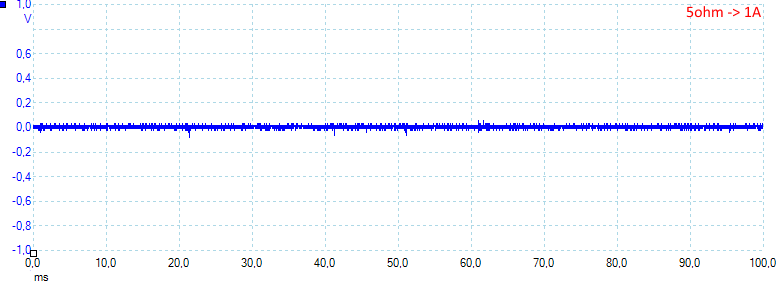
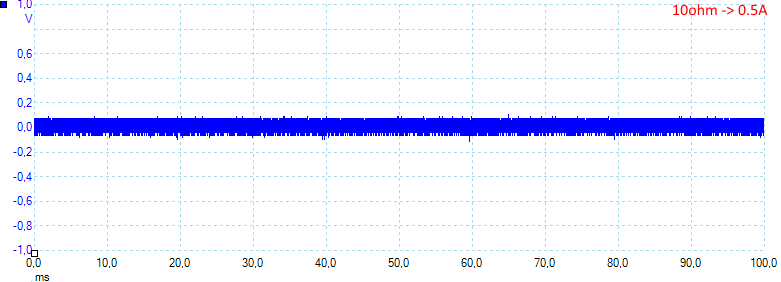
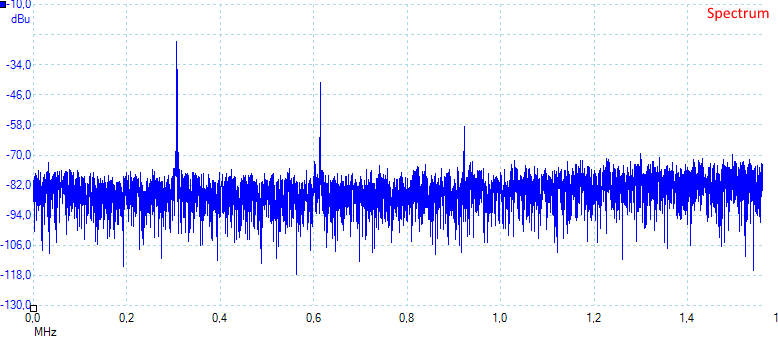
Noise is 4mV rms and 32mVpp, this is very good.

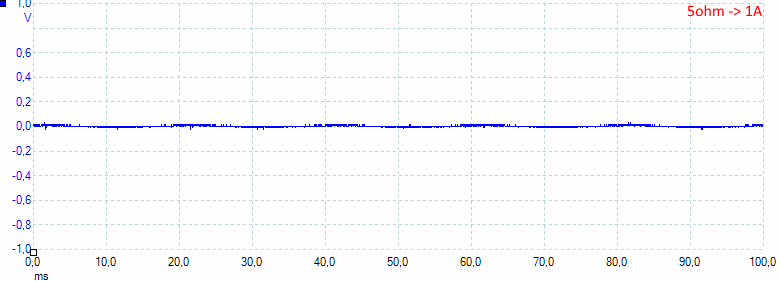
Noise is 6mV rms and 57mVpp, this is very good.

As long as the battery has high enough voltage the noise is 11mV rms and 68mVpp, this is very good.
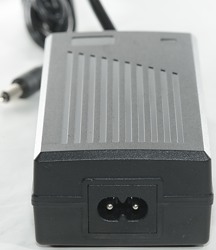
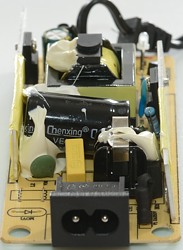
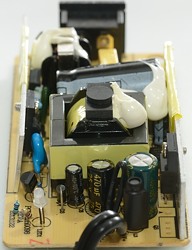
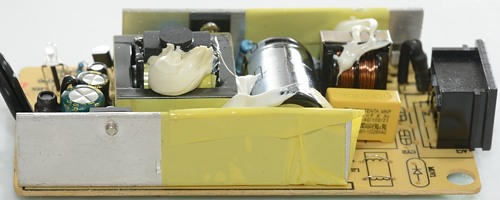
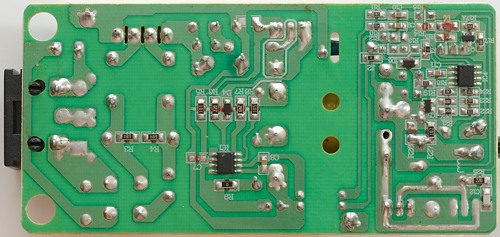
Testing the power supply with 2500 volt and 5000 volt between mains and low volt side on power supply, did not show any safety problems.
Conclusion
This charger is the most advanced single cell charger I have seen to date, it can do everything the larger Opus (C3100/C3400) can and then some.
The high charge current pulses has been mostly addressed in this charger, it do still use pwm, but not always at full current (good).
Being an early version of the charger, it do have some issues, hopefully most of them can be fixed in the software before it is released, but as can be seen above the charger works even with the issues. The micro usb input connector requires some changes to the design and may not be fixed for the initial release, but as long as the charger can be used on 12V it is not a major problem.
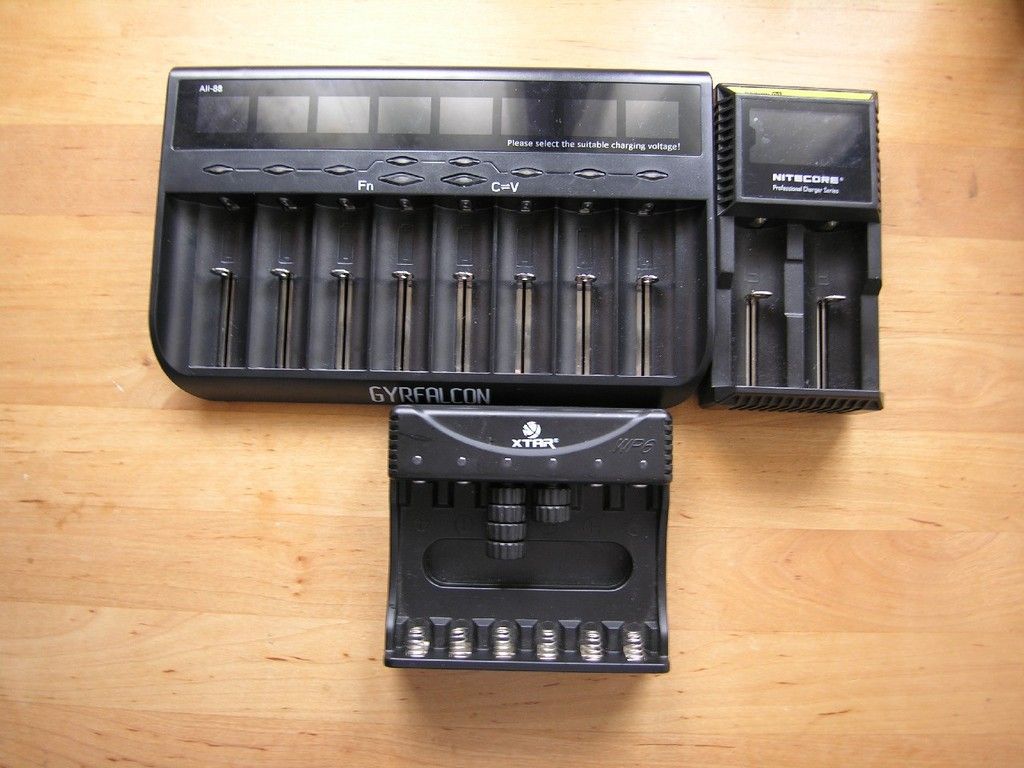
I see this charger as a very useful tool for people with a few LiIon/NiMH cells or as supplement to a less capable charger.
Notes
When measuring charge current with an oscilloscope I has a 0.1 ohm resistor in series with the battery, this means that the measured currents is lower than reality.
The charger was supplied by Gearbest for review.
Here is an explanation on how I did the above charge curves: How do I test a charger
My website with reviews of many chargers and batteries: http://lygte-info.dk/


%20%231.png)
%20%232.png)
%20%231.png)
%20%231.png)
%20%231.png)
%20%231.png)
%20%231.png)
a.png)
.png)
.png)
%20%231.png)
%20%232.png)
%20%231.png)
%20%231.png)
%20%231.png)
%20%231.png)
%20%231.png)
.png)
%20%231.png)
%20%232.png)
%20%231.png)
%20%231.png)
%20%231.png)
%20%231.png)
.png)


.png)
.png)
.png)
.png)
.png)
.png)
.png)
.png)


.png)
.png)
.png)
.png)
.png)
.png)
.png)
.png)
.png)

%20%231.png)
%20%232.png)
%20%233.png)
%20%234.png)
%20%231.png)
%20%231.png)
%20%231.png)
%20%231.png)
%20%231.png)
%20%231.png)
%20%231.png)
.png)
.png)
%20%231.png)
%20%231.png)
.png)

%20%231.png)
%20%231.png)


%20%231.png)
%20%232.png)
%20%233.png)
%20%234.png)
%20%235.png)
%20%236.png)
%20%237.png)
%20%238.png)
%20%231.png)
%20%231.png)
%20%231.png)
%20%231.png)
%20%231.png)
%20%231.png)
%20%231.png)
.png)
.png)
%20%231.png)
%20%231.png)
%20%231.png)
%20%231.png)
%20%231.png)
%20%232.png)
%20%233.png)
%20%234.png)
%20%235.png)
%20%236.png)
%20%237.png)
%20%238.png)
%20%231.png)
%20%231.png)
%20%231.png)
%20%231.png)
%20%231.png)
%20%231.png)
.png)
.png)


%20%231.png)
%20%232.png)
%20%233.png)
%20%234.png)
%20%231.png)
.png)
%20%231.png)
%20%231.png)
%20%232.png)
%20%233.png)
%20%234.png)
%20%231.png)
%20%231.png)
.png)


%20%231.png)
%20%232.png)
%20%231.png)
%20%231.png)
%20%231.png)
%20%231.png)
.png)


%20%231.png)
%20%232.png)
%20%231.png)
%20%231.png)
%20%231.png)
%20%231.png)
%20%231.png)
.png)
.png)
%20%231.png)
%20%232.png)
%20%231.png)
%20%231.png)
%20%231.png)
%20%231.png)
%20%231.png)
%20%231.png)
.png)
.png)

.png)
.png)


.png)
.png)
.png)
.png)
.png)
.png)


%20%231.png)
%20%231.png)
%20%231.png)
%20%231.png)
.png)
.png)


%20%231.png)
%20%232.png)
%20%233.png)
%20%234.png)
%20%231.png)
%20%231.png)
%20%231.png)
%20%231.png)
%20%231.png)
.png)
a.png)


.png)
.png)
.png)
.png)
.png)
.png)
.png)


.png)
%20Efficiency.png)


.png)
.png)
.png)
.png)
.png)
.png)
.png)

.png)
.png)