Quantcast
Channel: BudgetLightForum.com - Charger Reviews
Viewing all 322 articles
Browse latest View live

Folomov A4 Quick Charger

$
0
0

I received this charger free for review, but after using it I would spend $40 to buy another if needed. I found that once I bought a BLF Q8 that the 2-cell charger was no longer keeping up with my charging needs.
I have recharged a bunch of cells this week. It took all sizes that I own, and charged them quickly and safely. The Protected Keeppower 18650 – 3200mAh cell is long for some chargers, but fit fine. It states that it fits the 21700 cells, but I do not have any so I could not confirm this. It fits the fat 26650 cells in all four bays.

If I filled all 4 slots then plugged it in, I had to be quick to choose the rate of charge. I found I was not always fast enough and the fourth slot defaulted to the lowest setting. Double clicking the button put it back into select mode, then I could choose the rate.
The way I found I prefer to use this charger was to plug it in then add one cell at a time, starting with the outside slots. That way I could leisurely choose the fastest rate for each.
The picture shows 3 Samsung 30 Q button tops with the outside ones charging at 3 amps and another at 2 amps for a total of 8 amps. If you use all 4 slots then the most you can do is 2 amps each slot.

The two outside slots show 3000mAh which is three times faster than my Xtar VP2.

You can see that in this picture that I am charging two 26650 batteries at 2000mAh and two 18650 at 100 mAh. I could have done all 4 at 2000mAh.

What I like is that you can mix it up and do each slot a different cell type and a different rate.
Here I have one NiMH eneloop and a mix of protected and unprotected cells charging at different speeds.

What made me want this was the charging fast speed you are never going to get from a USB charger. I found that I just really like the simple controls: It always seems to know what type of cell I am using, but I can override it if I wanted to. There is one button over each slot and I can choose the speed I want, changing it mid-charge if needed.

In writing this review I read the others and I wanted to link to what I consider the definative review and the last word in testing. HKJ review of this charger:
http://budgetlightforum.com/node/56695

Convoy S 2+ Sofirn SP31 ThorFire VG-10S BLF Q8
Convoy C8 Manker E02H


Review - Folomov A1 Compact Magnetic charger

$
0
0


Flashlight Charger Review

Folomov A1 Mini Magnetic Charger Review

A short review of the mini Folomov A1 charger/Power bank. There are a lots of single cell chargers around that also provide a powerbank feature but this one has a unique design and is does a good job!.

Firstly lets look at what you get. The product comes in small packaging or blister pack which describes some key features on the front side. The instructions are covered on the back of the packaging on a card that can be removed from the plastic cover.

Inside the packing is the charger and nothing else. It's a single unit that comprises of the main tiny body with cables for each terminal (+ and -) along with the two way USB connector.

The terminal leads are labeled in clear manner and contain a strong magnet, that appears to be a rare earth magnet/Neodymium. These easily and securely attach to battery terminals and wont slip off unless some force is applied.

The quality of the build is very good. The leads to the terminals are flexible but not so thin that they would be easily damaged.

The main body section is labeled clearly with the print that this charger can only be used for Li Ion batteries.

The charger is small in size and weight. Overall length is almost 21 cm, and it weighs only 21 Grams. This makes it a very compact charger or unit to use with a battery as a powerbank.

Below we see some examples of where the A1 is being used as a power bank. The left image is using a Folomov Protected 26650 battery and on the right a LG HE4 18650. The current measurements show up as one being 0.91A and the other 1.02A. As a power bank the charge rate appears to be around 1A depending on the cell. In both cases below the batteries were fully charged. In power bank mode the led on the A1 main unit remains lit up as blue.

Two examples below where the A1 is used as a battery charger. Whilst charging the LED on the A1 body flashes Green. Once the battery is fully charged the flashing ends and it remains permanently green.

The rated charge current is 1A. The current measured from the USB charger exceed 1A as per the images below. The charge current at the battery terminals was not measured however I'd expect that it's likely to be around 1A.

At the end of the charging the voltage of the LG HE4 was measured as 4.16V and the Folomov 26650 as 4.17V. Not quite 4.2V which would be ideal but close.


Sellers/Manufacturers Specs and Product Description

Specs shown below. The A1 can only be used with Lithium Ion batteries. As its design uses flexible leads there's no issue with battery length.

Summary

The Folomov A1 is a simply useful compact charger. It's small size and weight makes it a very compact device that can be used at times where batteries need to be charged or there is a need to use the power bank feature to charge phones when they are running low on charge.

Overall a very good compact charger.

Pros:

> Build Quality

> Power bank feature

> Very compact and light.

Cons:

> Doesn't fully charge batteries to 4.20V


Thanks to Folomov for providing this flashlight for review. No compensation received for this review other than the item for the review.

Key sites to see more about the Folomov Tour 5BM Flashlight

Folomov Home Site

Product at Amazon.com

Product at Amazon.uk

Facebook Link


Test/review of Charger Basen BO-1

$
0
0

Charger Basen BO-1

DSC_8527

DSC_8528DSC_8529

This is a fairly simple single cell LiIon charger from Basen.

DSC_8484DSC_8485DSC_8486DSC_8487

It arrived in a cardboard box with a lot of specification on it.

DSC_8524

The box contained the charger, a usb cable and a instruction sheet.

DSC_8531

The charger is usb powered with a micro usb input.

DSC_8530

There is only one button and a couple of leds. The button will change selected current, default is 0.5A.

DSC_8713

During power on all the leds will shortly turn on. During charge the blue leds are animated and only one green led is on.

DSC_8532

The specifications are on the bottom of the charger, but rather hard to read.

DSC_8533DSC_8534

The charger uses the classic slider construction and will handle batteries from 28mm to 70.7mm, this will give problem with the longest protected cells.

supportedBatteryTypes
supportedBatterySizes

DSC_8692DSC_8693DSC_8694DSC_8695DSC_8696DSC_8697DSC_8698

The charger can handle up to 70mm long batteries,


Measurements


  • Power consumption from usb when idle with no batteries is 18mA
  • Below 0.3V the charger will not detect a battery
  • Between 0.3 and 3V the charger will charge with low current
  • Above 3V the charger will use full current.
  • Will restart charging if voltage drops.
  • Will restart charging if battery is inserted or power cycled.


Basen%20BO-1%201A%20%28SA18650-33%29

A nice CC/CV charge curve with termination current of about 35mA. The charge voltage is at the top of the allowable range.

Basen%20BO-1%201A%20%28SA18650-26%29
Basen%20BO-1%201A%20%28PA18650-31%29

The two other batteries also look nice.

Basen%20BO-1%201A%20%28BE18650-26%29

There is no problem with this old cell.

Basen%20BO-1%200.5A%20%28SA18650-33%29

Using 0.5A also works fine.

Basen%20BO-1%200.5A%20%28KP14500-08%29

The low termination current is fine for smaller cells.

Basen%20BO-1%200.5A%20%28AW18350-IMR%29

And also for old worn out cells.

Basen%20BO-1%202A%20%28SA18650-33%29

The 2A current is only maintained for a short time due to voltage limitations, then it will slowly drop. The charging is faster than 1A charging.

Basen%20BO-1%202A%200.5ohm%20%28SA18650-33%29

Adding 0.5ohm resistance in series with the power supply to simulate a long cable or weak supply shows that the charger will reduce usb and charge current, but the charging works fine.

Temp5313

M1: 39.4°C, M2: 51.9°C, M3: 58.5°C, M4: 52.2°C, HS1: 60.0°C


Voltage%20sweep%200-4.25V%202A

Being a fairly simple charger I could draw the current profile.

Poweron

The charger is very fast to start, it only needs about 1 seconds.

CurrentChange

It is possible to change current at any time.


Conclusion

The high charge voltage and low termination current will mean fully charged cell, but will cost a bit lifetime for the batteries. I like the simple user interface and adjustable tray, it is easy to use and means that the charger can handle most LiIon battery sizes.

I will rate it as good.


Notes

Here is an explanation on how I did the above charge curves: How do I test a charger

My website with reviews of many chargers and batteries (More than 1000): https://lygte-info.dk/

Test/review of Varta LCD Multi Charger 57671

$
0
0

Varta LCD Multi Charger 57671

DSC_2679

DSC_2680DSC_2681

This multi charger can be used for AA and AAA and handle up to 8 at a time. It can also be used as a usb charger.

DSC_2511DSC_2512

I got the charger in a blister pack. The pack has a few specifications on it.

DSC_2678

The pack contained the charger, a power supply and an instruction sheet.

DSC_2682

The power connector is placed at the back of the charger. The input voltage is rather special at 5.4V 3A, no standard power pack can be used.

DSC_2747

The user interface is a LCD display with 8 batteries on it.

DSC_2684

The usb output is placed on the front.

DSC_2686DSC_2687

The slots must be manually adjusted depending on the AA/AAA batteries. This setting is for 4 slots at a time.

DSC_2685

Half the charger is for AAA, the other half for AA in this image.

DSC_2688

The negative connection is steel springs.

supportedBatteryTypes

supportedBatterySizes

DSC_2690


Measurements charger


  • When not powered it will discharge the battery with about 0.6mA
  • Charge will restart charging after power loss, or battery insertion.
  • Power consumption when idle is 0.7 watt
  • Batteries must be charged in pairs.


Varta%20%282xeneloop%29%2012

This looks like a fine -dv/dt charge curve with a one hour top-off charge.
Usual I do not like a top-off charge on a -dv/dt charger, but because it is charging batteries in series it is necessary.

Varta%20%282xeneloop%29%2034
Varta%20%282xeneloop%29%2056
Varta%20%282xeneloop%29%2078

It is the same with the other slots.

Varta%20%282xeneloopPro%29%2012
Varta%20%282xpowerex%29%2012

The two high capacity cells works the same way.

Varta%20%282xeneloopAAA%29%2012

And also the AAA cell is handled nice.
Both the charge current and the top-off current is reduced for AAA cells.

Varta%20full%20%282xeneloop%29%2012

As expected it will take some time to detect a full cell and it will also get the top-off charge.

Varta%20full%2Bempty%20%282xeneloop%29%2012

Here is the main problem with the charger, I am charging one full and one empty cell, but both cells gets nearly a full charge.

Varta%20%288xeneloop%29

The charger fails with 8 cells, for some reason it terminates after 30 minutes.

Temp3053

M1: 36,5°C, M2: 38,3°C, M3: 37,4°C, M4: 36,4°C, M5: 36,3°C, M6: 37,3°C, M7: 36,1°C, M8: 34,9°C, M9: 38,3°C, HS1: 42,6°C
This time the charger did charge the 8 cells.

Poweron

The charger needs a about 3 seconds to initialize.

Charging

The charger uses two batteries in series and time shared two pair on the same charging circuit.
This means the charger must have two charging circuit to handle the 8 batteries.


USB output


  • Usb output is coded Apple 0.5A


Varta%20load%20sweep

The usb output is rated for 1A and can deliver just above 1.1A, this is fine.

Varta%20load%20test

Rated output for one hour is no problem.
The temperature photos below are taken between 30 minutes and 60 minutes into the one hour test.

Temp4218

HS1: 35,1°C

Temp4219

HS1: 33,0°C

Temp4220

HS1: 33,3°C

10ohm

Noise is 35mV rms and 134mVpp

5ohm

Noise is 39mV rms and 140mVpp, this is nice low values.


Testing the transformer with 2830 volt and 4242 volt between mains and low volt side, did not show any safety problems.


Conclusion

For this charger to work the batteries must be used and charged in pairs. Batteries from 1 or 3 cell devices are not welcome in this charger. Mostly it terminates nicely, but I had one early termination.

The usb charger works fine with low noise and good overload protection, but the coding is obsolete and it is a bit weak with only 1A.

I will rate it as acceptable.


Notes

Here is an explanation on how I did the above charge curves: How do I test a charger
Charge selection table

My website with reviews of many chargers and batteries (More than 1000): https://lygte-info.dk/

“REVIEW”: XTAR PB2 – Powerbank and Battery Charger + PROMOTION & DISCOUNT CODE [PIC HEAVY]

$
0
0

Hi BLF!

Some weeks ago, I received from Banggood the XTAR PB2, a powerbank and battery charger! I didn’t receive any other compensation than powerbank/charger.

The XTAR PB2 can be bought on Banggood (non-affiliate): https://goo.gl/Bkg3y5CORRECT LINK!Smile

Banggood is also making a promotion until June 30th. The price is $12.99 .
After the promotion, you can use the code: ad8cd9 for the price of $13.69 .

Thanks Swi from Banggood for these offers!!! Smile

There is an ongoing discussion thread about this powerbank/charger, here: http://budgetlightforum.com/node/60796

NOTE: This is my first non-flashlight review. I won’t be able say some things about this XTAR PB2 powerbank/charger, as I didn’t make tests (charge/discharge times), and I also don’t have some tools to inform you about the charging and discharging currents.

That said, this is what I can show you !!

_________________________________________________________________

PACKAGING and ACCESSORIES

The XTAR PB2 arrived inside a box, wrapped in foam – to protect from bruises -, which arrived in a plastic bag. The box has some basic information on the back, which can also be found on the user manual.

Inside the box we find: the powerbank/battery charger, a USB to micro USB cable (80cm; 2.5A) and the user Manual.

About the user manual, it is (well) written in at least 10 languages (English, German, French, Italian, Spanish, Greek, Turkish, Russian, Japanese and Polish).

Here’s a detail “attempt” for the English part Silly

_________________________________________________________________

THE POWERBANK / BATTERY CHARGER

The body colour of the PB2 is a mix of dark blue and grey. It has an overall rectangular shape, but it is rounded instead of square. This gives it some ergonomics when grabbing it!

The PB2 made of plastic, but has a soft rubber touch, and seems to be anti-scratch.
The body material is also flame retardant, as mentioned in the box.

Front and back
On the front we find the luminous display and the removable panel.
On the back we find some information about battery compatibility and using currents.

Left and right
On the middle left we find a groove to help removing the battery panel.
On the top right we find the button to switch the powerbank function.

On the top it has a USB and micro-USB port.
The USB port works with the output of 5V 2.1A and with it we can use the XTAR PB2 as powerbank.
The micro USB port works with the input of 5V 2.1A and with it we can use the XTAR PB2 as a battery charger.

The XTAR PB2 has a removable panel on the front through which we can access the battery slots.
This is a magnetic panel, with 2 strong magnets, one in each side. It is reversible, meaning that there is no “correct” or incorrect side to attach it to the body of the charger. Therefore, the XTAR logotype can be turned to the left or the right!


_______________________________________

BATTERIES

The battery slots are able to fit 1 or 2 batteries that can be 3.6V or 3.7V Unprotected 18650 batteries (Li-Ion /IMR / INR / ICR).
I only have unprotected flat top batteries, therefore, I couldn’t test if unprotected button top batteries fit this powerbank/charger.
However, the space that is left in the negative contacts let me think that unprotected button top batteries may fit ! If someone has input on this please post Wink

As mentioned above, protected 18650 batteries will not fit this powerbank/charger. As an example, I picked:
1 unprotected Sony US18650 VCT6 3.7V 3000mAh battery (Green)
1 protected Odepro 18650 battery 3.7V 3000mAh battery (Grey)

As you can see below, the protected battery is too long to fit the inner space of the powerbank / charger.

_______________________________________

DIMMENSIONS & WEIGHT

The XTAR PB2 is very lightweight (specially without batteries Big Smile ) and compact.
Even with batteries it is easily portable in the pockets or in your backpack (or man purse).

Without batteries >>> With batteries (yeah, some flashlights weigh more Silly )

_______________________________________

DISPLAY

The luminous display has space for 3 digits (to mark the 100 % charge).
Here is how it works:
- Constant light: device is being used as powerbank, the cells are being discharged;

- Flashing single digit (on the right): batteries are being charged;
When the PB2 is being used to charge the batteries and as powerbank at the same time, the diplay will blink as charging.

- Flashing double digit: low voltage signal;
I actually tested this one. The double digits started to blink at 9% when discharging. When I took the battery out, I used the Opus BT C3100 to see the voltage of the cell and it was on the 3.49V .

- Er : when batteries are wrongly placed and the device won’t work (reverse polarity protection), or by short circuit, or over-voltage input.

If the PB2 is being used incorrectly (the powerbank function is not working, or the charging is not working), the display will turn OFF.

_______________________________________

OPERATION & FUNCTIONING

CHARGING : To charge 1 or 2 batteries, place them correctly (+ towards display; – towards bottom), insert the micro USB cable in the port and it will start charging after 1 or 2 seconds.
The display lights ON and when charging the digit on the right will start blinking and will ramp up according to the charge.

POWERBANK : To use the XTAR PB2 as powerbank, with 1 or 2 batteries inside, either plug in the USB cable and it starts discharging or use the power button on the right side to turn the powerbank function ON. To turn it OFF, one must retrieve the USB cable or the batteries. The button will not work to switch the device OFF.

According to specs on user manual:

CHARGE / INPUT
- when 1 battery is charging, input current is 2Amps (1 channel)
- when 2 batteries are charging, input current is 1Amp per channel.
- when 2 batteries with different Voltage are charging, the charger will charge first the one with lower Voltage until it equals the one with higher Voltage. When they are equal, then the charger will charge both batteries together.

DISCHARGE / OUTPUT
- when only 1 battery is being used within the powerbank, the output current will be 1Amp
- when 2 batteries are being used withing the powerbank, the output current will be 2Amps
- when using 2 batteries, if one has a lower Voltage, the powerbank with discharge first the one with higher Voltage, and the discharges the 2 batteries together.

SIMULTANEOUS CHARGE / DISCHARGE
If the batteries are being charged and discharged simultaneously – ex: at the same time, charging cells while using the PB2 as powerbank to charge a cellphone – the input current will serve to charge the external device first so that the batteries’ charging cycles are safeguarded.

This means that, in these cases, the greatest amount of current will be directed to the cellphone (e.g.) and not the batteries. The batteries will not be over-charged, then, due to that simultaneous charge-discharge tension!!

0V ACTIVATION FUNCTION
The XTAR PB2 can also be used to battery revival – if they can be revived. According to specs, a 0V battery placed in the charger will start charging after 10 minutes.

As I mentioned ealier, I didn’t perform charge/discharge tests. So I’ll just leave you some photos about how this appears to work.

When charging 2 batteries, the number that is shown on the display is the “mean” of both batteries Voltage, not the number for an individual one. As far as I perceived that “individual” value can’t be displayed.

Battery #1 (left) = 80 % charge
Battery #2 (right) = 56 % charge
Both batteries = 67 % charge [this is the result of = (#1 + #2) : 2 ]

_______________________________________

OVERALL APPRECIATION

What do I really appreciate on this charger?

1) Well…it can be used as a battery charger for unprotected 18650 cells ! Big Smile

2) Well…it can be used as a powerbank ! Big Smile

3) We can put inside the powerbank (unprotected) batteries that we trust and of which we know the real capacity (if we can test them outside this charger). So, we can have at least 6800mAh (or more) to use, if you use 2 × 3400/3500mAh 18650 batteries. Well, if we use a single imaginary 6800mAh battery…then we can easily reach the 13600mAh FacepalmEvil

4) We can use the ‘juice’ of 1 or 2 batteries in powerbank mode. So, depending on the needs, one battery can be used for other things or spared!

5) When on a trip/travelling, we can take the XTAR PB2 to charge our cells and act as a powerbank (I don’t see me taking the OPUS BT C3100 on a trip…. Facepalm ), and we can also use the same cells in your Flashlights Big SmileCool
Honestly, this is what I liked the most, as from now on I don’t need to be carrying a powerbank and extra batteries for my flashlights LoveGrad
This means that it can help to reduce the weight of the backpack when travelling and have the best of both worlds Big Smile

6) The touch of the XTAR PB2 is soft and seems to be anti-scratch.

7) It is easy to reach and replace the batteries, and the removable magnetic panel doesn’t fall easily, even if shaken!!

8) It is very portable and ergonomic.

9) It works with USB and micro USB (a plus for those like me that don’t have USB-C cables) and it brings a USB to micro-USB cable included.

——————- /////——————-

What do I think that could be improved?

1) The power button could be used to turn OFF the powerbank function, despite retrieving the cable also works.

2) It only uses unprotected batteries. Well it probably wouldn’t work completely if protected batteries were used due the protection trip at lower voltages.

3) It isn’t much clear if when using different capacity cells (3400mAh + 2800mAh) it will only behave accordingly to Voltage or it the capacity will have something to do with the performance too.

_______________________________________

So far I don’t have much more to say as a “bad” or “to improve” thing.

I will probably order some 3400mAh (Sanyo GA) batteries to use in it!

If any of you has remarks to do, please, feel free to do so Wink They’ll be welcome!

Thanks for reading!
Best regards to all!

OH, and don’t forget:
The XTAR PB2 can be bought on Banggood (non-affiliate): https://goo.gl/Bkg3y5CORRECT LINK!Smile

Banggood is also making a promotion until June 30th. The price is$12.99.
After the promotion, you can use the code: ad8cd9 for the price of $13.69 .

CashBeer

DB Custom said: "Hide your billfold, cut up your credit cards... you're a perfect candidate for full blown flashaholism and will soon need dedicated flashlight cabinets. [...] Have fun! Modding is next... :P" 

REVIEWS : Amutorch S3 - XPG3-S3 /  AM S3 vs Neal 219c  /  Amutorch AM30 - XHP70.2 / Nitefox UT20 / Sofirn SF14 & SP10A / Sofirn SP32A / Sofirn SP10B / Odepro KL52 / Acebeam H20 / SS AAA / Wuben TO10R / BlitzWolf BW-ET1 / Odepro B018 / DQG Slim Ti / XTAR PB2 Charger 

Mods and tricks:1 / 2 / 3 / 4 / 5 / 6 / 7                        Convoy S2+ TIR Lenses on: XML2 / XPL-HI                             Others:Convoy S2+ Mini (Biscotti 3 & 1*7135)

Sofirn K6 Discussion: 1 / 2 / 3                                Triple TIR Lenses & XP-G2                                     MY GIVEAWAY = ACTIVE


Test/review of Charger Leise NiMH 2 slots LS-U2C

$
0
0

Charger Leise NiMH 2 slots LS-U2C

DSC_8888

DSC_8889DSC_8890

This is a fairly simple dual NiMH charger powered from USB.

DSC_8874DSC_8876

DSC_8875
DSC_8877
DSC_8878

It arrived in a cardboard box with brand name and not not much else on it.

DSC_8885

The box contained the charger, a usb cable and a instruction sheet in Chinese.

DSC_8891

The charger is usb powered with a micro usb input.

DSC_9238

There is a led for each slot that will light up for the 9½ hour a charge takes.

DSC_8893

The specifications are on the bottom of the charger.

DSC_8894DSC_8895
DSC_8896

The charger uses the classic two level construction for AA/AAA batteries.

supportedBatteryTypes
supportedBatterySizes

DSC_8898DSC_8897


Measurements


  • Power consumption from usb when idle with no batteries is 0.4mA
  • The charge current will depend on battery voltage, see voltage sweep curve below.


Leise%20%28eneloop%29%20%231

The battery is nearly charged fully in about 9½ hour with a fairly low charge current.

Leise%20%28eneloop%29%20%232

This cell is charged fully, again in 9½ hour.

Leise%20%28eneloopPro%29%20%231

The pro is far from fully charged, the charger again used 9½ hour.

Leise%20%28leise25%29%20%232

Not much surprise, 9½ hour charging and the charger stops.

Leise%20%28eneloopAAA%29%20%232

The AAA also gets 9½ hour at a lower current and is overcharged a bit.

Leise%20full%20%28eneloop%29%20%231

The full eneloop gets 9½ hour, that is about 9 hours of overcharge.

Leise%20%282xeneloop%29

With two batteries each battery gets the same current and the same 9½ hour.

Temp5412

M1: 40.5°C, M2: 40.5°C, HS1: 97.0°C
The charger use a linear regulation and need to burn some power, this means there is a rather hot location on it.

Voltage%20sweep%200-1.8V

Being a very simple charger I could draw the current profile. There is no regulation.

Poweron

The charger do not have any controller that need time to initialize, but starts immediately


Conclusion

The charger is a very small size, due to this is can be useful, but is is very slow and use a timer based termination. The low charge current means that damage to a battery is fairly limited and the charger can be used sometimes, but it is a bad idea to use this charger as the main charger for NiMH.

I will rate it usable.


Notes

Here is an explanation on how I did the above charge curves: How do I test a charger

My website with reviews of many chargers and batteries (More than 1000): https://lygte-info.dk/

Test/review of Golisi S2

$
0
0

Golisi S2

DSC_9253

DSC_9254DSC_9255

A 2 channel universal charger from Golisi.

DSC_9245DSC_9246DSC_9247DSC_9248

It arrived in a black very stylish cardboard box, there is some specifications on the back.

DSC_9250

The box included the charger, a mains cable and the instruction sheet.

DSC_9258

The charger has universal mains (110-240VAC 50/60Hz) and a 12V input on the back.

DSC_9256

The user interface is two buttons and a large display. The buttons can be used to change what is displayed, but do not affect the charging. Current selection depends on number of batteries and chemistry.
It is possible to select between V, h(time) and mAh

DSC_9327

During power on all the segments are shown.

DSC_9328DSC_9329

Empty charger and with a LiIon and a NiMH battery.
Current is selected depending on number of batteries, slot and chemistry.

DSC_9326

The charger do also support power bank function.

DSC_9259

On the bottom of the charger there are specifications.

DSC_9260DSC_9261

The slots uses the classical slider construction and it works fine.
The slots can work from 32mm to 70.6mm. This covers unprotected batteries, but some protected will be too long.

supportedBatteryTypes

supportedBatterySizesDSC_9458DSC_9459DSC_9460DSC_9461

DSC_9466DSC_9467DSC_9462DSC_9463DSC_9464DSC_9465


The charger can handle 70 mm long batteries including flat top cells.

The charge current for 1 cell is 1A when using #2 slot or both slots, this is rather high for small cells.
D cells may or may not work, they have a tendency to slide above the positive connection.


Measurements


  • Discharge LiIon battery with 1.4mA when not connected to power.
  • When power is connected with a full battery, it will charge with about 0.4mA.
  • Below 0.25 volt the charger will report error
  • Below 1.6V the charger will assume NiMH
  • Above 2.2V the charger will assume LiIon.
  • A slot with a battery will not increase current when other slots are finished (Good).
  • Display turns off after 30 seconds.
  • Voltmeter is within 0.02V
  • Voltmeter stops updating when charging is stopped and will not show above 4.20V
  • A single LiIon in is charged at 2A in slot #1.
  • Two LiIon is charged at 1A
  • NiMH is always charged at 0.5A
  • Charger will not restart when voltage drops.
  • The display turns off after 30 seconds (This can be disabled).
  • It will restart charging on reinsertion of the battery or power cycling.
  • Power consumption when idle without battery is 0.22 watt (0.54 with display on).


Charging LiIon

Charge current is 2A or 1A, depending on number of batteries and slot.

Golisi%20S2%20%28SA18650-33%29%20%231

A CC/CV charge curve, the final voltage is at the top of the allowed range (4.25V) and the termination current a bit high at 190mA, together the result is a fully charge battery (At least for this cell).
Display shows 3327mAh and 2:16

Golisi%20S2%20%28SA18650-33%29%20%232

This channel is limited to 1A and also use a fairly good CC/CV charge, again the voltage and termination current is a bit high
Display shows 3064mAh and 3:46

Golisi%20S2%20%28SA18650-26%29%20%231

No problem with the 2600mAh cell.

Golisi%20S2%20%28PA18650-31%29%20%231

This slightly older cell drops significantly in voltage due to the high termination current.

Golisi%20S2%20%28BE18650-26%29%20%231

This old cell handles the high termination current better.

Golisi%20S2%20%28SA20700-30%29%20%231

A high current 20700 cell do not drop much.

Golisi%20S2%20%282xSA18650-33%29

Two cells at the same time means 1A charge current in both slots.
Display shows 3337mAh, 3:43, 3276 and 3:34

Golisi%20S2%2012V%20%282xSA18650-33%29

The current from a 12V power supply is also about 1A.

Temp5484

M1: 32.4°C, M2: 34.6°C, M3: 39.8°C, M4: 38.1°C, M5: 55.3°C, HS1: 62.3°C
The charger gets a bit warm, but the batteries do not.

Temp5485

M1: 49.6°C, HS1: 63.3°C

PoweronLiIon

The charger needs about 6 seconds to initialize.

CurrentChangeLiIon

When putting two batteries in the charger the current will drop to 1A, it will not increase again if one is removed.
The charger turns the current off to check the voltage.


Charging NiMH

Charge current is 1A or 0.5A, depending on number of batteries.

Golisi%20S2%20%28eneloop%29%20%231

With one cell the charger current is 1A and the charger uses a -dv/dt termination. This is a good charge, stopping shortly after the temperature increases.
Display shows 2075mAh and 2:13

Golisi%20S2%20%28eneloop%29%20%232

The second slots looks the same.
Display shows 1945mAh and 2:05

Golisi%20S2%20%28eneloopPro%29%20%231
Golisi%20S2%20%28leise25%29%20%231

Both high capacity cells are handled the same way.

Golisi%20S2%20%28eneloopAAA%29%20%231

Oops, the AAA failed to termination, even though there is a very obvious -dv/dt signal.

Golisi%20S2%20full%20%28eneloop%29%20%231

A full cell is detected in about 12 minutes, that is fast for a -dv/dt charger.

Golisi%20S2%20%282xeneloop%29

With two cells the current is reduced to 0.5A and the termination still looks fine.
Display shows 1993mAh, 4:03, 1875mAh and 3:39

Golisi%20S2%2012V%20%282xeneloop%29

Current from 12V is about 0.25A

Temp5494

M1: 32.8°C, M2: 33.5°C, HS1: 43.8°C
Fairly low temperature.

PoweronNiMH

NiMH needs about 5 seconds to initialize.

ChargingNiMH

With NiMH the voltage check is done less frequently and takes longer.

CurrentChangeNiMH

When putting two batteries into the charger the current will drop.


USB output


  • USB output is coded as DCP
  • USB output turns off after 15 seconds when loaded with a small current
  • USB output is very sensitive, even a usb meter will turn it on, but it will power cycle every 15 seconds.


Golisi%20S2%20%231%20load%20sweep

The output has overload protection slightly above 1.3A

Golisi%20S2%20%232%20load%20sweep

Same with a battery in the other slot.

Golisi%20S2%20load%20sweep

With both batteries it can nearly deliver 1.5A

Golisi%20S2%20usb%20out%2010ohm%20%28SA18650-33%29%20%231
Golisi%20S2%20usb%20out%2010ohm%20%28SA18650-33%29%20%232
Golisi%20S2%20usb%20out%2010ohm%20%282xSA18650-33%29

With 0.5A load the output voltage is stable with either battery or with both batteries. The minimum discharge voltage is around 3.3V

Golisi%20S2%20usb%20out%205ohm%20%28SA18650-33%29%20%231

With 1A load and one battery the output has trouble keeping the voltage stable.

Golisi%20S2%20usb%20out%205ohm%20%282xSA18650-33%29

With two batteries it works much better.

noohm

With no load the noise is 32mV rms and 170mVpp.

10ohm

At 0.5A the noise is 94mV rms and 291mVpp.

5ohm

At 1A the noise is 31mV rms and 239mVpp.


Testing with 2830 volt and 4242 volt between mains and low volt side, did not show any safety problems.


Conclusion

This charger is very simple to use, you just have to put the batteries in, this also means that current selection is fairly limited. With LiIon you can select between 1A and 2A for a single cell, depending on slot. With 1A being the minimum LiIon current this means the charger is bad for small cells.

Mostly the charger did well, but it failed the AAA test where it missed the termination (it did terminate later on).

The usb output works fine with two batteries in the charger, but has problems with full current on one battery.

The default is for the display to turn off while charging, this makes it impossible to see when the charger is finished without pressing a button.


I will rate it as a fairly good and simple charger, but I am missing a charge done indicator I can see without pressing a button.


Notes

The charger was supplied by Golisi for review.

It is possible to keep the background light on, just hold the button down for a few seconds and the auto-off feature is disabled. This is not explained in the manual!

Here is an explanation on how I did the above charge curves: How do I test a charger

My website with reviews of many chargers and batteries (More than 1000): https://lygte-info.dk/

Test/review of Charger EV-Peak CQ1-XR

$
0
0

Charger EV-Peak CQ1-XR

DSC_6393

DSC_6396DSC_6395

This is a 4 channel analyzing charger and usb charger.

DSC_6351DSC_6352
DSC_6353
DSC_6354

I got the charger in a cardboard box

DSC_6390

The box contains the charger, a power supply and a manual.

DSC_6399

The charger has a barrel connector for 12V power input.

DSC_6398

The usb output connector can be used for charging, it is mains powered.

DSC_6397

As all analyzing charger it has a display and a couple of buttons. There is also a row of blue leds at the top, when a slot is selected it will flash and it will light when the slot is busy.
The buttons are marked: CH – + ENTER

DSC_8511

Selftest during powerup shows all the text on the display.

DSC_8510

When working the display looks like this

DSC_6401DSC_6402

The charger has the usual sliders to handle any length batteries, they work from 34mm to 72mm, but are too loose at 34mm to always securely handle 16340 and 18350 cells. They are not sliding that well either and a long battery must not be pressed against the bottom of the charger when pressing back (I will catch on the moldings, at the position the slider is on the photo).

DSC_6400

There is some small connectors at the bottom, they can be used to charger other batteries with. They are probably in parallel with charging slot.

supportedBatteryTypes

supportedBatterySizesDSC_6427DSC_6428DSC_6429

DSC_6430DSC_6431DSC_6432DSC_6433

DSC_6434DSC_6435DSC_8452DSC_6436


Settings

The termination conditions in the charger can be adjusted at it will remember the settings when power is removed. There are separate settings for each slot. To activate setting menu for a slot hold the CH button down.
I have used the default values for the testing.

Setting Delta-peak (DP) defaults to 5mV and can be adjusted from 4 to 30mV
Setting 3.6V LiFePO4 end voltage (LIFE ENDV) defaults to 3600mV and can be adjusted from 3 to 3.9V in 10mV steps
Setting 4.2V LiIon end voltage (LIPO ENDV) defaults to 4200mV and can be adjusted from 3.8 to 4.3V in 10mV steps
Setting maximum temperature (TEMP) defaults to 55° and can be adjusted from 55°C to 70°C in 1°C steps.


Measurements


  • Power consumption when idle is 1.4 watt (Power adapter is 0.1 watt).
  • Trickle charger on NiMH is 50mA at 2.5A charge current
  • At 0.3V a battery is detected.
  • At 1.6 volt it will assume LiFePO4 cell
  • At 3.6 volt it will assume LiPo (4.2V LiIon) cell
  • It is always possible to manually select another chemistry
  • Voltage display is within 0.01 volt.
  • Charge rate has large tolerances.
  • Will discharge NiMH batteries with about 0.1mA when not powered (1.2V).
  • Will discharge LiFePO4 batteries with about 3.8mA when not powered (3.4V).
  • Will discharge LiIon batteries with about 8.2mA when not powered (4.0V).
  • Will trickle charge a full LiIon cell.
  • Charge will not restart charging after power loss, or battery insertion.


Charge 4.2V LiIon

The charge mode can select from 0.1A to 2.5A current. Be careful with chemistry selection, depending on charge state it will select either LIFE or LIPO, the correct one is LIPO.

EV-Peak%20CQ1-XR%20charge%201A%20%28SA18650-33%29%20%231

The charger uses a CC/CV charge profile, but it do not turn the current off when finished, there is some trickle charge.
Display shows 3261mAh in 3:40 with Ri 46ohm

EV-Peak%20CQ1-XR%20charge%201A%20%28SA18650-33%29%20%232

Display shows 3409mAh in 3:36 with Ri 46ohm

EV-Peak%20CQ1-XR%20charge%201A%20%28SA18650-33%29%20%233

Display shows 3379mAh in 3:45 with Ri 46ohm

EV-Peak%20CQ1-XR%20charge%201A%20%28SA18650-33%29%20%234

Not much difference between channels.

EV-Peak%20CQ1-XR%20charge%201A%20%28SA18650-26%29%20%231

Display shows 3554mAh in 2:49 with Ri 51ohm

EV-Peak%20CQ1-XR%20charge%201A%20%28KP18650-33%29%20%231
EV-Peak%20CQ1-XR%20charge%201A%20%28PA18650-31%29%20%231

The charge profile is the same with the other cells. With an old cell it is more difficult to see the actual change from charge to trickle charge.

EV-Peak%20CQ1-XR%20charge%202.5A%20%28AWT18650-30%29%20%231

At 2.5A it changes to trickle charge at about the same current as 1A charge do.
Display shows 2938mAh in 1:47 with Ri 51ohm

EV-Peak%20CQ1-XR%20charge%200.1A%20%28KP18650-08%29%20%231

The 0.1A charge is a bit above 0.1A and the CV phase is skipped, it goes directly to trickle charge.

EV-Peak%20CQ1-XR%20charge%200.5A%20%28AW18350-IMR%29%20%231
EV-Peak%20CQ1-XR%20charge%200.5A%20%28KP18650-08%29%20%231

The smaller cells goes from the CV phase to trickle charge at about the same current.

EV-Peak%20CQ1-XR%20charge%200.5A%20%28SA18650-33%29%20%231

With larger cell the current will drop a bit.
Display shows 3224mAh in 6:13 with Ri 50ohm

EV-Peak%20CQ1-XR%20charge%201A%20%284xSA18650-33%29

Charging four cells failed, the charger will reset itself and stop charging.

Sorry, but there is no temperature photos, the charger restarted all the time

StartCharge2.5ALiIon

When the charger is started it will first check Ri, then apply a low current for about 30 seconds, before going to full charge current. There is no PWM in the charger current.

Charge1ALiIon

A check at 1A did not show any PWM either, but there is a lot of noise in the charge current.
All chargers has noise in the current and I usual apply a filter, it is applied here.

Charge0.1ALiIon

And 0.1A is also without PWM.

MeasuringRiLiIon

Here is a closer look at the Ri measuring discharge, it is done at about 420mA for 0.1 second.

Spectrum1ALiIon

I was a bit curious about the noise and switches my scope to spectrum, as can be seen the switcher is at about 30kHz, there is also a lot of noise at lower frequencies (The above do not show all of them), probably due to the regulation.

DSC_8470

Here is a image of the current/voltage when the charger is reporting END. Negative current means the charger is charging. This chart is done with a battery voltage at 4.1V, the current will be reduced at higher battery voltages.


Discharge 4.2V LiIon

Discharge current can be selected from 0.1A to 1.5A, but as can be seen below it is mostly a fake selection.
On the back of the charger it says 4×1.5W discharge, this limits discharge current to 0.35A with full LiIon batteries. That limit is not incorporated in the user interface.

EV-Peak%20CQ1-XR%20discharge%201.5A%20%28SA18650-33%29%20%231

Here I selected 0.5A discharge, but the charger is only discharging with about 300mA. The discharge stops at 3.35V (This is a fairly high voltage). The test was done with only one battery in the charger.
Display shows 3501mAh in 8:48 with Ri 27ohm

EV-Peak%20CQ1-XR%20discharge%201.5A%20%28SA18650-33%29%20%231

Another discharge with maximum discharge current selected, i.e. 1.5A. Again the current is around 300mA.
Display shows 3501mAh in 8:48 with Ri 27ohm

Discharge0.1ALiIon

At 0.1A discharge current the actual current is near the selected current (It is around 90mA, but display on charger toggles between 0.10A and 0.15A).

Discharge1.5ALiIon

Another check with the 1.5A setting.


Cycle 4.2V LiIon

With cycle setting it is possible to select number of cycles (1-12) and both charge and discharge current and charge/discharge sequence. The display shows the discharge from all discharge cycles.

EV-Peak%20CQ1-XR%20cycle%201A%20%28SA18650-33%29%20%231

I used 1A for both charge and discharge, selected charge then discharge, this means I finish with an empty battery.
The 1A charge works fine, but not the 1A discharge, as above the charger will not discharge with that much current.
Display shows 3501mAh in 8:46 with Ri 23ohm Cycle=3501, 3501, 3501


Refresh 4.2V LiIon

Refresh on this charger is a charge-discharge-charge sequence with user selected currents for both charge and discharge. The display shows the charge value.

EV-Peak%20CQ1-XR%20refresh%201A%20%28SA18650-33%29%20%231

Again the low discharge current and the final charge includes trickle charge.
Display shows 3084mAh in 3:35 with Ri 40ohm


Break-in 4.2V LiIon

Break-in is a charge followed by a short discharge with user selected currents for both charge and discharge. The display shows the values from the short discharge.

EV-Peak%20CQ1-XR%20break-in%201A%20%28SA18650-33%29%20%231

A normal charge, then a 5 minute discharge and this time there is no trickle charge.
Display shows 29mAh in 0:05 with Ri 17ohm


Charge 3.6V LiIon (LiFePo4)

The charging current can be select from 0.1A to 2.5A when charging LiFePO4.

EV-Peak%20CQ1-XR%20charge%201A%20%2818650-LiFePO4%29%20%231

The charge goes nicely to 3.6V, but then the charger switches to trickle charge.
Display shows 1254mAh in 1:32 with Ri 44ohm

EV-Peak%20CQ1-XR%20charge%200.5A%20%28SO14500-LiFePO4%29%20%231

This is also the case at lower current.
Display shows 561mAh in 1:08 with Ri 192ohm


Discharge 3.6V LiIon (LiFePo4)

The discharge current can be selected from 0.1A to 1.5A.

EV-Peak%20CQ1-XR%20discharge%201A%20%2818650-LiFePO4%29%20%231

The current has the same problem as with LiIon, the charger will not use the selected current, but only discharge with about 0.4A.
The termination voltage is 2.8V, this is a fine value for LiIon and if on the high side for LiFePO4
Display shows 1399mAh in 2:59 with Ri 57ohm


Cycle/Refresh/Break-in 3.6V LiIon (LiFePo4)

Sorry, no curves for this, it is basically the same as LiIon, but with changed limits.


Charge NiMH

The current can be adjusted from 0.1A to 2.5A for NiMH charging.

EV-Peak%20CQ1-XR%20charge%201A%20%28eneloop%29%20%231

Nice charge curve with -dv/dt termination


EV-Peak%20CQ1-XR%20charge%201A%20%28eneloop%29%20%232

Not as nice, the charger terminated way before the cell is anywhere near full.
Display shows 589mAh in 0:41 with Ri 40ohm

EV-Peak%20CQ1-XR%20charge%201A%20%28eneloop%29%20%233

Also failed.
Display shows 675mAh in 0:06 with Ri 53ohm

EV-Peak%20CQ1-XR%20charge%201A%20%28eneloop%29%20%234

And even more failed. This curve would have been fine if I had started with a full cell.
Notice that the charger is applying some trickle charge here.
Display shows 87mAh in 2:49 with Ri 51ohm

EV-Peak%20CQ1-XR%20charge%201A%20%28eneloopPro%29%20%231
EV-Peak%20CQ1-XR%20charge%201A%20%28powerex%29%20%231

The two high capacity cells also failed, one of them get a trickle charge.

EV-Peak%20CQ1-XR%20charge%200.1A%20%28eneloop%29%20%231

What about a very low charge current? The cell get charged nearly 3/4 full. The termination may be due to a time limit.

EV-Peak%20CQ1-XR%20charge%200.5A%20%28eneloopAAA%29%20%231

The AAA cell do not get charged either.

EV-Peak%20CQ1-XR%20charge%201A%20%284xeneloop%29

With 4 cell at a time it also fails.

EV-Peak%20CQ1-XR%20charge%202.5A%20%284xeneloop%29

And it fails even faster at full charge current.

StartCharge2.5ANiMH

When charging NiMH it first do the internal resistance check and then goes to full charge current, no low current charge here.

Charge0.1ANiMH

But about each minute it takes a break, probably to check the voltage, but the display shows the voltage during charge, not the voltage during the break.

Charge1ANiMH

The break is present at all NiMH charge current settings, this time it decided my cell was full.

Charge2.5ANiMH

Same at 2.5A charge current.


Discharge NiMH

It is possible to select discharge current from 0.1A to 1.5A, the 1.5A is not possible.

EV-Peak%20CQ1-XR%20discharge%200.1A%20%28eneloop%29%20%231

The termination is at about 1.25V, this is very high for NiMH cells, the reason is likely a time limit.
Display shows 1798mAh in 12:00 with Ri 79ohm

EV-Peak%20CQ1-XR%20discharge%201.5A%20%28eneloop%29%20%231

With the higher termination current the discharge curve looks fine, it terminated at 0.9V.
The discharge current is about 1A, even with 1.5A selected.
Display shows 1971mAh in 1:50 with Ri 35ohm

EV-Peak%20CQ1-XR%20discharge%201.5A%20%284xeneloop%29

Doing a discharge with four cells looks good enough, but again the current is limited to about 1A.

Discharge0.1ANiMH

No PWM in low current discharge.

Discharge1.5ANiMH

High current discharge is limited to 1A.


Cycle NiMH

For cycle it is possible to select number of cycles (1-12), charge and discharge current and initial operation (Charge/Discharge).

EV-Peak%20CQ1-XR%20cycle%201A%20%28eneloop%29%20%231

Starting with a charge I will end with a discharge. This time the charger works perfectly.
Display shows 2121mAh in 2:01 with Ri 32ohm Cycle=2122, 2126, 2121


Refresh NiMH

The refresh operation is a charge-discharge-charge sequence with user selectable charge and discharge current.

EV-Peak%20CQ1-XR%20refresh%201A%20%28eneloop%29%20%231

The first charge looks like it terminated a bit early, the second charge looks perfect.
Display shows 2093mAh in 2:25 with Ri 43ohm


Break-in NiMH

The break-in operation is a charge followed by a short discharge, it is possible to select charge and discharge current.

EV-Peak%20CQ1-XR%20break-in%201A%20%28eneloop%29%20%231

A nice charge followed by a 5 minute discharge.
Display shows 86mAh in 0:05 with Ri 24ohm


USb power output


  • Power consumption when idle is 1.4 watt (Power adapter alone is 0.1 watt).
  • Usb output is coded as Apple 2.1A
  • The display has no indication about the usb output.


EV-Peak%20CQ1-XR%20load%20sweep

The charger can easily deliver the rated 1A current on the usb output, but it do not live up to the 2.1A coding.
Efficiency is also rather bad, it is not very surprising with the high idle power consumption and two switchers (One in the mains adapter and one in the charger).

EV-Peak%20CQ1-XR%20load%20test

The charger can deliver the rated current for an hour without problems.

Temp3597

M1: 34,5°C, M2: 32,4°C, HS1: 38,7°C

Temp3598

HS1: 43,4°C

Temp3599

M1: 37,4°C, HS1: 41,8°C
Not much heat get to the outside of the charger with the usb running at full rated power.

10ohm

The noise is 20mV rms and 95mVpp.

5ohm

The noise is 20mV rms and 120mVpp, this is very low values.


Testing with 2830 volt and 4242 volt between mains and low volt side, did not show any safety problems.


Conclusion

At first glance the charger looks interesting with the usual selection of analyzer function and also connection for small LiIon batteries.
Sadly the charger do not really work:

  • It often restart when charging a full load of LiIon batteries.
  • It cannot reliable charge NiMH full.
  • It do not terminate on LiIon charge.
  • The discharge current settings are fantasy, it cannot discharge at these currents (A detailed reading of the specification will reveal that).
  • The break-in algorithm is not the standard one with only 5 minute discharge.


This make the charger usable for charging a few LiIon cells at a time or analyzing a small LiIon battery pack.
It is not usable for charging NiMH.


Notes

Here is an explanation on how I did the above charge curves: How do I test a charger
Charge selection table

My website with reviews of many chargers and batteries (More than 1000): https://lygte-info.dk/


Test/review of Uniross Charger LCD 3-5H

$
0
0

Uniross Charger LCD 3-5H

DSC_0050

DSC_0051DSC_0052

This is a fairly simple NiMH charger for AA and AAA cells.

DSC_0045DSC_0046

I got the charger in a blister pack. The pack has a few specifications on it.

DSC_0048

The pack contained the charger and an instruction sheet.

DSC_0055

The charger plugs directly into a mains outlet

DSC_6837DSC_6848

The user interface is a LCD display with 4 batteries on it and a 3. different messages: CHARGE, READY, BAD.
Very simple and easy to understand.

DSC_0054

Specifications are listed on the back.

DSC_0057DSC_0059DSC_0056

The charger uses the typical two level slots for NiMH AA/AAA batteries.

supportedBatteryTypes

supportedBatterySizes

DSC_0060DSC_0061


Measurements charger


  • Power consumption when idle is 0.63 watt
  • Charge will restart charging after power loss, or battery insertion.
  • Will discharge NiMH batteries with less than 0.1mA when unpowered.


Uniross%20%28eneloop%29%20%231

Nice charging, the termination is slightly slow, but works.

Uniross%20%28eneloop%29%20%232

A little bit faster termination this time.

Uniross%20%28eneloop%29%20%233

Oops, about two hours to termination.

Uniross%20%28eneloop%29%20%234

Again a nice curve.


Uniross%20%28eneloopPro%29%20%231

Also a nice curve.

Uniross%20%28powerex%29%20%231

This cell is very worn and the charger cannot really terminate on it. The time used is exactly the same as #3 above, it looks like a maximum charge time/capacity. The limit is fairly good for AA cells, it prevents serious over charge.

Uniross%20%28eneloopAAA%29%20%231

With AAA a lower charge current is used and again the termination was rather slow.

Uniross%20full%20%28eneloop%29%20%231

A full cell is discovered and charging stopped.

Uniross%20%284xeneloop%29

Charge speed is the same with 4 cells in the charger.

Temp5165

M1: 29.0°C, M2: 31.6°C, M3: 33.4°C, M4: 31.1°C, HS1: 38.1°C
The charger is fairly low current and do not get very warm.

Temp5166

M1: 30.3°C, HS1: 48.0°C

Poweron

The charger needs a about 1.4 seconds to initialize.

Charging

It has both short and long measuring pulses, I wonder why.


Testing the transformer with 2830 volt and 4242 volt between mains and low volt side, did not show any safety problems.


Conclusion

This is a simple and not that fast charger and sometimes it misses termination, but due to its capacity/time limit it will always stop without doing any serious damage to the batteries.

I will rate it acceptable.


Notes

Here is an explanation on how I did the above charge curves: How do I test a charger
Charge selection table

My website with reviews of many chargers and batteries (More than 1000): https://lygte-info.dk/

Test/review of Charger Doublepow DP-U03

$
0
0

Charger Doublepow DP-U03

DSC_9636

DSC_9637DSC_9638

This is a very simple NiMH charger for AA and AAA cells with 3 slots.

DSC_9626DSC_9627DSC_9628DSC_9629

I got the charger in a cardboard box without any accessories.

DSC_9647

The charger plugs directly into a usb socket

DSC_9639

The user interface is 3 leds that is on when it is charging, i.e. when powered and there is a battery in the slot,

DSC_9640

Specifications are listed on the back.

DSC_9641DSC_9642DSC_9643

The charger uses the typical two level slots for NiMH AA/AAA batteries.

supportedBatteryTypes

supportedBatterySizes

DSC_9645DSC_9644


Measurements charger


  • Power consumption when idle is 0 watt
  • Charge always charges
  • Will not discharge NiMH batteries


Doublepow%20%28eneloop%29%20%231

The charger is very slow and it do not terminate or indicate when the batteries is full.

Doublepow%20%28eneloop%29%20%232
Doublepow%20%28eneloop%29%20%233

The two other slots looks similar.

Doublepow%20%28eneloopAAA%29%20%231

The current is the same for a AAA battery.

Doublepow%20%283xeneloop%29

And it stays the same when charging 3 batteries, but the power consumption from usb goes up. It is still very low at 0.3A

Powered%20voltage%20sweep%200-1.8V

The charging is controlled by a series resistor and current only depends on battery voltage.


Conclusion

This is a very simple and slow charger without termination and if used regularly it will wear down good batteries.
This type of charger can be useful to get a little extra life from old worn batteries.

I will rate it usable.


Notes

The charger was supplied by fasttech.com for review (SKU: 8766600)

Here is an explanation on how I did the above charge curves: How do I test a charger
Charge selection table

My website with reviews of many chargers and batteries (More than 1000): https://lygte-info.dk/

Test/review of Efan Lux S4 LCD charger

$
0
0

Efan Lux S4 LCD charger

DSC_9936DSC_9938

DSC_9937

This is a analyzing charger from Efan (Eizfan), there is no buttons on it because it uses a color touchscreen for user interface.

DSC_9931DSC_9932DSC_9933DSC_9934

I got the charger in a cardboard box, if has a good picture of the charger and specifications on the back.

DSC_9935

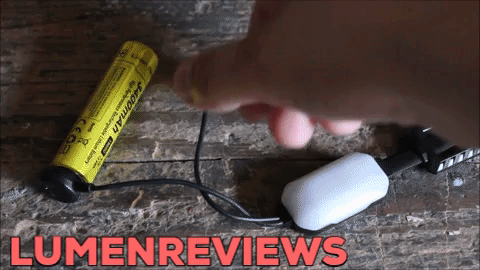
The pack included the charger, a power supply, a mains cable, a manual and probes for internal resistance measurement.

DSC_9939

The charger use 12V 5A power and the mains power supply is included. The probes for internal resistance is connected to the “IR TEST” socket when measuring IR. The DATA connector is for firmware upgrade

DSC_0260DSC_0261

The charger shows a animation during power on.

DSC_0266

This is the idle picture when no batteries are in the charger. When a battery is put in the battery symbol is selected and it is possible to press on it to select settings.

DSC_0263DSC_0264

There are 3 settings screens, the first one for mode, the second for current.

DSC_0265

And the last for chemistry

DSC_0262

Pressing the “R” button will show the internal resistance measurement screen.

DSC_0133DSC_0146

DSC_0132

Some examples on charging/discharging screens, the curve is drawn while working and the horizontal scale will change as needed.
There is no indication of charge/discharge current, it must be inferenced from the slope of the voltage curve.

DSC_0257

The probes for internal resistance measurement, they are not 4-terminal, but the circuit in the charger may eliminate the resistance in the connector.

DSC_0256

The probes includes tip protectors

DSC_0258

They are connected to the usb plug on the back of the charger.

DSC_0259

And pressed against the battery ends to measure internal resistance.

DSC_9940

The charger has a small fan, it is temperature controlled and starts when needed, but it is rather noisy.

DSC_9942
DSC_9943

The charger has the usual slider construction. It can handle from 33mm to 76mm, this is most common cells on the market.

supportedBatteryTypes

supportedBatterySizes
DSC_0269
DSC_0270
DSC_0271
DSC_0272
DSC_0273
DSC_0274
DSC_0275
DSC_0276
DSC_0277
DSC_0279
DSC_0281
DSC_0282

32xxx and D do not really fit in the charger, but it may be possible to put them in.


Measurements charger


  • Power consumption when idle is 1.6 watt (The power supply uses 0.11 watt in idle).
  • Without power it will discharge a LiIon battery with about 0.5mA
  • Without power it will discharge a NiMH battery with about 0.1mA
  • A full LiIon battery will be charged with 0.6ma
  • Below 0.07V the charger will charge will report error
  • Up to 2V the charger assumes NiMH
  • Above 2V the charge assumes LiIon.
  • Charger will restart if battery voltage drops below 3.9V in 4.20V mode
  • The charger will restart when a battery is inserted or power is cycled.
  • The meter has a minimum readout of 0.5V
  • Up to 0.8V the meter is not very precise.
  • From 0.8V to maximum the meter is within 0.05V
  • The meter will never show above maximum battery voltage (3.60V, 4.20V, 4.35V)

Charging 4.2V LiIon

Current can be selected from 0.5A, 1A, 1.5A and 2A, default is 1A.

EFAN%20S4%201A%20%28SA18650-33%29%20%231

This is a nice CC/CV charge curve with termination at around 100mA.
Display shows 3084mAh and 3:58

EFAN%20S4%201A%20%28SA18650-33%29%20%232

Display shows 3071mAh and 3:56

EFAN%20S4%201A%20%28SA18650-33%29%20%233

Display shows 3106mAh and 5:25

EFAN%20S4%201A%20%28SA18650-33%29%20%234

The other 3 channels works the same way.
Display shows 3096mAh and 4:22

EFAN%20S4%201A%20%28SA18650-26%29%20%231

Display shows 2485mAh and 3:28

EFAN%20S4%201A%20%28PA18650-31%29%20%231

No problem with other capacities.
Display shows 2747mAh and 4:34

EFAN%20S4%201A%20%28BE18650-26%29%20%231

The old cell goes into CV mode fairly fast and also stops when the current is down to 100mA
Display shows 1940mAh and 5:13

EFAN%20S4%200.5A%20%28SA18650-33%29%20%231

Lower charge current means longer charge time and slightly lower charge voltage, the termination current is the same.
Display shows 3064mAh and 7:42

EFAN%20S4%200.5A%20%28AW18350-IMR%29%20%231

This old and worn down cell is handled as fine as possible with 100mA termination current.
Display shows 151mAh and 0:40

EFAN%20S4%200.5A%20%28KP14500-08%29%20%231

Same with this cell.
Display shows 688mAh and 1:52

EFAN%20S4%201.5A%20%28SA18650-33%29%20%231

The 1.5A setting is fine for 3000mA and larger cells, it will charge a bit faster than the 1A setting.
Display shows 3152mAh and 3:21

EFAN%20S4%202A%20%28SA18650-33%29%20%231

The charger can also charge with 2A, the termination current is 100mA. The charging is for high current cells and larger cells it is faster than 1A/1.5A, but there can be a long CV phase.
Display shows 3212mAh and 2:43

EFAN%20S4%202A%20%28SA20700-30%29%20%231

Charging a high current cell at 2A is faster, there the CV phase is fairly short.
Display shows 3024mAh and 1:44

EFAN%20S4%202A%20%284xSA18650-33%29

The charger can charge 4 batteries at 2A
Display shows 3188mAh,3209mAh,3173mAh,2420mAh and 2:30, 2:26, 2:21, 2:06

EFAN%20S4%202A%2012V%20%284xSA18650-33%29

It need about 4A from 12V to do it.
Display shows 3159mAh, 3241mAh, 3205mAh, 3151mAh and 3:04, 2:25, 2:19, 2:29

Temp5591

When charging 4×2A it do get a bit warm, especially the battery nearest the display.
M1: 48.1°C, M2: 43.6°C, M3: 41.0°C, M4: 39.0°C, HS1: 58.8°C

Temp5592

M1: 53.0°C, M2: 43.0°C, HS1: 64.6°C

PoweronLiIon

The charger starts very slowly, this gives the user time to change mode or battery type.

CurrentChangeLiIon

It is possible to change current at any time during the charge.


Discharging 4.2V LiIon

Discharging is with a constant 0.5A current.

EFAN%20S4%200.5A%20discharge%20%28SA18650-33%29%20%231

The charger will discharge to about 2.8V with a constant current, i.e. not PWM.
Display shows 2995mAh and 6:06

EFAN%20S4%200.5A%20discharge%20%28SA18650-33%29%20%232

Display shows 3044mAh and 6:12

EFAN%20S4%200.5A%20discharge%20%28SA18650-33%29%20%233

Display shows 3074mAh and 6:16

EFAN%20S4%200.5A%20discharge%20%28SA18650-33%29%20%234

The other slots look similar.
Display shows 3085mAh and 6:14

EFAN%20S4%200.5A%20discharge%20%284xSA18650-33%29

With a fan in the charger it is no problem discharging 4 batteries.
Display shows 3070mAh ,3185mAh ,3149mAh ,3079mAh and 6:16, 6:29, 6:25, 6:17

Temp5599

M1: 39.7°C, M2: 35.2°C, M3: 32.7°C, M4: 30.9°C, M5: 46.2°C, HS1: 53.9°C

DischargeLiIon

No PWM when discharging.


Capacity test 4.2V LiIon

A capacity test consist of charging the battery, discharging it and final charging it again. The discharge current is fixed at 0.5A, the two charge cycles can be selected from 0.5A, 1A, 1.5A and 2A, default is 1A

EFAN%20S4%201A%20capacity%20%28SA18650-33%29%20%231

Display shows 3037mAh and 14:45


Charging 4.35V LiIon

EFAN%20S4%201A%20%28LG18650-30%29%20%231

Charging a 4.35V cell looks fine enough.
Display shows 2777mAh and 3:29


Charging 3.6V LiIon (LiFePO4)

EFAN%20S4%201A%20%2818650-LiFePO4%29%20%231

Display shows 1185mAh and 1:43

EFAN%20S4%200.5A%20%28SO14500-LiFePO4%29%20%231

Charging LiFePO4 also looks fine enough.
Display shows 508mAh and 1:16


Measuring Internal Resistance LiIon

The charger do not measure internal resistance in the slots, but uses an external probe.

RILiIon

The results looks fairly consistency but the values is not correct, especially the +100mOhm is way to low.

RiLiIonLong

The measurement is done with two pulses, at the first pulse the display will show voltage a 0mOhm, at the next pulse the measured resistance will be shows.

RiLiIonZeroPulse

RiLiIonMeasurementPulse

It looks like a hardware bug with a initial 6A+ current draw and then dropping to around 1A. I will not expect this to affect the measurement.


Charging NiMH

Current can be selected from 0.5A, 1A, 1.5A and 2A, default is 0.5A. When charging starts the current is locked and cannot be changed.

EFAN%20S4%201A%20%28eneloop%29%20%231

The charging is terminated on voltage and then followed by a two hour trickle/top-off charge. The termination looks to be just before the temperature raises to signal full cell. The measured mAh is a bit on the low side.
Display shows 1525mAh and 2:11

EFAN%20S4%201A%20%28eneloop%29%20%232

Display shows 1483mAh and 2:08

EFAN%20S4%201A%20%28eneloop%29%20%233

Display shows 1536mAh and 2:12

EFAN%20S4%201A%20%28eneloop%29%20%234

All slots looks similar.
Display shows 1478mAh and 2:07

EFAN%20S4%201A%20%28eneloopPro%29%20%231

The Pro is charged the same way.
Display shows 2165mAh and 3:03

EFAN%20S4%201A%20%28leise25%29%20%231

The Leise cell is filled completely (Temperature increases).
Display shows 2440mAh and 3:25

EFAN%20S4%200.5A%20%28eneloopAAA%29%20%231

No surprise with the AAA
Display shows 589mAh and 1:42

EFAN%20S4%200.5A%20%28eneloop%29%20%232

The charger has no problem terminating at low charge current, because it uses voltage termination.
Display shows 1601mAh and 4:25

EFAN%20S4%202A%20%28eneloop%29%20%231

It can also charger NiMH at 2A, due to the measurement pauses the average current is a bit below 2A.
Display shows 1528mAh and 1:10

EFAN%20S4%201A%20full%20%28eneloop%29%20%231

A full cell was not detected before it went to full charge current, but it is still a fairly fast detection. As usual it adds the two hour top-off charge.
Display shows 41mAh and 0:12

EFAN%20S4%202A%20%284xeneloop%29

The charger can charge 4 NiMH with 2A each at the same time.

EFAN%20S4%202A%2012V%20%284xeneloop%29

Charging at 4×2A requires about 2A from the power supply
Display shows 1514mAh ,1622mAh ,1564mAh ,1438mAh and 1:10, 1:14, 1:12, 1:07

Temp5614

There is not much heat when charging AA cells.
M1: 31.3°C, M2: 31.3°C, M3: 32.3°C, M4: 30.2°C, HS1: 41.9°C

Temp5615
M1: 40.2°C, M2: 30.0°C, HS1: 45.2°C

PoweronNiMHlong

The charger has the same startup sequence as LiIon, but in addition it uses a low charge current for the first 10 minutes.

Charging0.5ANiMH

As is common with all NiMH chargers the current is turned off to measure the NiMH voltage.

Charging2ANiMH

It is the same at 2A.

TrickleNiMH

The top-off/trickle charging is pulses

Trickle2APulsNiMH

Each pulse is about 1 second wide with 20 second between pulses, this gives an average current of 100mA when using 2A charging. The current will scale with selected charge current.


Discharging NiMH

Discharging is with a constant 0.5A current.

EFAN%20S4%200.5A%20discharge%20%28eneloop%29%20%231

The batteries are discharged to about 1.05V with a constant current.
Display shows 1847mAh and 3:34

EFAN%20S4%200.5A%20discharge%20%28eneloop%29%20%232

Display shows 1770mAh and 3:25

EFAN%20S4%200.5A%20discharge%20%28eneloop%29%20%233

Display shows 1862mAh and 3:36

EFAN%20S4%200.5A%20discharge%20%28eneloop%29%20%234

All 4 slots looks similar.
Display shows 1758mAh and 3:24

Temp5630

M1: 32.2°C, M2: 29.6°C, M3: 29.1°C, M4: 29.0°C, M5: 37.8°C, HS1: 40.0°C

DischargeNiMH

No pwm when discharging.


Capacity NiMH

A capacity test consist of charging the battery, discharging it and final charging it again. The discharge current is fixed at 0.5A, the two charge cycles can be selected from 0.5A, 1A, 1.5A and 2A, default is 0.5A

EFAN%20S4%201A%20capacity%20%28eneloop%29%20%231

Display shows 1818mAh and 7:55


Measuring Internal Resistance NiMH

The charger do not measure internal resistance in the slots, but uses an external probe.

RINiMH

The measurement is fairly consistent, but I am not very impressed with the results here.

RiNiMHlong

The measurement is done with two pulses, at the first pulse the display will show voltage a 0mOhm, at the next pulse the measured resistance will be shows.

RiNiMHZeroPulse

RiNiMHMeasurementPulse

These pulses looks fine enough.


Testing with 2830 volt and 4242 volt between mains and low volt side, did not show any safety problems.


Conclusion

This is a fairly advanced charger with discharge and capacity measurements and 3 LiIon chemistries. The color screen with touch works fine and may allow for updates later on. The charger shows all relevant data on the main screen, but only for one cell at a time.

Generally it is a good charger and analyzer, but capacity when charging NiMH (Discharge and capacity test is fine) and IR measurements are not reliable with the current software.


Notes

The charger was supplied by Efan for review.

Here is an explanation on how I did the above charge curves: How do I test a charger

My website with reviews of many chargers and batteries (More than 1000): https://lygte-info.dk/

LiiTokala Lii-500 Charger Review

$
0
0

The LiiTokala Lii-500 charger was released a couple of years ago, and there are already several reviews of it. So, why do we need yet another review? Because Banggood was nice enough to send me one to give it a review.

Okay, I also include both written and video reviews, and I will use it to analyse the discharge capacity of some popular cells (lithium-ion and NiMH), and determine how they degrade with age and use.

The LiiTokala Lii-500 is a 4-slot charger that accepts both lithium-ion cells as well as NiMH cells. It accepts a broad range of cell sizes, from AAA batteries up to 26650 batteries. It will also analyze cell capacity, using both charge capacity and discharge capacity. Finally, it can also function as a stand-alone USB power bank, with cells installed in it.


This is a video review of the charger I put up on Youtube:


The charger and specs can be found here:

https://goo.gl/3p6AAu

You can use the discount code “05083e” to buy the charger for $22 from Banggood. Or, sometimes it is on sale.

The Lii-500 was provided by Banggood for review purposes. I receive no other form of compensation.


Overview:

The LiiTokala Lii-500 is an ideal charger for most charging and analyzing needs of all your usual cells, both lithium-ion and NiMH. The main thing I like about it is its simplicity. The default settings of the charger whenever you power it on or insert a cell, are ideal for almost all your charging needs.

Standard charge rates for all 4 slots is 500mA, for all lengths and chemistries. Lithium-ion cells will charge to 4.2v, and NiMH cells will charge until they are detected as full (usually around 1.5v). When you power it on, if there are cells in it, that is the charge they will get. If you insert a cell into an empty slot while the unit is on, it will get a default charge of 500mA.

You may also very easily change the charge rate after inserting a cell or powering on the unit. Charge rates can be 300mA, 500mA, 700mA, and 1000mA. A simple press of the “Current” button changes the charge rate.

One thing I really appreciate is that this charger will fully charge very old worn-out NiMH cells, that most other chargers refuse to charge. Select the lowest charge rate for very old cells (300mA).


Analyzing:

In addition to charging, there are also two different kinds of analyzing functions on the LiiTokala Lii-500. These are selected using the “Mode” button, after power-on or inserting a cell.

The “NOR” analyzing function (which stands for Normal), does a discharge test to report the amount of mAh of capacity for a cell. There are 4 phases to this:

1. Charge the cell to full.
2. Discharge the cell to 2.8v (lithium-ion) or 0.9v (NiMH).
3. Display the amount of discharge capacity (this remains until you remove the cell).
4. Charge the cell back up to full (or you can remove the cell before this completes).

The NOR function is the most useful analyzing tool, since it reports the discharge capacity which is really what you want.

There are two discharge rates you can select: 500mA and 250mA. These are implicitly determined by whatever “Current” rate you use. A current of 300mA or 500mA will result in a discharge rate of 250mA. A current of 700mA or 1000mA will result in a discharge rate of 500mA. This is not obvious, but I suspect they do this to prevent higher discharge rates. If you were testing 4 cells, it might cause the unit to get too hot. All that discharge energy has to go somewhere.

The “FAST” charge will give you the amount of mAh put into a cell during a full charge. There are 3 phases:

1. Discharge the cell to 2.8v (lithium-ion) or 0.9v (NiMH).
2. Charge the cell back up to full.
3. Display the amount of capacity used to charge the cell.

This can give you a rough estimate of the cell’s capacity, especially with lithium-ion cells (because charging is very efficient). But it is not as accurate as a “Normal” test, especially with NiMH cells because charging NiMH is not as efficient. I would suggest not to bother with “Fast” testing, and instead do a proper test with the “Normal” function.


Interface:

Each of the 4 slots on the LiiTokala Lii-500 operates independently, so you can perform different tasks (charging or analyzing) and different rates of charge for each of the slots. You can also mix different lithium-ion cells and NiMH cells together.

There are 6 buttons used to operate the unit. 4 of the buttons are used to select each slot, and they are laid out nicely under each slot. Pressing one of those buttons will display all the information about that slot. Unfortunately, there is not a way to display information about all 4 slots simultaneously.

The other 2 buttons are a Mode button and a Current button.

Pressing the Mode button cycles through the different functions: Charge, “FAST” Analyzing, and “NOR” analyzing.

Pressing the Current button selects 300mA, 500mA, 700mA, or 1000mA charge rates.

The type of cell (lithium-ion or NiMH) is determined automatically by the Lii-500. Note that only lithium-ion cells meant to charge to 4.2v should be used in this device (which is the vast majority of cells). LiFePO4 cells should not be used.

After inserting a cell, the slot will default to a Charge function with a current of 500mA. You can change this within about 10 seconds by pressing the Mode and/or Current buttons. You can also change it at any time by pressing and holding the Mode button for 2 seconds.

Note that if you load in multiple cells before you turn on the unit, if you change the default function or current, it will affect all 4 slots. This is a nice time-saver if you’re dealing with several cells at once and don’t want to use the defaults.


Display:

The LiiTokala Lii-500 has a display panel that displays information about each slot.
Press a slot button (1, 2, 3, or 4) to display information about that slot.

Displayed, is the function going on (Charge, NOR, or FAST), as well as whether it is finished or not. Also displayed is the capacity in mAh. For charging, this is the amount of capacity put into the cell. For analyzing, this is the result of the analyzing function.

Other useful information is the amount of time that slot has been charging (or discharging), and the current being used for charging.

Finally, there is also an internal resistance of the cell displayed. As with almost all chargers, it’s not very accurate, but it can give you a reasonable idea of whether the cell has low or high internal resistance, and thus the health of the cell. I find it works best with lithium-ion cells. With NiMH, it appears to max out at 52mR for some reason.


Power bank:

The LiiTokala Lii-500 can also be used as a USB power bank, if you need to charge your USB devices and don’t have access to regular power. It will charge USB devices (such as a smart phone) at a rate of 1 amp. It must have lithium-ion cells loaded into its slots (use 2 or more for best results). Unfortunately, NiMH cells can not be used as a power bank energy source.

Using it as a power bank is very simple. Unplug the unit from the wall, load in some lithium-ion cells, and plug your USB cable into the back of the unit.

It’s not the most elegant-looking power bank, but it’s good to know you have the option to use your lithium-ion cells for this purpose if needed.


Error handling:

The LiiTokala Lii-500 charger handles several kind of errors, usually displaying “Null” on the screen if a problem is detected.

Most importantly, it detects whether you insert a cell the proper way around. This is called reverse-polarity protection. This is a very important function that most good chargers have, since it is rather easy to accidentally insert a flat-top lithium-ion cell the wrong way.

Other protection features are: overcharge and over discharge, short circuit, temperature, zero volt activation function, and recognition of a bad battery.


Contents:

The LiiTokala Lii-500 comes with:
- The Battery Charger
- A plug/adapter, with either a US plug or European plug
- A plug for a 12v car socket
- Manual


Specifications:

Construction: Plastic

Size: 16cm x 9.5cm x 3.5cm

Weight: 209g

Input: 2A 12v power, using either the wall adapter or car plug.

Output: standard USB, 5V 1A

Charge rate: up to 1A, 4 cells.

Protection: see above

Heat: The unit does get warm when charging 4 cells at 1 amp, otherwise it remains fairly cool.


My impressions:

Pros:
- Easy to use, good all-purpose charger.
- Fully-independent slots.
- Good default rates, applicable to all cells.
- Good termination for full charge of 18650 cells and NiMH.
- Power bank is a nice additional feature.

Cons:
- Due to its small size, it will get warm when charging 4 cells at the maximum rate.


Summary:

This is a nice general-purpose charger that is simple to use. Since it charges both lithium-ion and NiMH cells, it really is the only charger you’ll likely need. Being able to do discharge analyzing of your cells is a great way to check whether your old cells are performing as expected. While a 1 amp charge is not considered “fast”, it will charge most cells in about 3 hours, and not put any stress on them due to a high charge rate. Normally, I use use 500mA, because I’m not in a hurry and it’s applicable for all kind of cells.

That’s all for now. Thank you for reading.

"Review" Nitecore LC10 (USB battery Charger, powerbank, light)

$
0
0

I received the Nitecore LC10 form Nitecore for the review.
As usual for this kind of items, I have very little knowledge of electronics and all I can say about this product is my honest opinion as a user.

The LC10 is a simple charger that works both way: you can use it to charge cylindrical li-ion batteries, and as a power bank, using any cylindrical li-ion battery as a energy source. In addition, it features white LEDs that act like a flashlight and can be set at 3 output levels.

The LC10 comes in this simple box, without any accessories or instructions.


The LC10

On one end there are the 2 magnetic contact points for the battery. There is no indication of the polarity because the battery can be connected both ways.

On the other end there are the plugs (micro USB – Lightning – USB) nested.
The USB port is used to charge the cylindrical battery you have connected to the charger.

When you need to charge your device using the micro USB port or the lightning one, you need to pull the micro USB plug out of the port and either use it as it is, or add the adaptor for the lightning port that is included.

The middle part of the LC10 has a translucent plastic shell that has 3 colored (white, red) LEDs and on the other side there of it, there is a touch sensitive panel.

When you connect the cylindrical battery, the red LEDs will turn on and show the battery charge level

If you tap on the back of the translucent plastic shell, it will turn on the white LEDs on low mode. Tap again for switching to medium and again for high mode.

When you connect a device to charge, the red LEDs will show the battery charge level.

You can still tap on the back to turn on the white LEDs and change their brightness while the process continues.

Here’s a gif of the whole process.

The LC10 can charge with current up to 1 A, and works as a charger/powerbank only with li-ion batteries.
There is no way to select the charging current, that will depend on the input (ie power adapter, usb port…).

As far as I can tell with my eye about the brightness of the white LEDs, the brightness goes from a few lumen (1-2) of the low mode to a good 20 lumen of the high mode. This means that the LC10 can be used as a dim night light, to a light that can provide enough light to brighten short distances.

As an android user I had no use for the lightning port, so I removed the adapter and never carried it. However, if you are an apple user and you need to use the LC10 as a battery charger, and not a device charger, you have to remove the lightning adapter, in order to connect the micro USB port to the USB port. The adapter is small and you have to pay attention not to lose it.

The LC10 works with magnetic system so batteries need to have magnetic attractive poles. I found that protected batteries tend to work better (they are more strongly attracted) than non protected batteries.

In the end, for me, the Nitecore LC10 is a simple li-ion charger / powerbank that works well with my micro-USB based system and has the useful additional feature of a flashlight.
I wish it could charge nimh batteires.

Thanks to AntoLed for the camera help.

All my reviews, in italian and english, here: Lumenreviews.com

[Review] Nitecore SC4 (2*3A/4*1.5A, Ni-Mh/Li-Ion, 4 channel indipendently controlled, 300~3000mA charging current steps)

$
0
0

Hello to everyone laughing
Thanking them for the trust, today I will review the Nitecore SC4 that was kindly provided by Nitecore itself.


CLICK HERE to go to the official product's page on the Nitecore website.

I want to clarify that my reviews are made at an amateur level, so without the aid of science fiction tools or tests in secret and cutting edge
laboratories.Therefore, among the lines that follow, there will be my humble observations and even my humble opinions.


Official features:

- maximum charging speed up to 3000 mA
- charging current from 300 mA - 3000 mA is manually selectable
- compatible with 1,2V, 3,7V, 4,2V, 4,35V batteries
- high-definition color LCD screen displays charging parameter in real time
- utilizes energy saving function
- charging program optimized from IMR batteries
- automatically identifies battery type and selcts appropriate charching voltage and current
- capable of manually choosing charging voltage for LiFeP04 battery (3,7V) and Li-Ion battery (4,35V)
- automatically detects small capacity battery and select appropriate charging current
- capable of charging four battery simultaneously
- indipendently controls and charges each slot
- integrated USB port compatible with all USB devices
- automatically stops charging upon charging completion
- reverse polarity protection and short circuit prevention
- Li-Ion battery restoration
- overtime charging protection
- built-in temperature monitor to prevent overheating
- automatically detects internal resistance
- made from fire retardant/flame resistant PC material
- designed for optimal heat dissipation
- certified by RoHS, CE, FCC and CEC
- insured worldwide by Ping An Insurance (Group) Company of China, Ltd.


Where to buy it

The Nitecore SC4 is available to be purchased from the NitecoreStore.


The packaging

The Nitecore SC4 is sold inside a light black cardboard box with the yellow ends and therelief lettering.On the front stand out the image (in scale) of the product, the name of the company and the one of the product.
The writing "superb charger" is clearly emphasized to underline the high performances that can be achieved by the product, whose main characteristics are reported a little lower.


On the back are explained the general characteristics of this charger.A QRcode sends us back to the official page of the product on the Nitecore website and, finally, we find the company data and their website.


On one side there are the technical specifications concerning input and output together with CE, RoHS and FCC certifications


while on the opposite side there is a long list of all the SC4 compatible batteries.


Once we have extract everything from the package, we will find:
- SC4
- a power cable over 1 meter and 20 cm long with an Italian plug
- the warranty card
- the multilingual manual
Ps There is not the car charger as it is optional


Here is the manual page in the English language only.It is however possible to view (and download) the entire manual at THIS address.


The charger

The SC4 is the Nitecore's top-of-the-range charger.This is a product with a generous screen with two buttons and 4 independent slides able to charge 4 different batteries simultaneously at a maximum speed of 3000 mA.We also have the possibility to select a speed that goes from the 300 mA up to the 3000 mA already mentioned, selecting the speed in 100 mA steps (for a total of 28 selectable speeds).Inside the body there is the transformer which supplies the necessary current to the 4 slides.
The body is made of good-quality plastic able to delay flames and avoid, or at least slow down, the spread of a possible fire inside the apartment.Good general quality is perceived by touch.
On each sled, however capable of accommodating cells up to a maximum of 6.8 / 9 cm, a little drawing of a battery is imprinted to indicate the polarity that have to be respected.The two side slides are wider than the central ones and allow larger cells (like 26650) to be accommodated.The charger is however equipped with an anti-reverse polarity device and that prevent short-circuits.
The connectors on each slide are however protruding and adapt to the best of each battery,  as long as
at last 2.7 cm long (minimum distance between positive and negative connectors).


As mentioned earlier, we can put a multitude of batteries in the slides of this SC4.For demonstration purposes I put a 18350, an AA, a protected 18650 and an unsecured 26650.


At the top of the charger we find a USB output (does not have the powerbank function but it is useful if we want to charge some devices like the smartphone), the car adapter socket (which I remember to be optional and not included) and the one for the power cord included in the package.


On the two sides we find the name of the product.These cuts to dissipate the heat generated do not go unnoticed.


On the back we find the name Nitecore together with the certifications.


A yellow sticker report the batteries accepted by the SC4 and the speeds involved.


Once the power cable is connected, the monitor will turn on and all the information will be readable without problems thanks to the use of white and yellow on a black background.The screen has a good backlight that drops automatically after a while but
unfortunately it is not possible to completely turn off the screen manually.
Without batteries we can see that the screen is divided into three distinct zones: the "chg.mode", in which we can see or select the chemistry of the battery inserted in a given channel;the "channel status", in which we will see all the information about the battery;the "chg.channel", the area in which the charge progress of the cell is indicated.


How does it work

The SC4 automatically identifies both the chemistry (ie Li-Ion, Ni-Mh / Ni-Cd) and the capacity of the batteries, thus choosing the right charging program based on the inserted battery.The initial speed will also depend on the capacity of the battery itself (always detected automatically) so we will have a speed of 500 mA for small batteries (<1200 mAh) and 2000 mA for large batteries (> 1200 mAh).
Obviously in the settings we could change the speed, selecting it in a range between 300 and 3000 mA.
To change the speed it is necessary, with the battery inserted, keep the C key pressed and, when the charging speed will flash (under the channel status panel), press V to increase the speed of 100 mA at a time.With the V key pressed, the speed can be increased faster.To exit the setting after reaching the desired speed, just hold down the C key again.

As I said, the inserted battery is automatically identified, whether there is a Ni-Mh / Ni-Cd


than a Li-Ion.


As we all know, there are different types of Li-Ion and therefore may will be necessary to go to the settings to select a different one from the classic one (4.2V).As for the change of speed, you must hold down the C key, press C again to switch from the speed (located under "channel status") to the information that will be proposed under "chg.mode".By pressing the V key we can select the type of battery between Li-Ion and LiFePO4 in the voltages (4.3 and 3.7).To exit the settings after selecting the type of our battery, just keep the C key pressed.


When we have filled two or more slots, we may need to move between the channels to see information about each individual slot.To do this, just press the C key once, each time we move of one position and we will know which channel we are consulting thanks to the yellow "flags".


Once a specific channel has been selected, we will be able to know various information about that battery.Under the word "channel status" we will have information that will change automatically during the charge or that we can manually recall by pressing the V key.
Among the information that we will have available there will be the mAh stored during the charging process, the time spent,


the charging speed, the battery voltage


and the battery status (indicated with GOOD or POOR) with the value of its internal resistance.


Once the charge is completed on a given channel, we will have the word FULL in the "channel status" field and the cleats under "chg.channel" will be full.


Here is a little tab with the various times I found reloading some cells at certain speeds (type of battery, starting V, current speed, time spent, end V).


I also remember that the SC4 is equipped with a USB output that can power large and small devices.This does not have a powerbank function (ie it does not use the capacity of the batteries to charge other devices) but uses part of the current that enters from the power cable.
Here is a LA30 charging


and a common powerbank.


The SC4 has the function of battery recovery (it is able to charge those batteries that have 0V).Simply insert a damaged battery into the slide and simultaneously press the C and V keys to start charging.
Nitecore also advises to dispose of batteries that fail
properly to overcome this type of charging as they could be seriously damaged and could constitute a serious danger to our person.


Weights and dimensions

The Nitecore SC4 measures 16.5 x 11 x 4.7 cm and weighs 386 gr.

Next here is the dimensional comparison with a big BIC lighter and a 18650


and an Xtar VC4 and an Opus BT-C3100.


Here is a shot demostrative video to see the behavior of the display and the charger in detail


Personal considerations

The Nitecore SC4 is a battery charger with 4 slides and 4 independent channels with not excessive dimensions and good build quality.
I really appreciated the possibility to manually set the charging speed from 300 to 3000 mA.This allows us to choose different speeds unlike other products that have 3-4 pre-set positions but which do not allow us to set an ideal speed for a given battery.
The slides flow well and I have not detected problems or malfunctions even though I would have liked to be able to manually turn off the backlight of the monitor.
I found the USB port comfortable and not running from powerbank has no importance given the size of the charger itself ... it would not be a compact powerbank unlike other Nitecore products that operate as powerbanks.
The only flaw in my sample is a slight buzz (coil noise) given by the integrated transformer.The "noise" is not synonymous with malfunctions and does not affect the correct operation of the device.

What do you think of this battery charger?Would you buy?

Test/review of Charger Woyum ZK6

$
0
0

Charger Woyum ZK6

DSC_0117

DSC_0118DSC_0119

This is a 6 slot NiMH charger with a nice display and it is usb powered.

DSC_0071DSC_0072DSC_0073DSC_0074

I got the charger in a cardboard box.

DSC_0114

The pack contained the charger, a usb cable and a instruction sheet.

DSC_0120

The charger is powered from usb

DSC_0498

Each slot has a red/green led, that will show red while charging and green at all other times.

DSC_0504

The charger can show 3 values for each cell, here it is charged capacity.
The circle peripheral is animated while charging, the dial and short arc shows the selected cell.

DSC_0505

Cell voltage.

DSC_0506

And time. It will change between them for the selected slot.
A single press on the button will move to the next slot, this sequence will always include all 6 slots, i.e. also empty slots.

DSC_0507

A double click enters current configuration for that slot. The current is changed with single clicks between 300, 400, 500 and 1000mA.
The response when clicking is a bit slow.

DSC_0122DSC_0123
DSC_0124

The charger has the typically two level slots used for AA and AAA batteries.

supportedBatteryTypes

supportedBatterySizesDSC_0127DSC_0126


Measurements charger


  • Power consumption when idle is 15mA from usb.
  • Voltmeter shows 0.01V, but actual resolution is about 0.07V
  • Voltmeter is within 0.08V
  • Charger will start charging at about 0.55V
  • Charger will discharge batteries with less than 0.1mA when not powered
  • Charge will restart charging after power loss, or battery insertion.


Woyum%20ZK6%201A%20%28eneloop%29%20%231

This is a classic -dv/dt charging and termination where the cell gets a bit warm at the end.
Display shows 2103mAh in 2:26

Woyum%20ZK6%201A%20%28eneloop%29%20%232

Display shows 2152mAh in 2:32

Woyum%20ZK6%201A%20%28eneloop%29%20%233

Display shows 2062mAh in 2:25

Woyum%20ZK6%201A%20%28eneloop%29%20%234

Display shows 2179mAh in 2:34

Woyum%20ZK6%201A%20%28eneloop%29%20%235

Display shows 1968mAh in 2:09

Woyum%20ZK6%201A%20%28eneloop%29%20%236

All the slots looks about the same.
Display shows 2143mAh in 2:22

Woyum%20ZK6%201A%20%28eneloopPro%29%20%231

Display shows 2705mAh in 3:12

Woyum%20ZK6%201A%20%28leise25%29%20%231

The two high capacity cells are also handled nicely
Display shows 2712mAh in 3:12

Woyum%20ZK6%200.3A%20%28eneloop%29%20%231

Using the lowest charge current slows down the termination, but the charger do terminate.
Display shows 2157mAh in 9:22

Woyum%20ZK6%200.5A%20%28eneloopAAA%29%20%231

The AAA cell looks nice.
Display shows 748mAh in 1:50

Woyum%20ZK6%20auto%20%28eneloop%29%20%231

Usual the charger will automatic select current, this time it selected 300mA (My current sensor adds some resistance making the battery look older).
Display shows 2087mAh in 9:06

Woyum%20ZK6%201A%20full%20%28eneloop%29%20%231

A full battery takes some time to detect when using -dv/dt, here it is done in 14 minutes, this is fairly fast for this type of charger.
Display shows 201mAh in 0:14

Woyum%20ZK6%200.5A%20%286xeneloop%29

With 6 batteries it need about 1.5A from USB power.

Woyum%20ZK6%200.5A%20%286xeneloop%29a

Woyum%20ZK6%201A%20%284xeneloop%29

With 4 batteries at 1A the current is 1.8A from USB power.
Display shows 2068mAh,2089mAh,2092mAh,2195mAh in 2:27,2:26,2:27,2:37

Woyum%20ZK6%201A%20%284xeneloop%29a

Temp5691

M1: 47.4°C, M2: 43.4°C, M3: 40.7°C, M4: 37.7°C, HS1: 65.3°C
The charger gets a bit warm around the electronic, this is heating slot #1, especially at full power.
I would recommend when charging at 1A to use slot #3..#6 and leave #1 and #2 empty, this means cooler batteries (When charging 6 batteries the total current will be lower, this will probably also mean less heat).

Temp5692

M1: 45.4°C, HS1: 52.3°C

Poweron

The charger needs a few seconds to start.

CurrentChange

It is possible to change current at any time.

Charging

As usual with NiMH chargers the current is turned off to measure the voltage.


Conclusion

The charger is charging NiMH cells fine and due to the current settings it can be used for older cells also. Using the 6 slots do not make the charger faster, because it will use a lower current, for the fastest charging up to 4 slots can be used.
The user interface is fine as long as charging current is selected automatically, but manually selecting current for a couple of cells requires a lot of button presses!

I will rate it as a good charger.


Notes

The charger was supplied by Woyum (Goeasy Charger Technology) for review

Here is an explanation on how I did the above charge curves: How do I test a charger

My website with reviews of many chargers and batteries (More than 1000): https://lygte-info.dk/


(Review) MiBoxer C8 NiMH-NiCd-Li-ion Battery Charger

$
0
0

Supplied via MiBoxer for product review

MiBoxer C8 is a intelligent charger with temperature adjustment function. C8 has 8 independent charging slots, it can charge 8 different batteries at the same time, it has single channel charging up to 1.5A. You can choose different charging currents to meet the needs of slow charge or fast charge batteries and the charger will display the status of each rechargeable battery when charging. This charger is the largest charger in the MiBoxer lineup doubling its previous chargers capacity, although this charger doesn’t do 3.0A per slot it makes up for it in its 8 slots capacity.

This charger can be bought on Amazon for $49.99

https://www.amazon.com/Universal-Battery-Charger-MiBOXER-Display/dp/B07G...

Specifications Listed by Manufacturer

Apply to:
Li-ion(4.2V/4.35V) IMR/INR/ICRLiFePO4 (3.6V)Ni-MH/Ni-Cd (1.48V)Apply to:10340 / 10350 / 10440 / 10500 / 12340 / 12500 / 12650 / 13450 / 13500 / 13650 / 14350 / 14430 / 14500 / 14650 / 16500 / 16340(RCR123) / 16650 / 17350 / 17500 / 17650 / 17670 / 18350 / 18490 / 18500 /18650 / 18700 / 20700 / 21700 / 22500 / 22650 / 25500 / 26500/ 26650 / A / AA / AAA / AAAA / C / SC

Parameters :
Input Voltage: DC12V 3A (5.5*2.1mm)
Output Voltage: 4.2V±1% / 4.35V±1% / 3.6V±1% / 1.48V±1%
Output Current: Li-ion / LiFePO4 ( MAX 1.5A x 4 / 0.8A x 8 ) Ni-MH / Ni-Cd ( MAX 1A x 8 )
Size: 7in X 5.5in X 1.3in

Package Includes :
1* C8 Smart Battery Charger
1* US Wall Charger Cable
1* User Manual

Packaging:

Weight: 1.48 pounds
Product Weight:1.1 pounds
Product Size (LxWxH) 1.3 × 5 × 6.5 inches

Front

Back

Contents:

1* C8 Intelligent Battery Charger
1* Adapter
1* manual

Included AC-DC adapter outputs DC12V 3A Max

Physical Attributes:

The C8 is made out of PC+ABS fire-prevention material, the plastic of the unit is textured and it doesnt contract fingerprints and is high quality feeling. The buttons on the unit are rubberized and may see some wear after long term use. Every slot is eqipped with a high precision sliding negative bracket that moves very smoothly and is made very well. The LCD is very bright and crisp and comes with a plastic seal over it for protection. The charger body can hold up to 8 18650s in unison or only 4 26650s in alternating slots. Unlike other chargers such as the Opus this charger makes full contact with protected 26650s on both ends and holds them in well.

Front

Back

Plugged in

Full of 18650s

Can only hold 26650s on every other slot but can hold 18650s in between

Cooling the Unit:

This unit doesnt have active cooling, it uses thermal throttling if the batteries get too hot the unit turns down the current

Measurements:

The unit is approximately 5.5” × 7.1” or 14cm × 18cm
The vernier wasn’t big enough to measure the top length but I measured from where it stopped being long enough and added them together and got ~ 7.1”

Display and selectable modes:

The C8 comes equipped with a large digital LCD display, the display shows voltage, current, charging time, mode, battery type, internal resistance and battery capacity data. The charger can repair “0V” batteries and when charging 4 batteries it goes up to 1.5A for Li-ion / LiFePO4, and up to 0.8A when charging 8 Li-ion / LiFePO4. Also its up to 1.0A for when you charge 8 Ni-MH / Ni-Cd rechargeable batteries. The best feature of this new UI is that you can set the charge current of all batteries inserted by the click of one button instead of going through each battery and choosing the current.


Amperage

Battery types supported:

-NiMH and NiCd
-Lithium-ion (4.2V ICR, INR, IMR, etc.)
-Lithium Iron Phosphate

Battery Sizes Supported:

10340 / 10350 / 10440 / 10500 / 12340 / 12500 / 12650 / 13450 / 13500 / 13650 / 14350 / 14430 / 14500 / 14650 / 16500 / 16340(RCR123) / 16650 / 17350 / 17500 / 17650 / 17670 / 18350 / 18490 / 18500 /18650 / 18700 / 20700 / 21700 / 22500 / 22650 / 25500 / 26500/ 26650 / A / AA / AAA / AAAA / C / SC

UI:
Setting battery type- insert batteries into any slots then double click the [mode] button, then the battery types will begin flashing and you can cycle through the types with the [mode] button once again.
Setting the charge current- long press the [mode] until the amperage indicator begins to blink, then short pressed to the [mode] key will cycle through the currents, (0.1-1.5A)
Setting functions of every slot at once- long pressing the [slot] key will make all slot symbols flash in unison, from there you can long press the [mode] key to set the currents of all slots at once, if you double tap the [mode] key it will change all slots battery types

Wish list:
1- Test mode, I wish that this charger also had a drain and test function to determine capacity for all 8 slots.
2- Quick charge, I wash this charger has a quick charge function similar to the C4-12s 3.0A charging capacity, even if ot only charged quickly on the outer 2 slots or something similar.
3- ability to charge 8 26650s, it may not be necessary but if you make an 8 bay charger you may as well make it fit 8 26650s

Final thoughts:
All things considered the MiBoxer C8 is a great charger for the price, the 8 slots in this charger is great especially because not many chargers on the market have 8 slots. This charger is good if you have a flashlight like the BLF GT because instead of charging one set of 4 batteries at a time you can charge all 8 and have the light ready to go.

My favorite part of this charger is the intelligent charging feature, this feature makes it easy to use for anybody because all they have to do is put a battery in and let the charger do the rest, especially if you have it and someone who doesnt know how to use the charger uses it you dont have to worry about teaching them how to use it, its simply plug and play.

https://www.amazon.com/Universal-Battery-Charger-MiBOXER-Display/dp/B07G...

Current collection Olight -S1R turbo S -I3E EOS -S mini brass -S2A -X7R -S mini copper Sofirn -SP33 Nitecore -TM06S Thrunite  -TN42  ThorFire -S70S -BLF Q8 -C8s Manker -Mk35 Noctigon -Meteor M43 -Emisar D4 -Emisar D1 -Emisar D1S Rofis -TR31 Lumintop - BLF GT -GT Mini 


Product Reviews

Chargers:

Opus BT-C3100MiBoxer C4-12

Flashlights:

BLF GTTN42TG06SEmisar D4GT Mini

Test/review of Miboxer C8 Smart charger

$
0
0

Miboxer C8 Smart charger

DSC_0696

DSC_0488
DSC_0695

This is a large charger from Miboxer that can handle up to 8 cells, each with automatic current selection and lots of information. The charger supports NiMH and 3 LiIon chemistries with support for many battery sizes.

DSC_0423DSC_0425

DSC_0424

I got the charger in a cardboard box with specification on it.

DSC_0483

The pack included the charger, a power supply and a instruction sheet.

DSC_0494

The charger requires 12V 3A power.

DSC_0490

The user interface is two buttons and a large display.
A short press on the SLOT button will switch between slots, holding the button down will select all slots.
A long press on the MODE button will allow adjustment of charge current for the selected channel (with short presses).
To adjust chemistry double click MODE button and then select with short presses.
The interface is easy to use and fairly logical.

DSC_0688

All segments are shown during power on.

DSC_0687

Display when the charger is idle without batteries.

DSC_0689

A NiMH battery is put into slot #4, the charger has not calculated internal resistance yet.

DSC_0690

Internal resistance is calculated and charger has selected 0.25A as initial charger current, it might be adjusted later on.
There is two numbers that toggles: The first is internal resistance and charge current (mOhm/A), the second is charged capacity and charge time.

DSC_0692

A LiIon battery in slot #5 with 105mOhm internal resistance.

DSC_0491

Specifications are listed on the back of the charger with small black letters.

DSC_0492DSC_0493

The charger has the usual slider construction. It can handle from 28mm to 74mm, this means even the longest cells.

supportedBatteryTypes

supportedBatterySizesDSC_0705

DSC_0706DSC_0707


Measurements charger


  • Power consumption when idle is 0.3 watt
  • Without power it will discharge a LiIon battery with about 2mA
  • Without power it will discharge a NiMH battery with about 0.2mA
  • At 0V battery voltage the charger will charge with 1.5mA and report “Err”.
  • Up to 1.9V the charger assumes NiMH
  • Above 2V the charger assumes LiIon
  • The charger will restart when a battery is inserted or power is cycled.
  • The meter is within 0.01V and works from 0.02V

Charging 4.2V LiIon

Manual charging current: Auto, 0.1A, 0.2A, 0.3A, 0.5A, 0.6A, 0.8A, 1A, 1.2A, 1.5A
Maximum actual current depends on number of batteries, charger can only deliver 1.5A with up to 4 batteries and 0.8A with 8 batteries.

Miboxer%20C8%20auto%20%28SA18650-33%29%20%231

I let the charger automatic select current here, it started at 1A and increased to 1.5A, the termination is at about 50mA after a nice CC/CV charging.
Display shows 3016mAh in 3:12, 64mOhm

Miboxer%20C8%20auto%20%28SA18650-33%29%20%232

Display shows 3194mAh in 4:40, 80mOhm

Miboxer%20C8%20auto%20%28SA18650-33%29%20%233

Display shows 3177mAh in 5:00, 93mOhm

Miboxer%20C8%20auto%20%28SA18650-33%29%20%234

Display shows 3275mAh in 3:36, 76mOhm

Miboxer%20C8%20auto%20%28SA18650-33%29%20%235

This time there must have been some contact resistance, the current was selected very very low and after a day and a half the charger stopped, but the battery was not fully charged (But nearly).
Display shows 3188mAh in 33:44, 407mOhm

Miboxer%20C8%20auto%20%28SA18650-33%29%20%236

Display shows 2984mAh in 7:42, 119mOhm

Miboxer%20C8%20auto%20%28SA18650-33%29%20%237

Display shows 3162mAh in 10:20, 146mOhm

Miboxer%20C8%20auto%20%28SA18650-33%29%20%238

Display shows 3234mAh in 13552, 197mOhm

Miboxer%20C8%201.5A%20%28SA18650-33%29%20%231

Manually selecting 1.5A gives a fast charging and is within specifications for all newer 18650 cells.
Display shows 3222mAh in 3:36, 95mOhm

Miboxer%20C8%201A%20%28PA18650-31%29%20%231

Display shows 2891mAh in 4:39, 113mOhm

Miboxer%20C8%201A%20%28SA18650-26%29%20%231

Display shows 2606mAh in 4:08, 205mOhm

Miboxer%20C8%201A%20%28BE18650-26%29%20%231

With manually selected current all batteries are charged nicely and as fast as possible.
Display shows 2283mAh in 4:58, 213mOhm

Miboxer%20C8%20auto%20%28AW18350-IMR%29%20%231

This old and worn down cell I tried automatic on and it charged the cell nicely.
Display shows 208mAh in 2:20, 632mOhm

Miboxer%20C8%200.5A%20%28KP14500-08%29%20%231

A smaller cell where I manually selected the current is charged fine.
Display shows 736mAh in 1:57, 237mOhm

Miboxer%20C8%201.5A%20%288xSA18650-33%29

Here I selected 1.5A current, but the charger reduced the charger current due to the number of cells. The charging looks fine.
  1. Display shows 3241mAh in 5:16, 67mOhm
  2. Display shows 3137mAh in 4:49, 43mOhm
  3. Display shows 3305mAh in 5:01, 35mOhm
  4. Display shows 3429mAh in 5:01, 61mOhm
  5. Display shows 3308mAh in 4:56, 33mOhm
  6. Display shows 3053mAh in 4:46, 36mOhm
  7. Display shows 3310mAh in 5:03, 34mOhm
  8. Display shows 3221mAh in 4:56, 45mOhm

    Miboxer%20C8%201.5A%20%284xSA18650-33%29

    With four cells I could use 1.5A charge current.
  9. Display shows 3279mAh in 3:35, 64mOhm
  10. Display shows 3204mAh in 2:49, 39mOhm
  11. Display shows 3236mAh in 2:55, 35mOhm
  12. Display shows 3220mAh in 2:52, 40mOhm

    Miboxer%20C8%201.5A%2012V%20%288xSA18650-33%29

    The charger uses up to about 2.5A from 12V when charging at full current.
  13. Display shows 3264mAh in 6:00, 181mOhm
  14. Display shows 3135mAh in 4:54, 43mOhm
  15. Display shows 3301mAh in 5:06, 32mOhm
  16. Display shows 3283mAh in 5:03, 44mOhm
  17. Display shows 3327mAh in 5:04, 32mOhm
  18. Display shows 3108mAh in 4:57, 40mOhm
  19. Display shows 3264mAh in 5:06, 41mOhm
  20. Display shows 3206mAh in 4:55, 44mOhm

    Temp5704

    M1: 31.0°C, M2: 33.2°C, M3: 33.8°C, M4: 34.6°C, M5: 35.1°C, M6: 35.2°C, M7: 34.4°C, M8: 32.9°C, HS1: 44.7°C
    With 8 batteries the temperature is fairly low.

    Temp5705
    HS1: 42.5°C

    Temp5714

    M1: 41.0°C, M2: 45.9°C, M3: 45.6°C, M4: 42.2°C, HS1: 63.4°C
    With 4 batteries both the batteries and the charger gets hotter.

    Temp5715
    M1: 49.3°C, M2: 47.6°C, HS1: 53.5°C

    PoweronLiIon

    The charger uses a internal resistance check to decide the charge current and will then ramp the charge current slowly up.

    CurrentChangeLiIon

    It is possible to override the current setting at any time.

    ChargingLiIon

    The charger turn the charge current off the check the voltage.


    Charging 4.35V LiIon

    Miboxer%20C8%201A%20%28LG18650-30%29%20%231

    The high voltage LiIon looks fine.
    Display shows 2931mAh in 3:32, 113mOhm


    Charging 3.6V LiFePO4

    Miboxer%20C8%201A%20%2818650-LiFePO4%29%20%231

    Display shows 1256mAh in 1:51, 82mOhm

    Miboxer%20C8%200.5A%20%28SO14500-LiFePO4%29%20%231

    LiFePO4 is charger to 3.6V and the charger stops when the battery is full, this looks fine.
    Display shows 576mAh in 2:03, 113mOhm


    Measuring Internal Resistance LiIon

    RiLiIon

    The results looks good and the consistency is also fine (I was a bit lazy and only checked 4 slots).


    Charging NiMH

    Charging current: Auto, 0.1A, 0.2A, 0.3A, 0.4A, 0.5A, 0.6A, 0.7A, 0.8A, 0.9A, 1A

    Miboxer%20C8%201A%20%28eneloop%29%20%231

    The NiMH charging uses -dv/dt termination, here I used manual current selection. There is no top-off or trickle charge and none is needed.
    Display shows 1782mAh in 2:14, 51mOhm

    Miboxer%20C8%201A%20%28eneloop%29%20%232
    Display shows 1715mAh in 2:08, 63mOhm

    Miboxer%20C8%201A%20%28eneloop%29%20%233

    Display shows 1707mAh in 2:10, 79mOhm

    Miboxer%20C8%201A%20%28eneloop%29%20%234
    Display shows 1705mAh in 2:04, 90mOhm

    Miboxer%20C8%201A%20%28eneloop%29%20%235

    Display shows 1783mAh in 2:12, 185mOhm


    Miboxer%20C8%201A%20%28eneloop%29%20%236

    Display shows 1681mAh in 2:18, 105mOhm

    Miboxer%20C8%201A%20%28eneloop%29%20%237

    Display shows 1775mAh in 2:11, 66mOhm


    Miboxer%20C8%201A%20%28eneloop%29%20%238

    Display shows 1743mAh in 2:15, 148mOhm

    Miboxer%20C8%201A%20%28eneloopPro%29%20%231

    Display shows 2258mAh in 2:50, 69mOhm

    Miboxer%20C8%201A%20%28leise25%29%20%231

    The two high capacity batteries is charged fine with a -dv/dt termination.
    Display shows 2293mAh in 2:55, 55mOhm

    Miboxer%20C8%200.5A%20%28eneloopAAA%29%20%231

    The AAA is charged fine.
    Display shows 666mAh in 1:53, 92mOhm

    Miboxer%20C8%200.1A%20%28eneloop%29%20%231

    Here I selected a very low charge current, this means a -dv/dt termination will not work. The charger terminated anyway and at about the correct time.
    Display shows 1725mAh in 18:43, 100mOhm

    Miboxer%20C8%201A%20full%20%28eneloop%29%20%231

    With -dv/dt termination the charger will be slow to termination on a full cell, here it took about 15 minutes.
    Display shows 60mAh in 0:14, 53mOhm

    Miboxer%20C8%20auto%20%28eneloop%29%20%231

    The automatic current selection can also be used for NiMH.
    Display shows 1744mAh in 4:01, 71mOhm

    Miboxer%20C8%201A%20%288xeneloop%29

    With NiMH the charger can charge 8 batteries with full current at once.
  21. Display shows 1890mAh in 2:24, 110mOhm
  22. Display shows 1794mAh in 2:13, 52mOhm
  23. Display shows 1880mAh in 2:14, 47mOhm
  24. Display shows 1847mAh in 2:12, 51mOhm
  25. Display shows 1750mAh in 2:07, 54mOhm
  26. Display shows 1766mAh in 2:07, 37mOhm
  27. Display shows 1890mAh in 2:14, 35mOhm
  28. Display shows 1870mAh in 2:13, 41mOhm

    Miboxer%20C8%201A%2012V%20%288xeneloop%29

    The charger uses about 1.8A from 12V
  29. Display shows 1844mAh in 2:13, 101mOhm
  30. Display shows 1834mAh in 2:12, 40mOhm
  31. Display shows 1905mAh in 2:14, 34mOhm
  32. Display shows 1879mAh in 2:15, 38mOhm
  33. Display shows 1724mAh in 2:03, 34mOhm
  34. Display shows 1813mAh in 2:09, 38mOhm
  35. Display shows 1869mAh in 2:12, 29mOhm
  36. Display shows 1847mAh in 2:03, 64mOhm

    Temp5730

    M1: 41.4°C, M2: 46.3°C, M3: 46.7°C, M4: 47.6°C, M5: 49.6°C, M6: 48.3°C, M7: 48.3°C, M8: 43.8°C, HS1: 70.2°C
    8 NiMH batteries gets warmer than 8 LiIon batteries when charging at full current, but it is acceptable.

    Temp5731

    M1: 49.7°C, M2: 48.5°C, HS1: 55.9°C

    PoweronNiMH

    The charger uses a internal resistance check to decide the charge current and will then ramp the charge current slowly up.

    CurrentChangeNiMH

    Current can be changed at any time.

    ChargingNiMH

    As is common with all NiMH chargers the current is turned off to measure the NiMH voltage.


    Measuring Internal Resistance NiMH

    RiNiMH

    The results looks good and the consistency is also fine.


    Conclusion

    The charger works fine and has a good user interface. For NiMH and 4.2V LiIon the charger is very easy to use, just put the batteries in and it will do everything, the automatic current selection may not select the best current, but it will not cook batteries.
    To get a more controlled charge current it is easy to set charge current for one or for all slots, it is also fairly easy to select 4.35V or 3.6V charge voltage.
    Some people like to see a percent, some a voltage, this charger shows everything at the same time including internal resistance, but only for one cell at a time.

    I will rate it as a good charger.


    Notes

    The charger was supplied by Miboxer for review.

    Here is an explanation on how I did the above charge curves: How do I test a charger

My website with reviews of many chargers and batteries (More than 1000): https://lygte-info.dk/

Test/review of Charger ISDT A4

$
0
0

ISDT A4

DSC_9847

DSC_9849DSC_9850

A very simple charger to look at from ISDT, but it can do more than the looks shows. It will charge NiMh, LiFePO4 and regular LiIon batteries in AA and AAA size.

DSC_9837DSC_9838DSC_9839DSC_9840

I got the charger in a cardboard box

DSC_9842

The pack included the charger, a usb cable and a instruction sheet.

DSC_9848

The charger is usb powered.

DSC_0164

There is one multicolor led for each slot. The color and blink pattern are used to show chemistry and charge state:


  • Orange/yellow: NiMH
  • Purple: LiFePO4 or LiIon
  • Green: Charge done
  • Red: Error, number of flashes shows type.
  • Up to 25% charge: Single flash
  • 25% to 75% charge: Double flash
  • More than 75% charge: Triple flash

DSC_9855DSC_9856DSC_9853

The charger uses the typical design with two level slots for AA/AAA batteries. This design limits its usability for LiIon, it will only work with button top unprotected cells. The plus pole will not connect to a flat top and the slot is too short for a protected cell.

supportedBatteryTypes

supportedBatterySizes

DSC_9851DSC_9852

DSC_9854

Only unprotected button top cells will fit.


Measurements charger


  • Power consumption when idle is 60mA from usb.
  • When charging the usb power draw is kept at 500mA or lower.
  • Without power it will not discharge a batteries with any significant current

Charging 4.2V LiIon

ISDT%20A4%20%28PK14500%29%20%231

The charge current for LiIon is about 0.5A, but there is not much CC/CV shape in the charge curve, instead it trickle charges the battery to 4.2V

ISDT%20A4%20%28PK14500%29%20%232
ISDT%20A4%20%28PK14500%29%20%233
ISDT%20A4%20%28PK14500%29%20%234

The other 3 slots look similar.

ISDT%20A4%20%28xxPK14500%29

Here I put a few more batteries in the charger and the current dropped.

PoweronLiIon

The charger need less than 5 seconds to get up in current, it looks like the 0.1ohm test resistance I have added is reducing the charge current some. The charger is turning voltage off to measure voltage.


Charging 3.6V LiIon (LiFePO4)

The charger can automatic recognize LiFePO4, it must be related to the pulsing charge current.

ISDT%20A4%20%28SO14500-LiFePO4%29%20%231

The charger uses low current up to 3V

Temp5657

M1: 33.4°C, M2: 32.8°C, HS1: 36.6°C
I only have two test button top LiFePO4 14500 batteries, these are handled without much heat.

PoweronLiFePo4

Because a LiFePO4 often is below 3V when starting to charge, the initial charging is at low current.


Charging NiMH

ISDT%20A4%20%28eneloop%29%20%231

This looks like a fairly good -dv/dt charge curve with slightly below 1A current.

ISDT%20A4%20%28eneloop%29%20%232
ISDT%20A4%20%28eneloop%29%20%233
ISDT%20A4%20%28eneloop%29%20%234

All 4 slots is about the same, but the reaction time when the battery is full varies a bit.

ISDT%20A4%20%28eneloopPro%29%20%231
ISDT%20A4%20%28leise25%29%20%231

The two high capacity batteries are also charged fine.

ISDT%20A4%20%28eneloopAAA%29%20%231

The AAA is charge at 1A and termination is slightly premature.

ISDT%20A4%20%284xeneloop%29

With 4 batteries the current is reduce significantly, probably to keep the usb power draw at about 500mA

Temp5639

M1: 40.1°C, M2: 42.6°C, M3: 42.1°C, M4: 40.4°C, M5: 43.8°C, HS1: 47.1°C
With 4 NiMH batteries in this compact format there is some heat.

PoweronNiMH

The charger needs about 7 second to start a NiMH charger, mostly because it turns the current on gradually.

BatteriesNiMH

The current changes when putting in or taking out batteries.


Conclusion

This charger looks like a AA/AAA charger, but it also handles small LiFePO4 and LiIon cells, all of them with automatic detection.
It is important to note that the charger only works with unprotected button top cell, this means all common NiMH, some LiFePO4 and few LiIon.
The charger only draws 0.5A from usb, it makes it a fairly slow charge when it has a full load of batteries, but it can be used with just about any usb outlet.
The LiIon charging is not really a CC/CV charge, but more like a CC charge with pulses to fill the cell.
With LiFePO4 it looks better, it is a CC charger, but it do not supplement with pulses.
With NiMH the charger works fine.

For NiMH and LiFePO4 I will call it fairly good and it is very compact.


Notes

The charger was supplied by Banggood for review.

Here is an explanation on how I did the above charge curves: How do I test a charger

My website with reviews of many chargers and batteries (More than 1000): https://lygte-info.dk/

(Review) Folomov A1 Magnetic Charger

$
0
0

Supplied via folomov for product review

This is a short review of the single battery charger from folomov, this charger acts as a power bank as well with the male/female USB connector. The A1 is a simple and fuss-free Lithium Ion charger with a useful power bank feature. the charger itself is very small, small enough to fit in a pocket and be there when you need to use it as a power bank in an emergency.

You can purchase this charger on amazon for $8.87

https://www.amazon.com/FOLOMOV-A1-Magnetic-Charging-Discharging/dp/B07BF...

Specifications Listed by Manufacturer

-Small magnetic USB battery charger at 1000mA charging speed

-Unique Power bank function can output power at 1000 mA to charge your cellphone

-Built in indicator to let you know if the battery is charging or discharging. It glows green when charging and blue when discharging

-It has reverse polarity protection and have red indicator to remind the reverse contact and Can automatic activate a 0V battery

-It provides constant current and stable voltage for safe and efficient charging; BATTERY NOT INCLUDED

Packaging

Weight: 46g
Product size (L x W x H): 5.5 × 3.5 × 0.8 Inches

Contents

1* A1 Charger

Physical Attributes

The charger is made of plastic mostly with some rubber coating on the wires. It also has 2 neodymium magnets for the positive and negative leads. This charger can hold any battery size all the way up to a 32650.

Modes

The A1 has a charge mode which charges the battery at 1.0A , there is also a discharge mode which charges a device at 5V 1A. The A1 has a 0V activation feature and over-current & over-discharge protection with a constant current & constant voltage charging algorithm.

Charge

Discharge

Supported Batteries/Technical Data

Final Thoughts

The Folomov A1 magnetic charger is a great charger if you don’t want to pull out a big charger for just 1 battery, it charges fairly quick and does the job well if you need a quick charge. The discharge feature is great if you want to charge a USB device such as a phone and your on the go, you can just pull out your flashlight and use some of the battery to charge up your mobile device. Overall I recommend this product for its usefulness and simplicity and size.

Current collection Olight -S1R turbo S -I3E EOS -S mini brass -S2A -X7R -S mini copper Sofirn -SP33 Nitecore -TM06S Thrunite  -TN42  ThorFire -S70S  -C8s Manker -Mk35 Noctigon -Meteor M43 -Emisar D4 -Emisar D1 -Emisar D1S Rofis -TR31 Lumintop - BLF GT -GT Mini 


Product Reviews

Chargers:

Opus BT-C3100MiBoxer C4-12MiBoxer C8Folomov A1

Flashlights:

BLF GTTN42TG06SEmisar D4GT MiniS70STM36EDC-C4BLF Q8

"Review" Nitecore Q6 (Fast charger for IMR and Li ion cells)

$
0
0

I received the Nitecore Q6 for the review from Nitecore.
While I think I can provide some useful information about flashlights from a technical point of view, when it comes to chargers, I have very little knowledge. So what I can do is give you my thoughts as a flashlight user, maybe with a few years of flashlight passion on my shoulders.

The Nitecore Q6 is a 6 slot IMR battery charger. This doesn’t mean that it won’t charge regular li-ion cells, but that the Q6 uses the best algorithm suited for IMR batteries. It has 6 independent slots, and is able to deliver 2A over a single slot, or 1 A over 4 slots or 0.65 A over 6.

It comes in this box

The Q6 with manual and power adapter.

The underside of the q6 has silicone pads and shows the supported cells.

The design is the typical of chargers, a prism with rounded edges.

Each slot has its own LED status indicator: red when charging, green when charged. The contact points are raised both for the positive and negative poles of the slot, so you can charge button and flat top cells.
The slots are wide and long enough to accept even bigger cells like 20700 and 21700.

The Q6 has 6 independent slots, and is able to deliver 2A over a single slot, or 1 A over 4 slots or 0.65 A over 6.
This comes with a caveat: you can’t charge a small number of cells with little capacity cause the current will be too high.
It is a very simple charger: you put the cell in and the charger does everything. If you forget batteries into it, it has even a built in timer of 16 hours to stop the charging process.

There is also available as an accessory the 12 V power adapter.

There is not much I can say about this charger. If you use a lot of big li-ion IMR cells, this is a good charger for you.

Thanks to Antoled for the camera help.

All my reviews, in italian and english, here: Lumenreviews.com

Viewing all 322 articles
Browse latest View live